Do you have a question about the Core Eclipse CR-ECP-04-KNX Series and is the answer not in the manual?
Details the CPU and RAM, including the operating system.
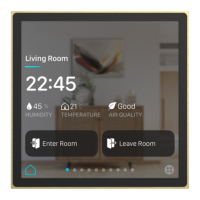
Specifies display type, resolution, and brightness.
Lists the integrated environmental and proximity sensors.
Provides the physical size of the device.
Describes the materials used for the device casing.
Specifies the power input requirements.
Details the power draw from different sources.
Indicates the communication protocol used.
Identifies the software required for configuration.
Defines limits for pages and control elements in KNX.
Specifies the standard for wall box installation.
| Product Name | Core Eclipse CR-ECP-04-KNX Series |
|---|---|
| Category | Controller |
| Product Type | KNX Controller |
| Communication Protocol | KNX |
| KNX Compatibility | Yes |
| Mounting | DIN Rail |
| Power Supply | 24V DC |
| Input Voltage | 21-30V DC |
| Frequency | 50/60 Hz |
| Operating Temperature | -5°C to +45°C |
| Protection Class | IP20 |
| Storage Temperature | -25°C to +70°C |
| Relative Humidity | 5% to 95% (non-condensing) |