User Manual v1.2
4
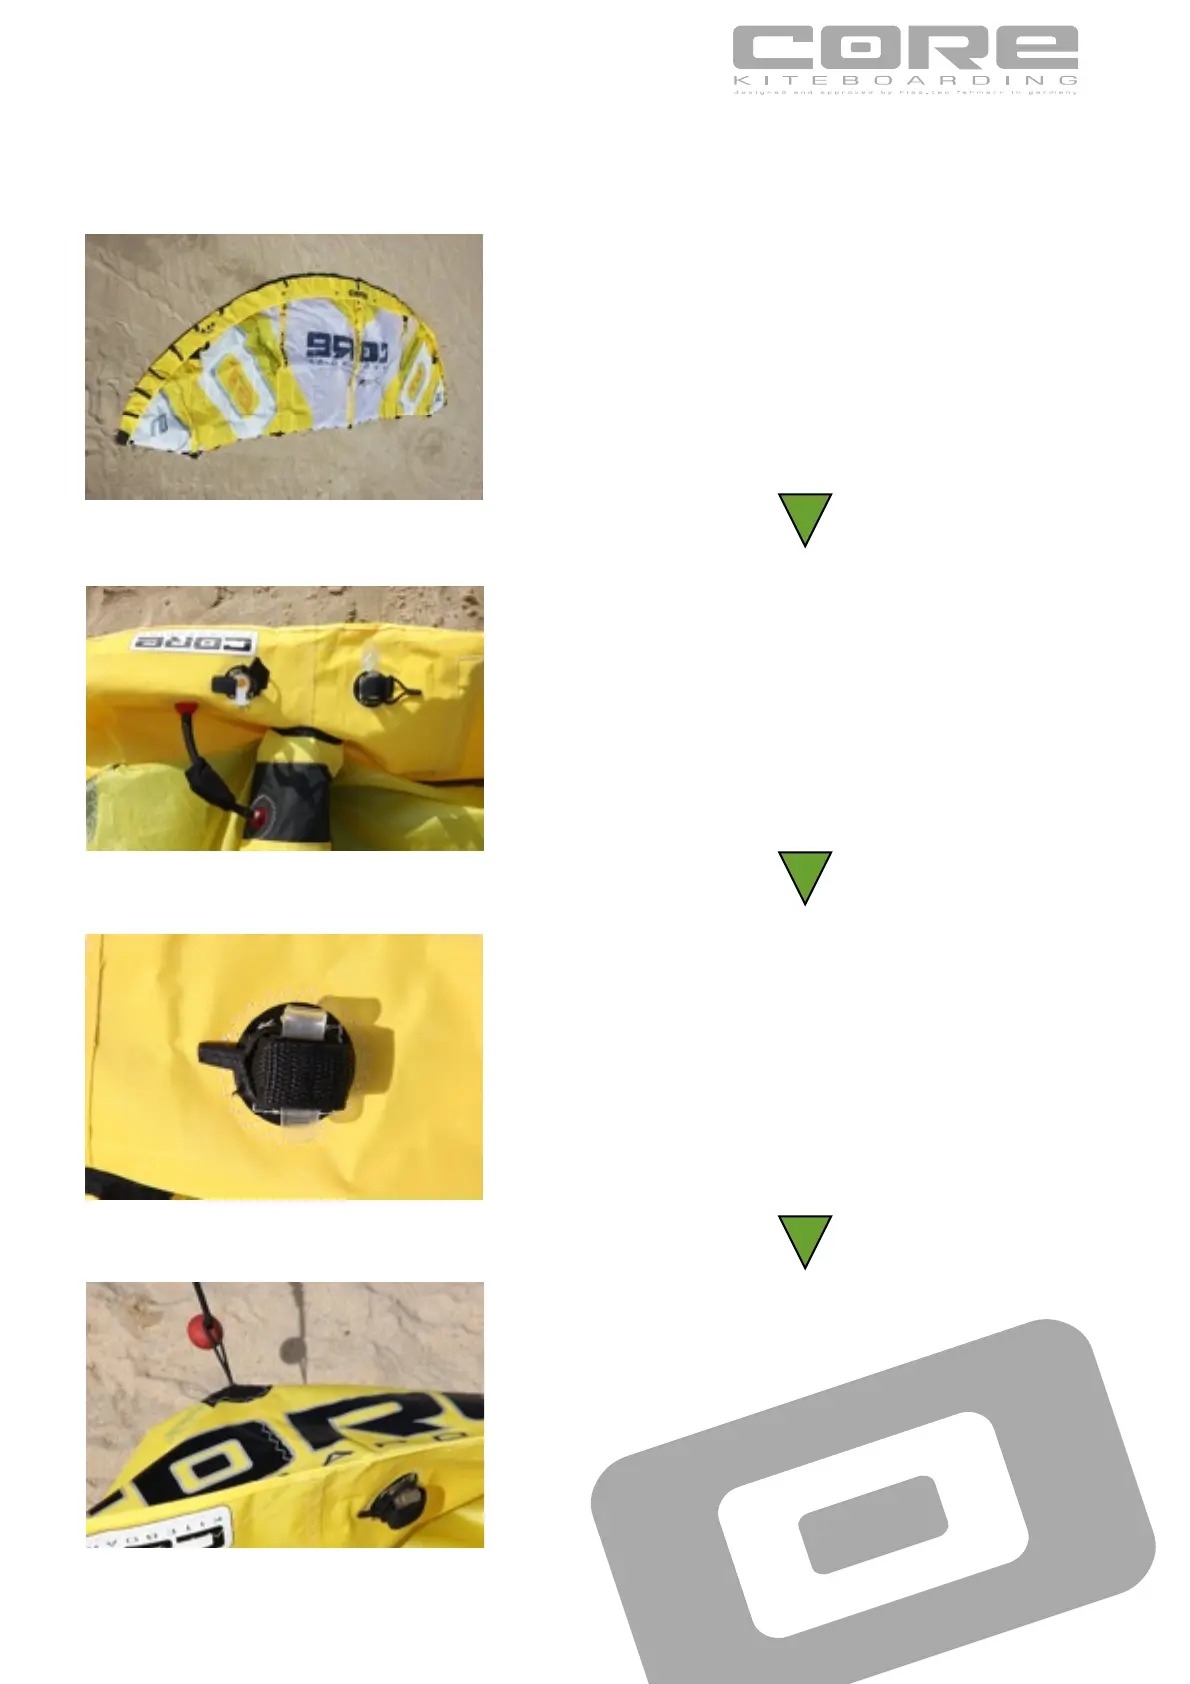
Close the outlet (larger) valve thoroughly and secure it with the
velcro and the rubber band as shown in the picture. This double
safety closure prevents any unsuspected opening of the valve e.g.
when the kite is crashed hard onto the water.
Go to the centre of the kite leading edge and take a look at the inlet
and outlet valves. Both valves have different air lock systems. The
larger valve is for the deflation of the kite and the smaller one for
the kites inflation.
Check the wind conditions in order to choose the correct kite size.
Lay out the kite. The arrow in the sand indicates the wind-direction.
Secure the upwind wingtip with sand and make sure that all FAST-
PUMP cleats are open to allow proper inflation of the kite. Check
that all bridle lines are evenly laid out and free off tangles.
There is a Pump-leash on the pump that secures the kite and stops
it from blowing away during the inflation process. Make sure to
connect the Pump-leash thoroughly onto the specifically designed
loop on the kites leading edge (the same loop to which the 5th line
is connected).
 Loading...