5. Wrap electrical tape (not included) around each wire connector down to the wire. Then, push wire connections
into the outlet box. Place the White wire connections on the opposite side of the outlet box from the Black and Blue
wire connections.
6. Reinstall the canopy.
7. Turn on power supply and wall switch to the fan.
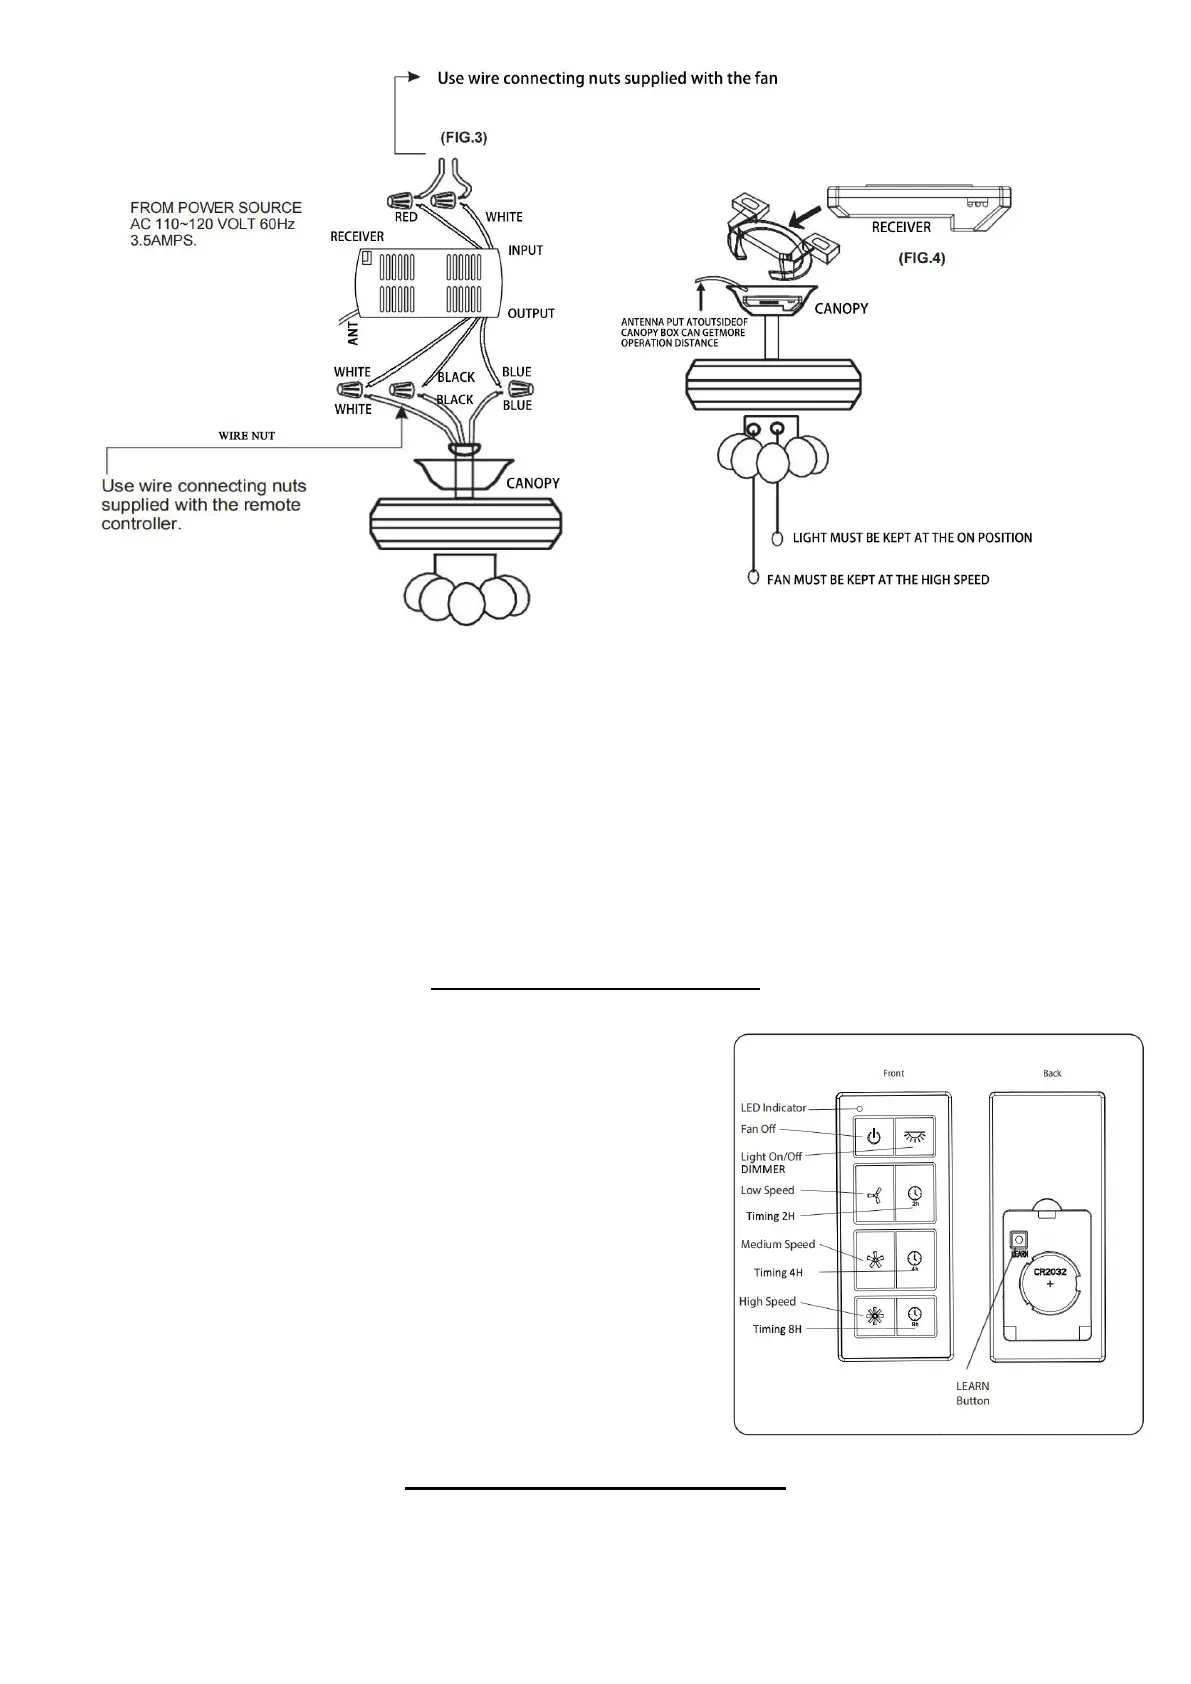
8. Remove the battery door from the back of the remote using a flat-head screwdriver (not included). Insert the
CR2032 batteries into the remote; ensure the positive pole of the batteries face up and then replace the battery door.
Press the HIGH SPEED button to ensure the LED indicator illuminates and the fan turns on.
9. If desired, the wall bracket can be attached to a wall using the mounting screws.
OPERATING INSTRUCTIONS
To operate the fan using the remote, make sure fan pull chain is on high
and light is turned on. Then press and release the following buttons:
Fan Off - Turns the power to fan off.
Light On/Off - Turns the light on and off. Press and hold to dim or
brighten lights (for dimmable bulbs only).
High Speed - Turns on fan at high speed.
Medium Speed - Turns on fan at medium speed.
Low Speed - Turns on fan at low speed.
LED indicator should illuminate when any remote button is pressed. If
not, replace the CR2032 batteries.
LEARN button - Syncs remote to receiver (see TROUBLESHOOTING
for instructions).
Note: To access LEARN button, remove battery door from back of the
remote using a flat-head screwdriver.
Connecting to the Smart Life App
1. First download the free "Smart Life" App from the App Store or Google Play or scan the QR Code below.
Note:This ceiling fan needs to use 2.4Ghz WIFI to work when connecting the device, and after connecting, it can use
the 5Ghz or 2.4Ghz.
2
 Loading...