2 www.AvantcoEquipment.com
Index
Parts Overview .............................................................. 3
Standard Accessories .................................................... 4
Operation Instructions .................................................. 4
Figure 1: Gear Axle ........................................................ 5
Figure 2: Initiative Axle .................................................. 6
Figure 3: Fork .................................................................7
Figure 4: Change Speed Axle ........................................ 8
Figure 5: Turning Plate and Mixing Axle ....................... 9
Figure 6: Single Phase Motor Diagram ....................... 10
Figure 7: Center Axle ................................................... 11
Maintenance and Protection ........................................ 12
Troubleshooting ........................................................... 13
Warranty Information ................................................... 13
IMPORTANT SAFEGUARDS
1. When using electrical appliances, basic safety precautions should always be followed including the
following:
2. Read all instructions.
3. Close supervision is necessary when any appliance is used by or near children.
5. Avoid contacting moving parts.
6. Do not operate any appliance with a damaged cord or plug or after the appliance malfunctions, or is
dropped or damaged in any manner. Return appliance to the nearest authorized service facility for
examination, repair or electrical or mechanical adjustment.
injury.
8. Do not use outdoors
9. Keep hands, hair, clothing, as well as spatulas and other utensils away from beaters during operation to
reduce the risk of injury to persons, and/or damage to the mixer.
SAVE THESE INSTRUCTIONS
Cleaning
........................................................... 13
Cleaning and Maintenance
8
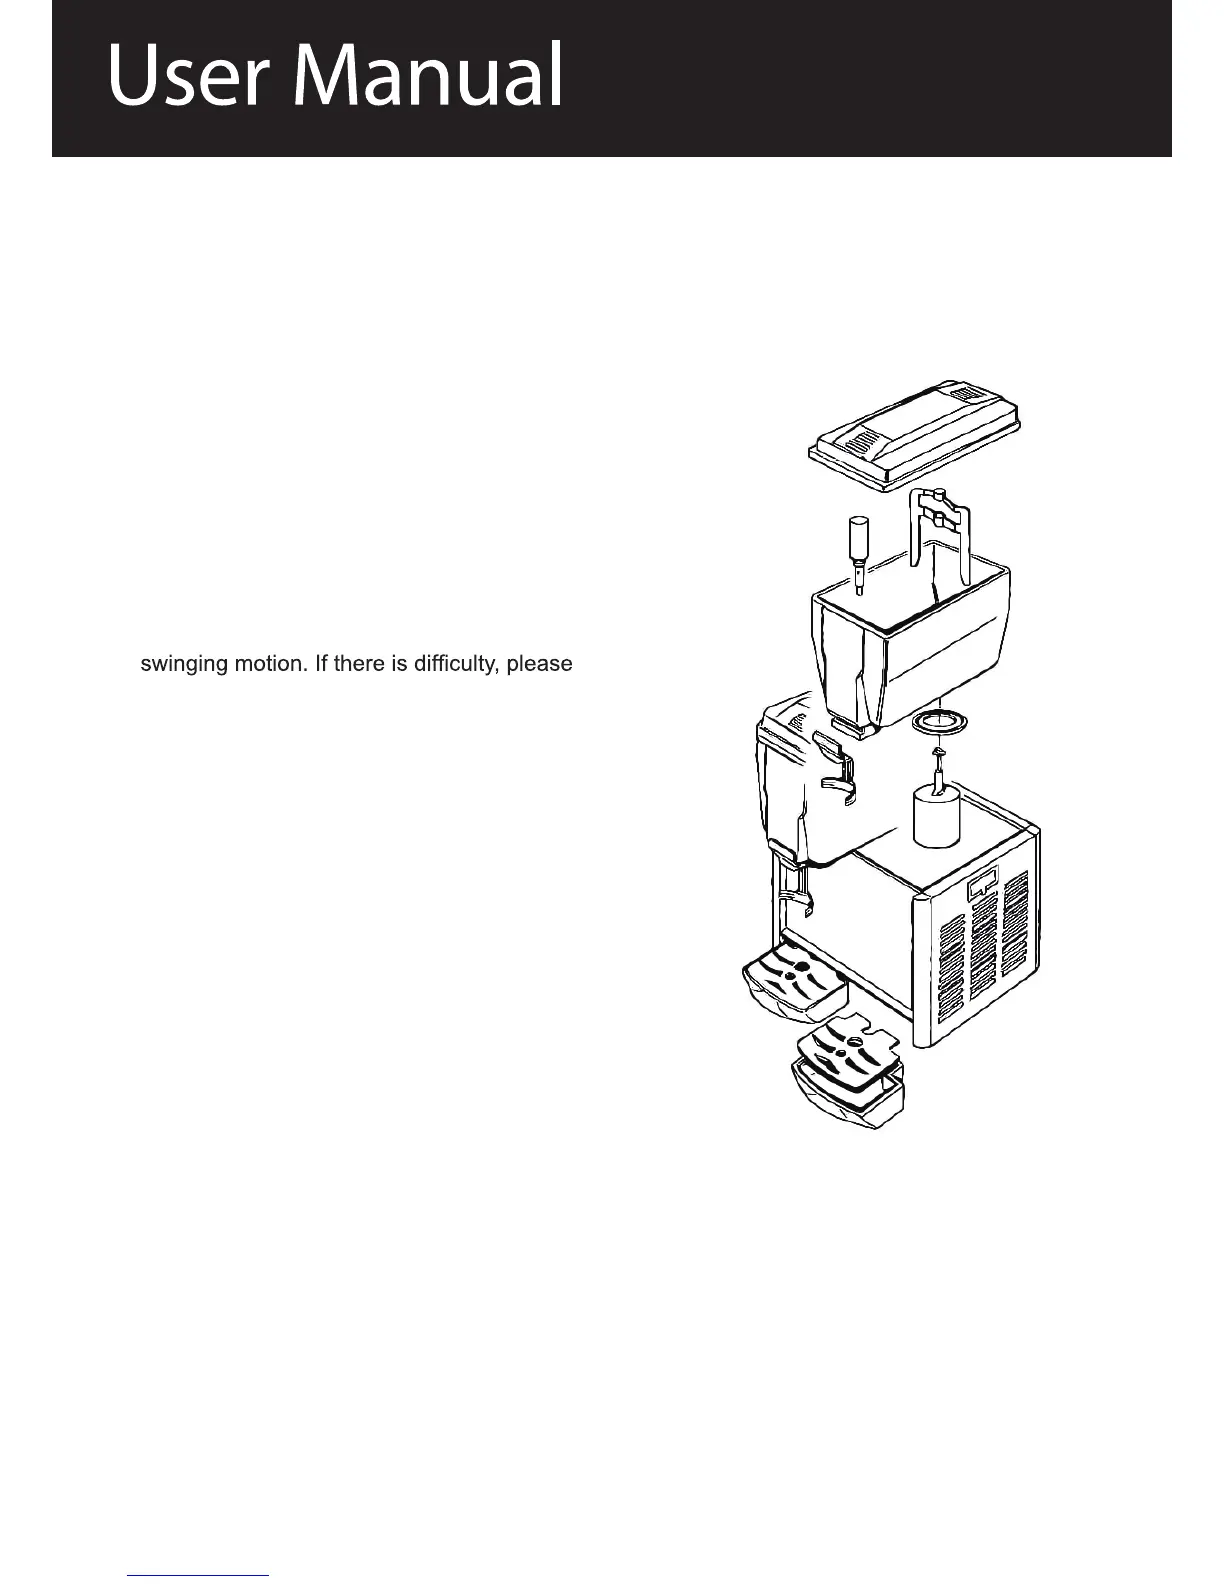
Disassembling and Assembling the tanks:
To disassemble and assemble the tanks or to
change the rubber tank gaskets :
1. Disconnect the unit by removing the plug.
2. Remove the cover from the tank.
3. Remove the mixing paddle from its shaft. For
the pump disassembling follow the instructions
reported on the diagram (Fig.6).
4. Lift container with both hands by a light,
wet the cooling column and gasket.
5. To remove tap, lift it from its setting.
6. Change the gaskets for tanks and taps only
with the genuine gaskets that are supplied by
an authorised supplier.
To reassemble the unit, repeat the above
operations in reverse.
Fig. 6
 Loading...