38
37
E. Installing Rear-Facing
continued on next page.
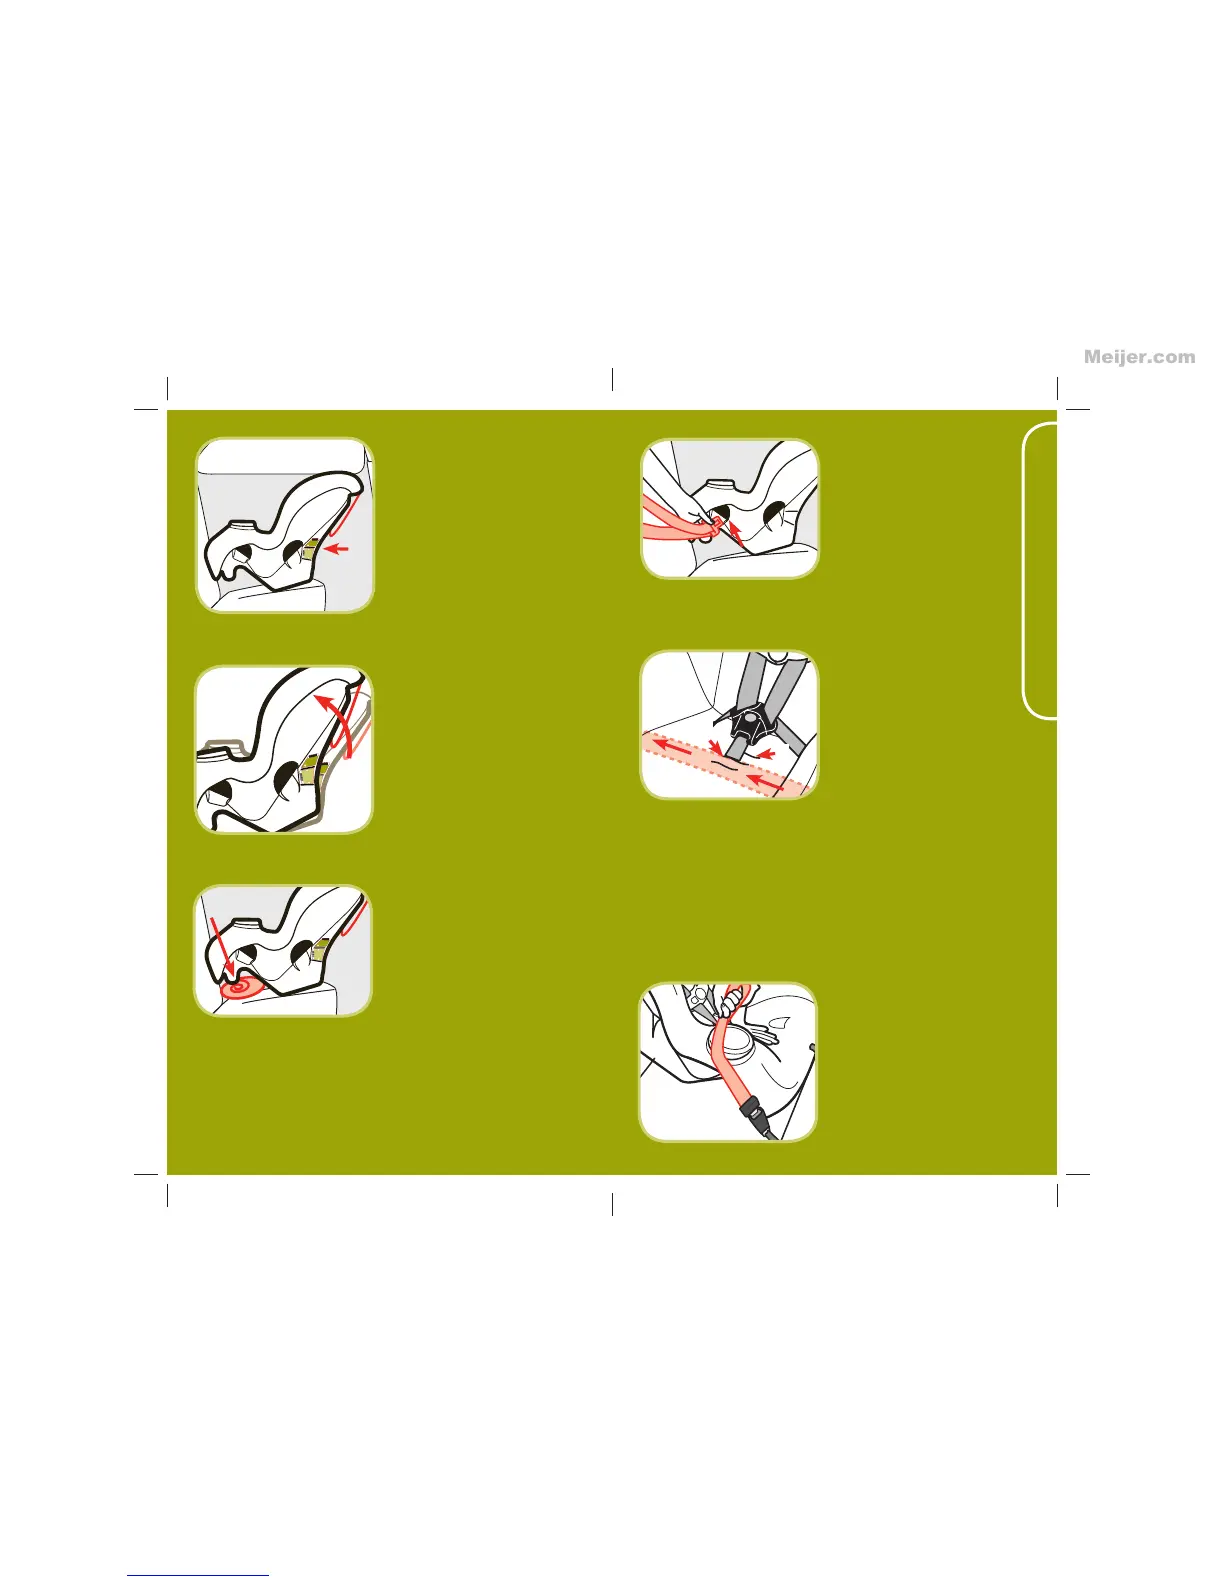
Thread Vehicle Belt
Thread the vehicle lap
or lap/shoulder belt
combination through the
rear-facing belt path.
With an ALR vehicle belt,
pull the vehicle belt all the
way out before threading
the child restraint.
4.
Place Child Restraint
in the Back Seat Rear-
Facing
Move the front seats forward
to give you room to install the
child restraint.
For children between 5-22
lbs (2.3-10 kg), the top
level to ground line MUST be
level to the ground. Rotate
the child restraint to make the
line level.
For children 22-40 lbs
(10.1-18 kg) and can sit
up unassisted,
rotate the
child restraint between the
2 level to ground lines.
Start
by making the bottom level to
ground line level, then rotate
seat up. DO NOT rotate past
the top most upright level to
ground line.
Adjust child restraint if
needed.
You may need to place a
large rolled towel(s) or foam
pool noodle(s) (A) under the
front of the child restraint
to help achieve the correct
recline. Check often to be
sure padding is still in place
and the vehicle belt is tight.
A
Note: Review the section D-4 to determine what kind of
vehicle belts you have. Review your vehicle’s owner manual
for vehicle seat belt use.
Pull Latch Plate Across
to Opposite Side
Reach under pad and pull
the vehicle belt across
the plastic shell. Vehicle
belt MUST be under pad
and in front of buckle strap.
Do not place vehicle belt
over child’s legs.
NOTE: You must use the 1st or 2nd buckle strap slots when
rear-facing.
2
1
4.
Tighten Vehicle Belt
Push down firmly on the
child restraint and pull on
the vehicle shoulder belt
to tighten.
5.