x
x
x
x
x
x
x
x
x
x
8 7 610 9
1 2 3 4 5
12:34
C1
Th
CH A MANUAL CH B
CLOCK
TIMER
DAY
HOUR
CLS/RCL
MIN
CH A ON
ON
AUTO
AUTO
OFF
OFF CH B
CH A CH B
RESET
Dual Clock (S2) and
Digital Thermostat Versions
3-PHASE ELEMENTS
MUST BE WIRED IN
STAR FASHION
N
3 PHASE ELEMENTS
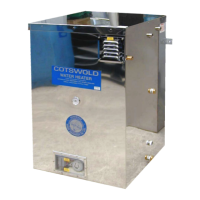
“All STAINLESS STEEL”
INSTRUCTIONS
Installation & Maintenance
DAIRY WATER HEATER
Cotswold Dairy Equipment Co Ltd
Avenue 3 Station Lane
Witney Oxford OX28 4BP
UK
Tel +44 (0)1993 774567
Fax +44 (0) 1993 771776
e-mail sales@cotswold-dairy.co.uk
www.cotswold-dairy.co.uk
CE
MADE IN ENGLAND
COTSWOLD
ELEMENTS AND THERMOSTATS
WH9 3kw 1 phase 18” & stat pocket
WH9A 3kw 1 phase 14” & stat pocket
WH9B 3kw 1 phase 9” & stat pocket
WH9D 4kw 1 phase 14” & stat pocket
WH9F 3kw 1 phase 11” & stat pocket
WH10 4.8kw 1 phase 18” & stat pocket
WH10A 4.8kw 3 phase 18” & stat pocket
WH11 6kw 1 phase 18” & stat pocket
WH12 6kw 3 phase 18” & stat pocket
WH12A 9kw 3 phase 18” no stat pocket
WH13 Hi Range Stat 30° - 110/120°
SET CURRENT TIME
Press and Hold Down CLOCK button whilst setting hours
and minutes to input current time
SET HEATER ON/OFF TIMES
Press and release TIMER until C1 appears on right
and 1-ON comes up at left, set first element ON time by
pressing HOUR and MIN
Press Timer again, 1-OFF will appear at left
set first element OFF time by pressing HOUR and MIN
Press Timer again, 2-ON will appear at left
set second element OFF time by pressing HOUR and MIN
Press Timer again, 2-OFF will appear at left
set second element OFF time by pressing HOUR and MIN
(repeat above steps for third and fourth on/offs if needed
if not required, press TIMER repeatedly to step through
3on/off and 4on/off)
SET WATER SOLENOID to re-fill heater
Press and release TIMER until C2 appears on right
and 1-ON comes up at left,
set first Solenoid OPEN time by pressing HOUR and MIN
Press TIMER again, 1-OFF will appear at left
set first SOLENOID OFF (close) time by pressing HOUR and
MIN
(this will shut water solenoid - allow 2 - 3 hours to refill
heater)
Press TIMER again and 2-ON comes up at left, set second
SOLENOID OPEN time by pressing HOUR and MIN
Press Timer again, 2-OFF will appear at left,
set Second SOLENOID OFF (close) time by pressing HOUR
and MIN, (this will again shut water solenoid - allow 2 - 3
hours to refill heater)
(repeat above sequences to set thirdon/offs if required,(no
fourth setting) if not required, press TIMER to step through
3on/off and return to C1)
Finalise settings by pressing CLOCK
SET AUTO OPERATION
Press CH A until line at bottom of display is above AUTO,
repeat for CH B
if stepping from ON to AUTO, timing starts immediately,
if stepping from OFF to AUTO timing will start at NEXT
clock point
CLOCK CONNECTIONS
Channel A (Heater Element)
Series 1 (Up to Approx Aug’08): 7 & 6
Series 2 (After Approx Aug’08): 2 & 3
Channel B (Water Inlet Solenoid)
Series 1 (Up to Approx Aug’08): 10 & 9
Series 2 (After Approx Aug’08): 1 & 2
Illustration is of Series 2 Clock, fitted August 2008 on
(both types of clock have
same set-up, but different connections)
TO SET DIGITAL CLOCK (for every day use)
See clock’s own manual for other settings.
THIS IS A 24 HOUR CLOCK