–4–
even blending.
4. Don’t leave your blender immersed in hot liquids during cooking. Use the blender
and remove it as soon as possible.
5. When aerating/beating mixtures, keep the blade/attachment just below the sur-
face of the liquid to facilitate intake of air.
6. Be careful not to damage cookware that uses non-stick coating. If possible, use
with stainless steel, aluminum, or other durable metal cookware.
7. Don’t immerse the blender too deep; the seam between the power handle and the
sha should be at least an inch above the liquid level line.
INTRODUCTION
Thank you for purchasing a quality Courant blender. Your Courant blender will help you
easily blend a wide variety of tasty treats.
This blender is ideal for making milkshakes, smoothies, sorbets, sauc-
es, creams, cocktails, and friends! However, it’s not made for crushing
ice, frozen foods, cereals, rice, or coee. Blending any of these can
damage the blades.
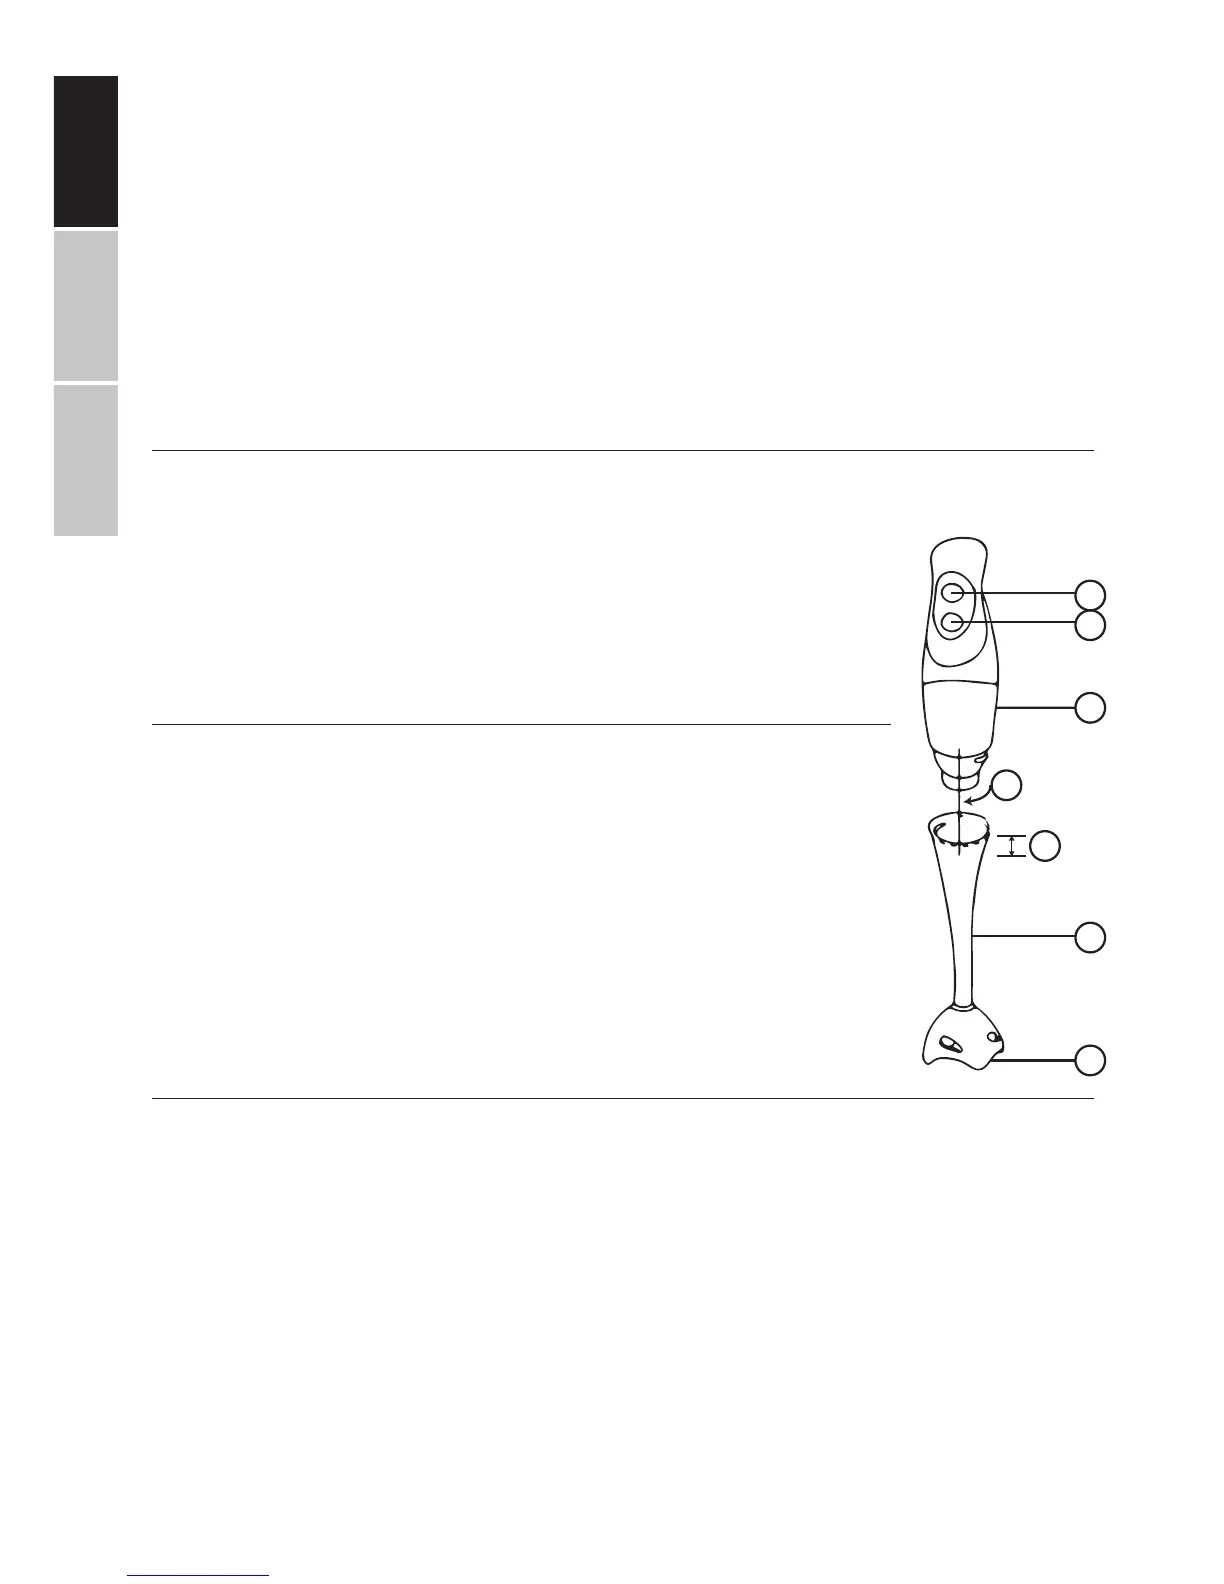
GETTING TO KNOW YOUR BLENDER
(A&B) Speed Buttons (Located on the Power Handle): (I) Low
Speed (II) High Speed
(C) Power Handle: Where the electric cord connects and the motor
resides. Don’t get it wet!
(D) Blender Sha (removable): The sha that gets immersed in liq-
uid containing the blade at the bottom.
(E) Stainless Steel Blade: Located at the bottom of the Blender Sha.
GETTING STARTED
Before using the appliance for the rst time:
1. Ensure that the immersion blender and parts are fully intact.
2. Disassemble the unit for cleaning by holding the unit upright with two hands and turning
the Power Handle (C) counter-clockwise one-quarter turn. Pull to separate.
3. Carefully wash the blender sha and blades. These parts can be washed with a nonabra-
sive sponge and mild detergent. The power handle should be cleaned with a damp cloth
and le to dry before use.
4. Reassemble the unit by inserting the Power Handle (C) into the Blender Sha (D) and
turn the Power Handle clockwise ¼ turn (See “1” in the diagram above).
Note: The blade itself is not removable form the Blender Sha.
A
2
B
C
1
D
E
1”