page 8
84502-C
ROUGH-IN INSTRUCTIONS
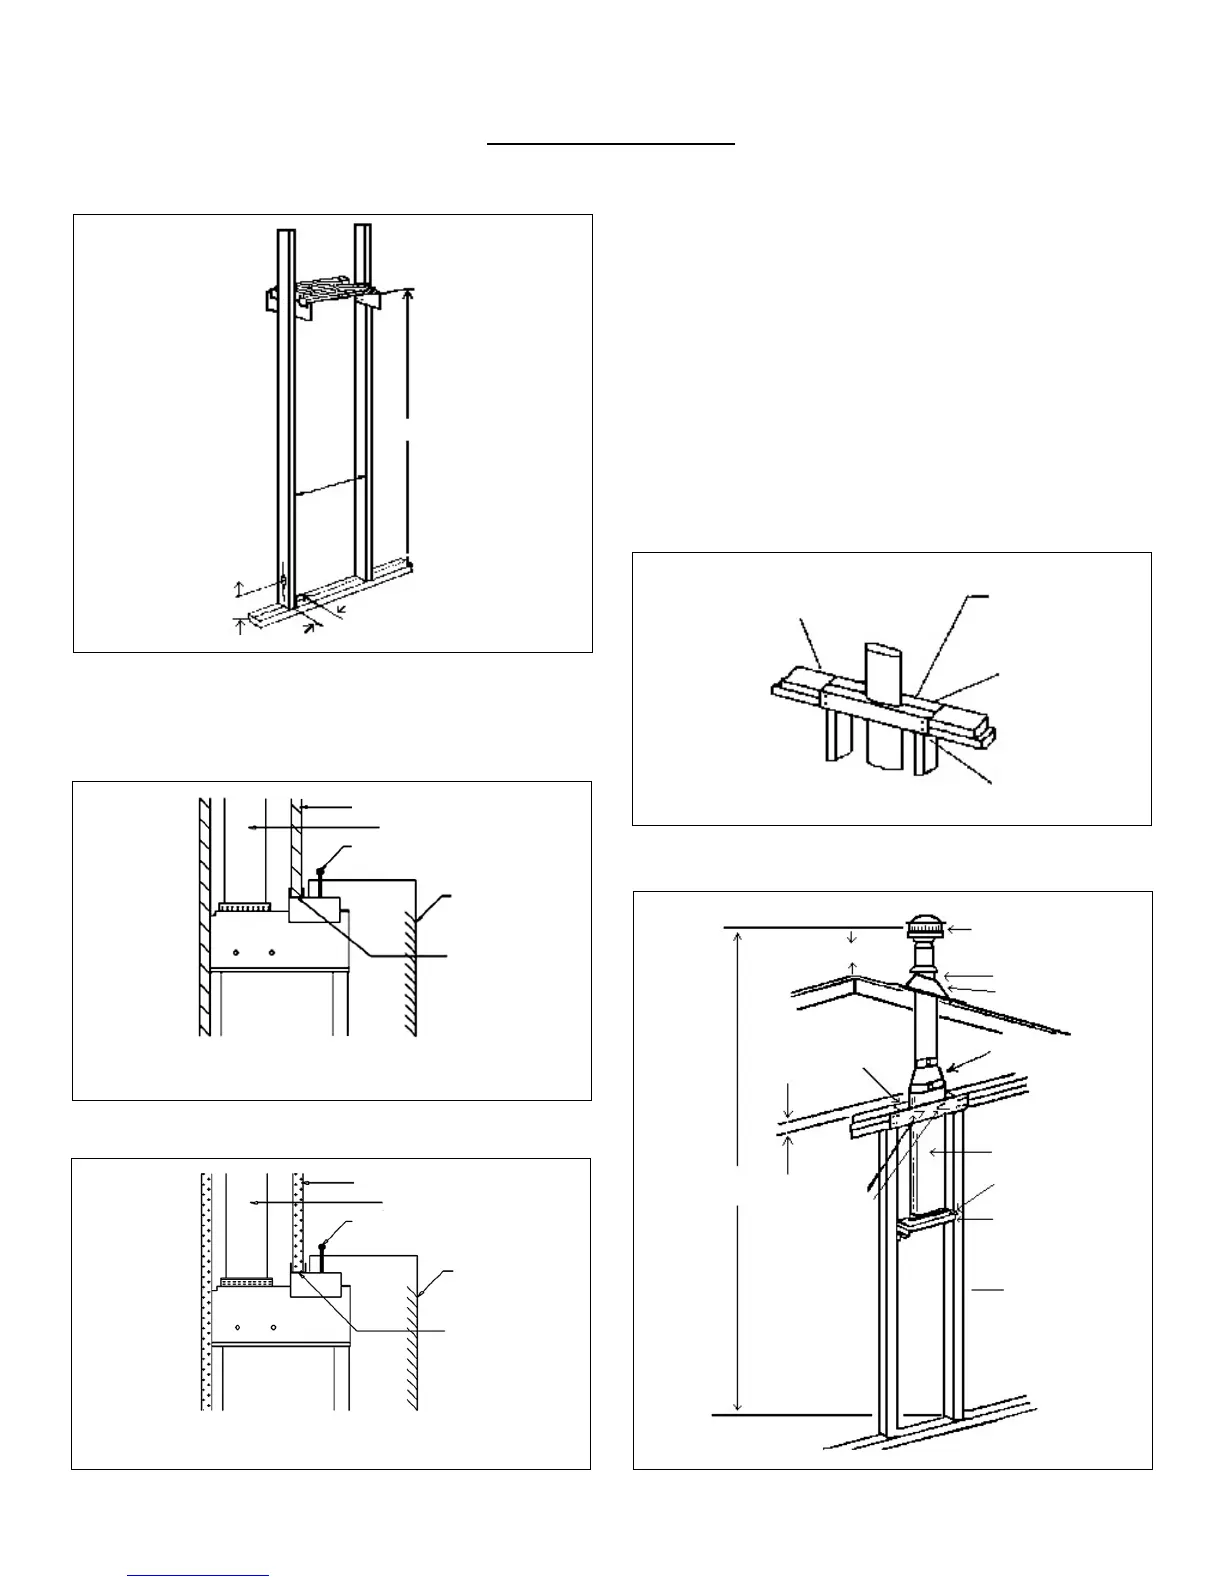
Fig. G-5: Vent Installation
STEP 4.
Remove double ceiling plate between studs. Install one
ceiling plate spacer across the cut out in ceiling plate.
Install vent pipe into position, be sure to lock bottom of
vent pipe into the base plate. Nail second ceiling plate
spacer in place. See Figure F (on page 7).
STEP 5.
If the vent continues through additional stories within the
2x4-stud space, then re-stop-spacers must be installed
at the second and subsequent ceiling levels.
See Figure G-4 (below).
Fig. G-4
Fig. G-1
Fig. G-2: Dry Wall
Fig. G-3: Plaster Wall
NOTE: For proper combustion, make sure units are
level, front to back and side to side.
Listed Vent Top
Storm Collar
Roof Flashing
Oval to Round
Adapter
Listed “BW”
Vent Pipe
Base Plate
Header
Plate
2 x 4
Wall Studs
Ceiling
Plate
Spacer
Lances
12’ Min.
Ceiling
Plate
Spacers
Ceiling
Plate
Spacers
2’ Min.
Installation of B-W gas vent
for each subsequent ceiling
or oor level of
multi-story buildings.
Firestop spacers
supplied by
manufacturer of
B-W gas vent.
Plate cut away to
provide passage
of B-W gas vent.
Nail restop
spacer securely.
4”
4”
*65
3
/
4
”
*This
measurement
must be taken
from top of
oor plate
Dry-Wall
Dry-Wall
B-W Type Vent
B-W Type Vent
Screw
Screw
Front
Panel
Front
Panel
Plaster
Ground
Plaster
Ground
ROUGH-IN
DIMENSIONS
14
1
/
4
”
Min.
14
1
/
2
”
Max.
NOTE: Front panel must be in front of plaster ground
channel. Do not hang it over front of plaster ground.
NOTE: Front panel must be in front of plaster ground
channel. Do not hang it over front of plaster ground.


 To Next Page