EasyManua.ls Logo

Craftsman 139.53648D User Manual

Craftsman 139.53648D
76 pages
To Next Page IconTo Next Page
Page #1 background imageLoading...
Page #1 background image
Owner's Manual/Manual Del Propietario
112 HP
315MN= GARAGE DOOR OPENER
ABRIDOR DE PUERTA DE COCHERA DE 315MN=
For Residential Use Only/Solo para uso residencial
Model/Modelo 139.53648D
I11
Z
G3
m
m
Z_
O
Read and follow all safety rules
and operating instructions before
first use of this product.
Fasten the manual near the garage
door after installation.
Leer y seguir todas las reglas de
seguridad y las instrucciones de
operacion antes de usar este
producto por primera vez.
Guardar este manual cerca de la
puerta de la cochera.
Periodic checks of the opener are
required to ensure safe operation.
Se deben realizar revisiones
peribdicas del abridor de puertas
para asegurar su operacion
segura.
Sears, Roebuck and Co., Hoffman Estates, IL 60179 U.S.A
www.sears.com/craftsman

Table of Contents

Question and Answer IconNeed help?

Do you have a question about the Craftsman 139.53648D and is the answer not in the manual?

Craftsman 139.53648D Specifications

General IconGeneral
BrandCraftsman
Model139.53648D
CategoryGarage Door Opener
LanguageEnglish

Summary

Preparing Your Garage Door for Opener Installation

Safety Warnings for Door Preparation

Details warnings for preventing serious injury or death during garage door preparation.

Assembly Step 1: Assemble the Rail and Attach Cable Pulley Bracket

Assembly Step 2: Install the Trolley

Assembly Step 3: Attach the Rail to the Motor Unit

Caution for Motor Unit Fasteners

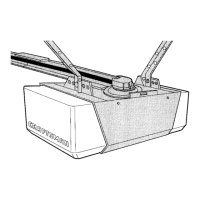
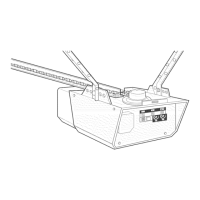
Warning to use only specific bolts/fasteners for motor unit to prevent serious damage.

Assembly Step 4: Install Chain/Cable and Sprocket Cover

Warning: Keep Hands Clear of Sprocket

Alerts users to potential serious injury from moving parts and the need to secure the sprocket cover.

Assembly Step 5: Tighten the Chain and Cable

Installation Instructions and Safety Warnings

Important Installation Safety Warnings

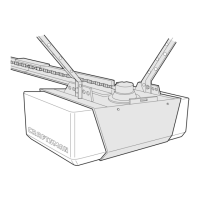
Critical warnings to reduce risk of severe injury or death during opener installation.

Installation Step 1: Determine Header Bracket Location

Installation Step 2: Install the Header Bracket

Installation Step 3: Attach Rail to Header Bracket

Installation Step 4: Position the Opener

Caution for Opener Positioning

Warning to prevent damage to the garage door by resting the opener rail on a 2x4 on the door's top section.

Installation Step 5: Hang the Opener

Warning: Secure Opener to Structural Supports

Emphasizes secure fastening to prevent serious injury from a falling opener; use concrete anchors for masonry.

Installation Step 6: Install the Door Control

Safety Warnings for Door Control Installation

Details warnings for preventing electrocution and serious injury from a closing garage door.

Installation Step 8: Attach Emergency Release Rope and Handle

Warning: Emergency Release Safety

Highlights risks associated with the emergency release, especially with unbalanced doors or when people are present.

Installation Step 9: Electrical Requirements

Warning: Electric Shock and Fire Prevention

Emphasizes grounding, proper outlets, and avoiding extensions to prevent shock or fire hazards.

Installation Step 10: Install The Protector System®

Important Information About Safety Reversing Sensor

Explains the function of the safety reversing sensor and its role in preventing entrapment injuries.

Warning: Safety Reversing Sensor Installation

Stresses correct installation and alignment of the safety reversing sensor to prevent serious injury or death.

Installing the Safety Sensor Brackets

Mounting and Wiring the Safety Sensors

Aligning the Safety Sensors

Guides on how to align the safety sensors for proper beam detection and indicator light confirmation.

Installation Step 11: Fasten the Door Bracket

Caution: Reinforcement for Lightweight Doors

Warns that fiberglass, aluminum, or steel doors require reinforcement before bracket installation.

Installation Step 12: Connect Door Arm to Trolley

One-Piece Doors: Assembling and Connecting Door Arm

One-Piece Door Travel Limit Adjustment

Explains how to adjust UP and DOWN travel limits before connecting the door arm to the trolley.

Adjustment Step 1: Adjust UP and DOWN Travel Limits

Warning: Safety Reversal System and Travel Limits

Highlights how incorrect travel limit adjustments can interfere with the safety reversal system's operation.

Adjustment Step 2: Adjust the Force

Warning: Force Adjustment and Safety Reversal

Explains how excessive force affects the safety reversal system and warns against using force to mask door issues.

Adjustment Step 3: Test the Safety Reversal System

Warning: Importance of Safety Reversal System Testing

Stresses the critical need for regular testing of the safety reversal system to prevent serious injury or death.

Adjustment Step 4: Test the Protector System®

Warning: Protector System Safety

Warns about serious injury or death from a closing door if the safety reversing sensor is not properly installed or aligned.

Operation of Your Garage Door Opener

Important Safety Instructions for Operation

Critical safety guidelines to prevent severe injury or death during opener usage and door movement.

Troubleshooting Common Garage Door Opener Problems

Diagnostic Chart for Opener Issues

Programming Your Garage Door Opener

Program Keyless Entry PIN

Related product manuals