Do you have a question about the Craftsman 139.53647SRT1 and is the answer not in the manual?
Crucial safety advice regarding door balance, locks, and electrical connections.
Critical safety rules for installing the garage door opener, emphasizing safe practices.
Critical warnings about the importance and proper installation of the safety reversing sensor.
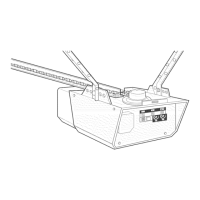
Connect T-rail sections and attach the cable pulley bracket to the opener assembly.
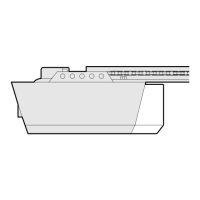
Mount the trolley onto the T-rail and secure the T-rail to the opener.
Thread the chain and cable, connect to trolley, and attach the sprocket cover.
Adjust chain tension and review important installation safety instructions.
Gather required tools and survey your garage for installation requirements.
Identify the correct position for the header bracket based on door type and clearance.
Mount the header bracket and attach the T-rail assembly to the opener.
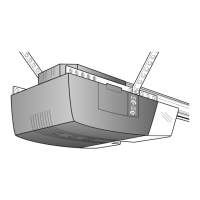
Place the opener at the correct height and securely mount it to the garage structure.
Mount the door control console and wire it to the opener unit.
Install and align the safety reversing sensor system for door closing safety.
Connect the door arm sections to the opener trolley for sectional or one-piece doors.
Set door travel limits and adjust force controls for optimal opener performance.
Verify the functionality of the safety reversing sensor and reverse system.
Learn how to operate the opener using remote, door control, and other features.
Program remote controls and keyless entry codes to the opener.
Diagnose and resolve common problems with opener operation and door movement.
Follow the recommended routine checks and lubrication for the opener.
Identify and order replacement parts for rail and opener assemblies.
Explore optional accessories to enhance opener functionality and convenience.
Understand the terms, limitations, and coverage of the garage door opener warranty.
| Model Number | 139.53647SRT1 |
|---|---|
| Horsepower | 1/2 HP |
| Frequency | 60 Hz |
| Safety Sensors | Yes |
| Battery Backup | No |
| Smart Technology | No |
| Drive Type | Chain Drive |
| Voltage | 120V |