ONtOFF
SWITCH
114"
-1
t_ I/ il
//
n If
u Ii
II
t
RING NUT
COND
RING NUT
©
©
REAR QUADRANT /S;_._
318 LOCK NUT
#!0 SELF
BOLT 3/8 X 2--112 TAPPING
SCREW
_£_ SWITCH
3/8 FLAT WASHER MOUNTING
I BRACKET
3/8 CABLE CUP (3)_,,._
1/2 CABLE CLIP CLUTCH CABLE
CABLE
TOW BAR TUBE
WIRE HARNESS HITCH ASSEMBLY
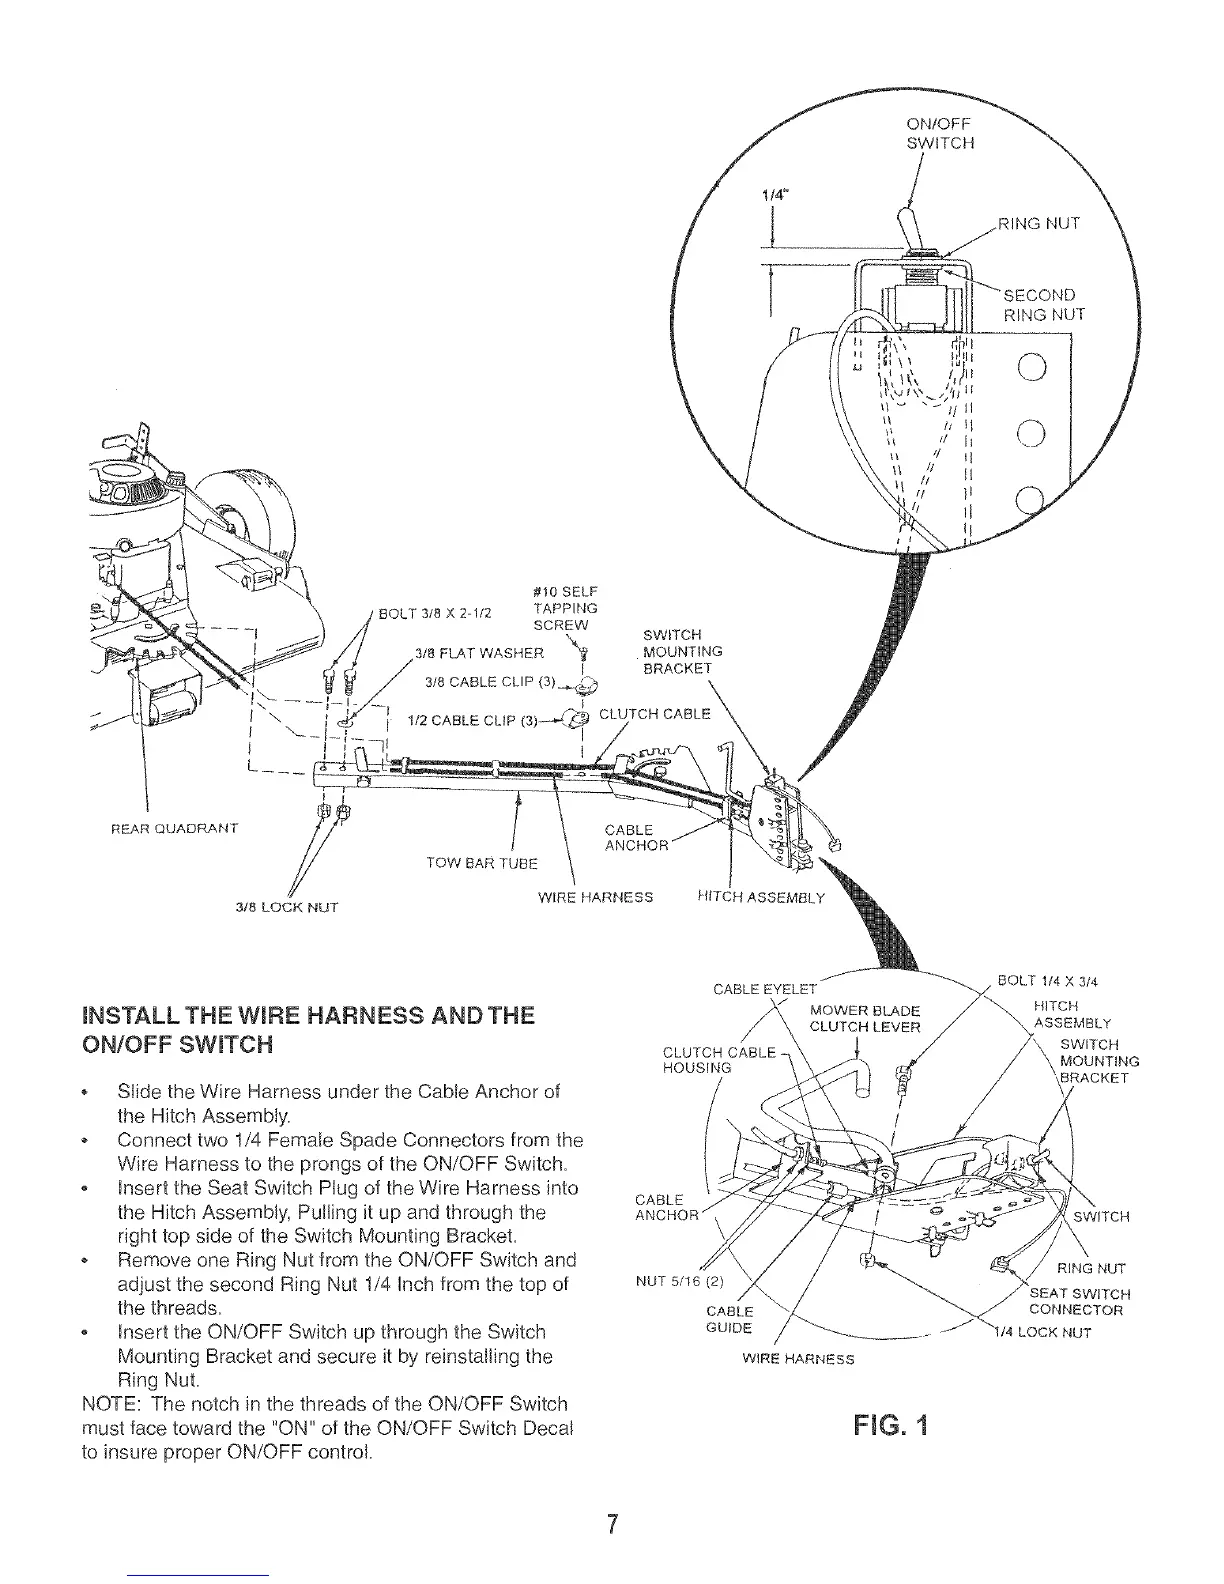
INSTALL THE WIRE HARNESS AND THE
ON/OFF SWITCH
• Slide the Wire Harness under the Cable Anchor of
the Hitch Assembly.
• Connect two 1/4 Female Spade Connectors from the
Wire Harness to the prongs of the ON/OFF Switch.
Insert the Seat Switch Plug of the Wire Harness into
the Hitch Assembly, Pulling it up and through the
right top side of the Switch Mounting Bracket.
• Remove one Ring Nut from the ON/OFF Switch and
adjust the second Ring Nut 1/4 Inch from the top of
the threads.
Insert the ON/OFF Switch up through the Switch
Mounting Bracket and secure it by reinstalling the
Ring Nut.
NOTE: The notch in the threads of the ON/OFF Switch
must face toward the "ON" of the ON/OFF Switch Decal
to insure proper ON/OFF control.
CABLE
AN(
CABLE EYELET
MOWER BLADE
CLUTCH LEVER
CLUTCH CABLE
HOUSING
NUT 5/16(2)
CABLE
GUIDE
WiRE HARNESS
FiG. 1
BOLT 1/4 X 3t4
H_TCH
ASSEMBLY
SWITCH
MOUNTING
BRACKET
G, SWITCH
RING NUT
SEAT SWITCH
CONNECTOR
-J_ LOCK NUT