LAWN MOWER
Alwaysobservesafety ruleswhenper-
forminganymaintenance.
TIRES
• Keep tiresfree of gasoline,oil, or insect
controlchemicalswhichcanharmrubber.
• Avoid stumps,stones,deepruts,sharp
objectsandother hazardsthat may
causetire damage.
DRIVEWHEELS
Checkfrontdrivewheelseachtime before
you mowtobe suretheymovefreely.
The wheelsnot turningfreelymeans
trash,grasscuttings,etc. are inthedrive
wheelareaandmustbe cleanedto free
drivewheels.
If necessaryto cleanthedrivewheels,be
sureto cleanbothfrontwheels.
1. Removehubcaps,Iocknuts& washers.
2. Removewheelsfrom wheeladjusters.
3. Removeanytrash or grasscuttings
frominsidethe dust cover,pinionand/
or drivewheelgearteeth.
4. Putwheelsbackin place.
NOTE: Ifafter cleaning,the drivewheels
do notturnfreely,contacta Searsor other
qualifiedservicecenter.
GEARCASE
• Tokeepyourdrivesystemworking
properly,the gearcaseandarea around
thedrive shouldbe keptcleanandfree
oftrash build-up. Cleanunderthe drive
covertwicea season.
• Thegearcaseis filledwith lubricantto
the properlevelat thefactory. The only
timethe lubricantneedsattentionis if
servicehasbeenperformedon the gear
case.
• Iflubricantis required,useonly ELF
MultisEP00. Donotsubstitute.
BLADE CARE
Forbestresults,mowerblademustbekept
sharp. Replacea bentor damagedblade.
_i, CAUTION: Use only a replacement
blade approved by the manufacturer of
your mower. Using a blade not approved
by the manufacturer of your mower is
hazardous, could damage your mower and
void your warranty.
TO REMOVE BLADE
1. Disconnect spark plug wire from spark
plug and place wire where it cannot
come in contact with plug.
2. Turn lawn mower on its side. Make
sure air filter and carburetor are up.
3. Use a wood block between blade and
mower housing to prevent blade from
turning when removing blade bolt.
NOTE: Protect your hands with gloves
and/or wrap blade with heavy cloth.
4. Remove blade bolt by turning counter-
clockwise.
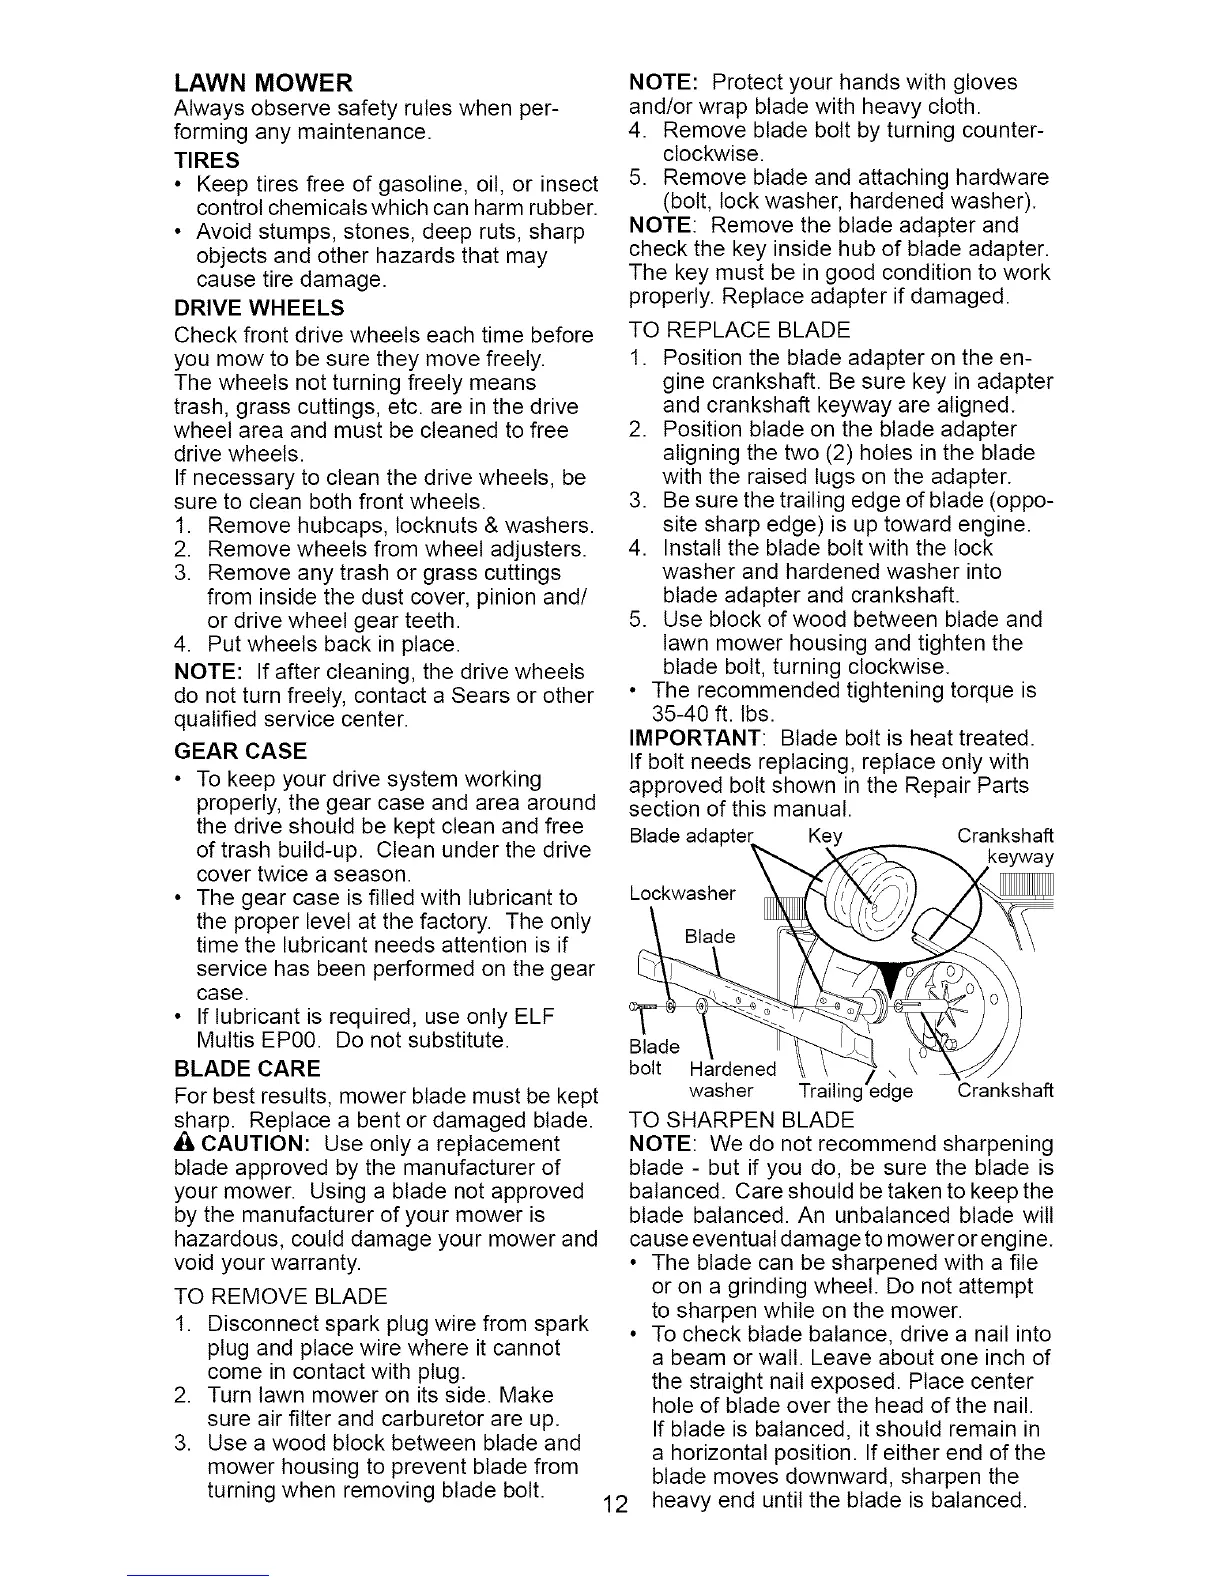
5. Remove blade and attaching hardware
(bolt, lock washer, hardened washer).
NOTE: Remove the blade adapter and
check the key inside hub of blade adapter.
The key must be in good condition to work
properly. Replace adapter if damaged.
TO REPLACE BLADE
1. Position the blade adapter on the en-
gine crankshaft. Be sure key in adapter
and crankshaft keyway are aligned.
2. Position blade on the blade adapter
aligning the two (2) holes in the blade
with the raised lugs on the adapter.
3. Be sure the trailing edge of blade (oppo-
site sharp edge) is up toward engine.
4. Install the blade bolt with the lock
washer and hardened washer into
blade adapter and crankshaft.
5. Use block of wood between blade and
lawn mower housing and tighten the
blade bolt, turning clockwise.
• The recommended tightening torque is
35-40 ft. Ibs.
IMPORTANT: Blade bolt is heat treated.
If bolt needs replacing, replace only with
approved bolt shown in the Repair Parts
section of this manual.
Blade adapter Key
Lockwasher _ _
o
Hardened _
washer
TO SHARPEN BLADE
Crankshaft
i
Crankshaft
NOTE: We do not recommend sharpening
blade - but if you do, be sure the blade is
balanced. Care should be taken to keep the
blade balanced. An unbalanced blade will
cause eventual damage to mower or engine.
• The blade can be sharpened with a file
or on a grinding wheel. Do not attempt
to sharpen while on the mower.
• To check blade balance, drive a nail into
a beam or wall. Leave about one inch of
the straight nail exposed. Place center
hole of blade over the head of the nail.
If blade is balanced, it should remain in
a horizontal position. If either end of the
blade moves downward, sharpen the
heavy end until the blade is balanced.
12