ENGLISH
6
OPERATION
WARNING: To reduce the risk of
serious personal injury, turn unit off and
disconnect it from power source before making
any adjustments or removing/installing
attachments or accessories. An accidental start-up
can causeinjury.
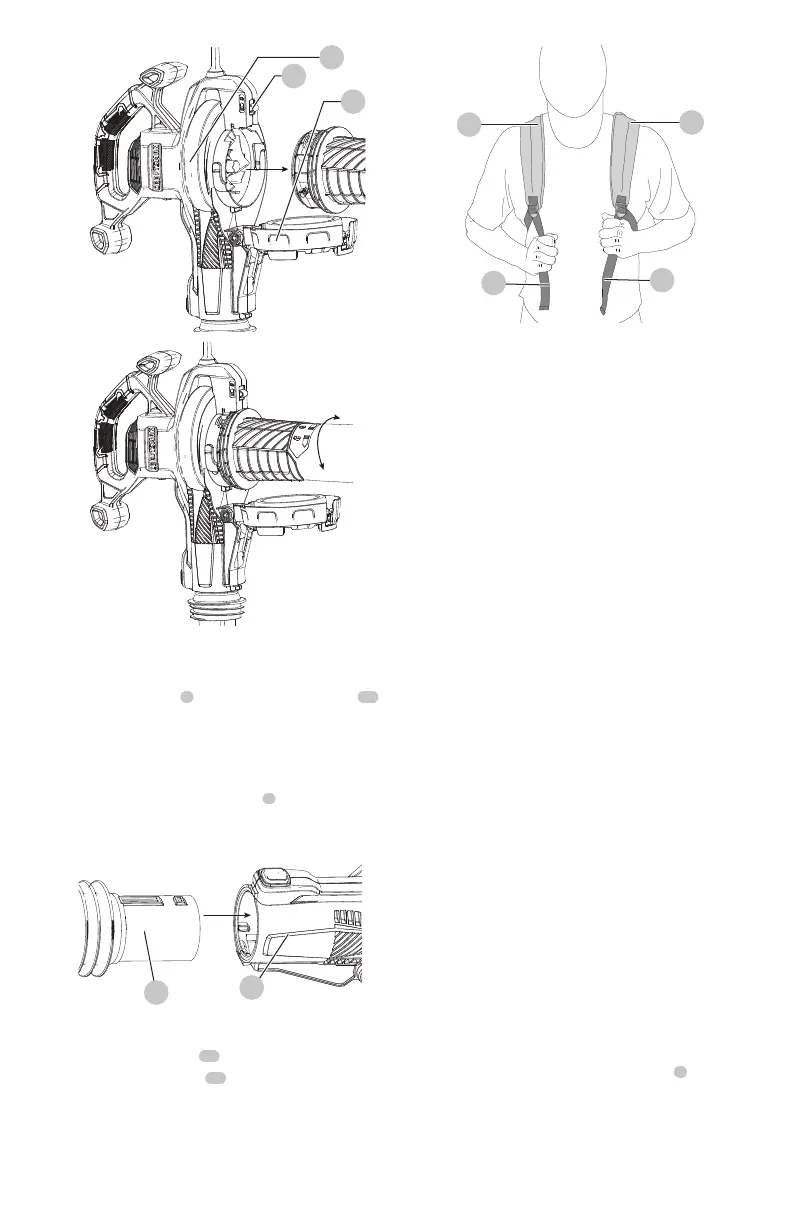
Removing Blow Tube or Flexible
Collection Tube (Fig. I)
To remove the blow tube, flexible collection tube, depress
the release button on the power head and pull straight off
(Fig.I).
WARNING: Always wear safety
glasses. Wear a filter mask if the operation is dusty.
Use of rubber gloves and substantial footwear is
recommended when working outdoors.
WARNING: Use blower/vac only in
daylight or good artificiallight.
Switching On and Off (Fig. K)
WARNING: Use both hands to grip the
product firmly when switchingon.
CAUTION: Do not point unit discharge at
self orbystanders.
WARNING: The tool will continue to run
for approximately 5 seconds after it has been switched
off. Use both hands to grip the tool and let the motor
come to a complete stop before setting the tooldown.
Your blower vac is fitted with a ON/OFF switch
1
located on
the top of the handle.
• To turn tool ON, slide the ON/OFF switch forward to the
ON position “1”.
• To turn tool OFF, slide the ON/OFF switch backward to
the OFF position “0”.
Attaching Flexible Tube to Power head
(Fig. I)
1. Align the power head
1
and flexible collection tube
12
as shown in Fig.I.
2. Push the flexible collection tube assembly onto the
power head until it is in the fully locked position and an
audible click is heard. (Fig. I).
3. To seal the back pack collection bag
8
, zip up the bag
zipper so the opening is closed.
Fig. I
1
12
Adjusting Harness (Fig. J)
1. Place the shoulder straps
14
over yourshoulders.
2. Pull the adjustment straps
15
down until the backplate
is firm against your back as shown in Fig.J.
Fig.H
Fig. J
15
15
14
14
Fig.G
2
9
18
 Loading...