4
Items Needed:
1/4-20 x 3/4" Button Head Screw (Qty: 3)
1/4-20 Serrated Flange Nut (Qty: 3)
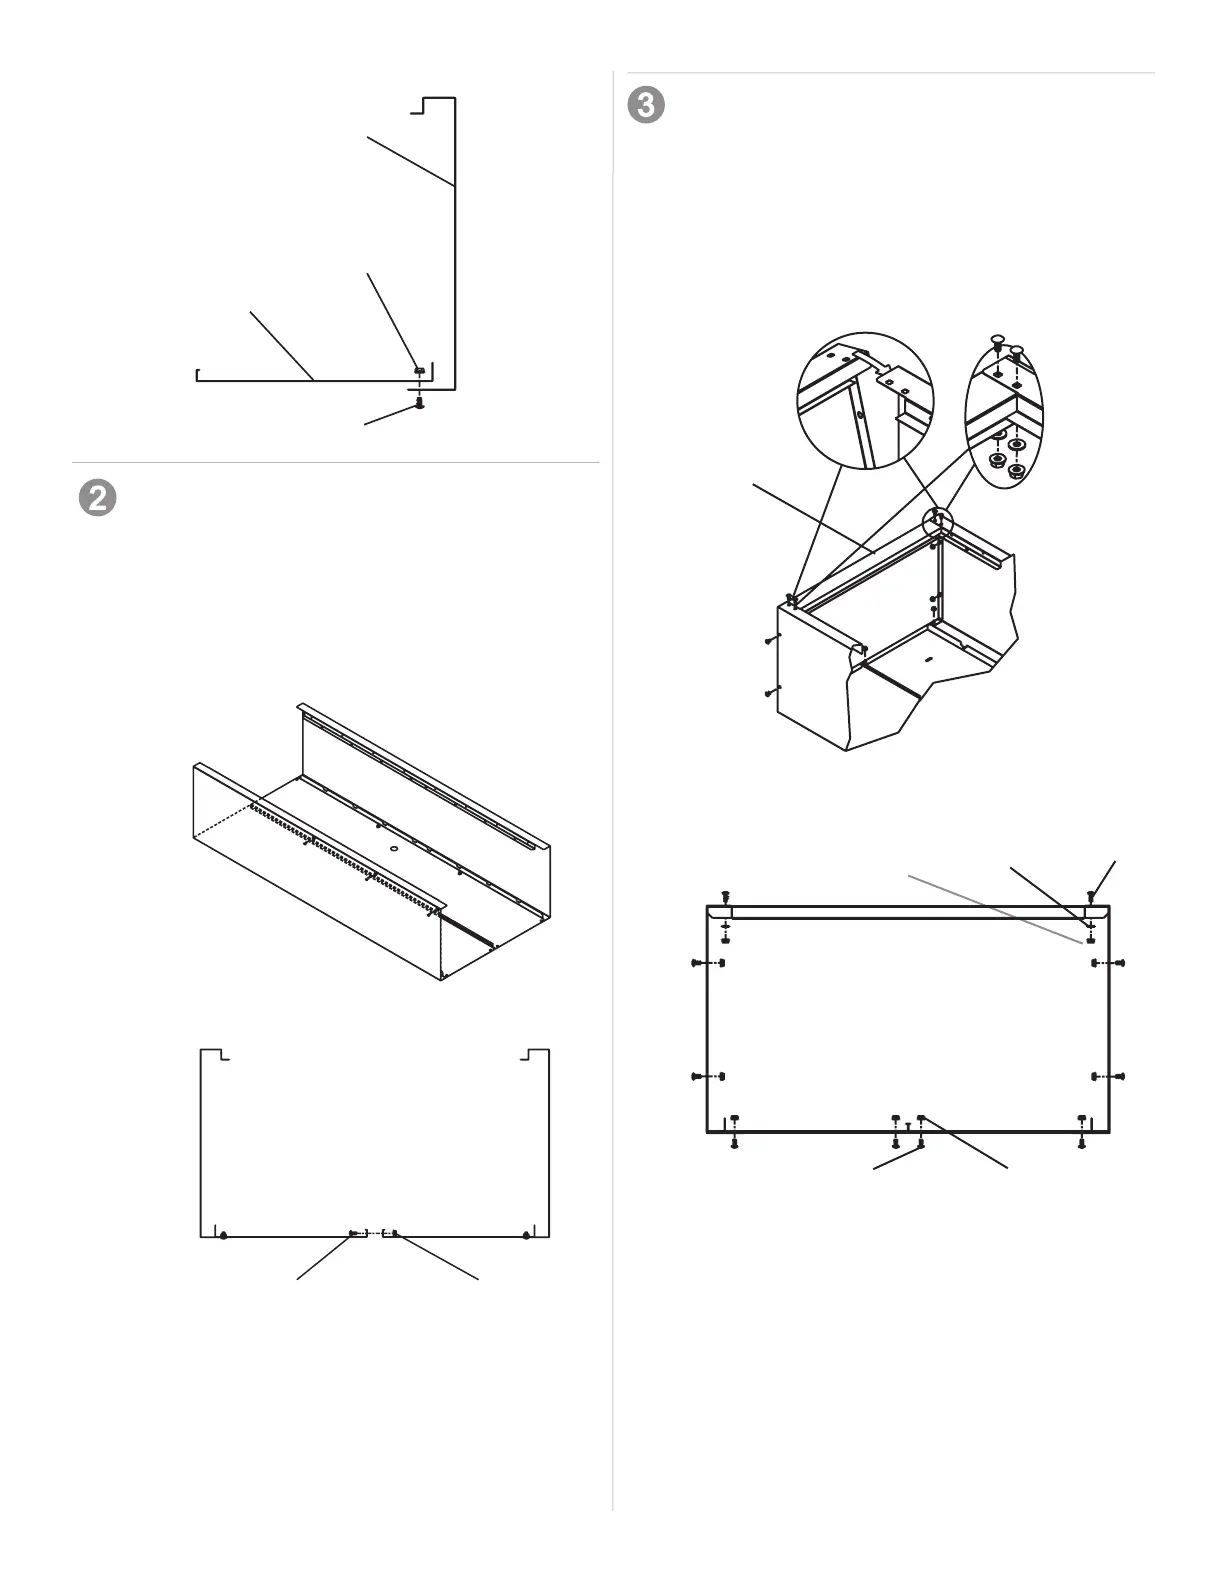
Process:
• Connect assemblies from step 1 using (3) 1/4-20 x 3/4”
screws and (3) nuts.
• Finger tighten.
Side panel
Nut
Back panel
Screw
Washer
Bolt
Nut
Screw
Top
Nut
Items Needed:
1/4-20 x 5/8" Carriage Bolt (Qty: 4)
1/4-20 x 3/4" Button Head Screw (Qty: 8)
11/32" Washer (Qty: 4)
1/4-20 Serrated Flange Nut (Qty: 12)
Process:
• Insert top into one end of assembly and attach using (4)
bolts, (8) screws, (4) washers, and (12) nuts.
• Finger tighten.
Nut
Screw