22
SERVICE AND MAINTENANCE
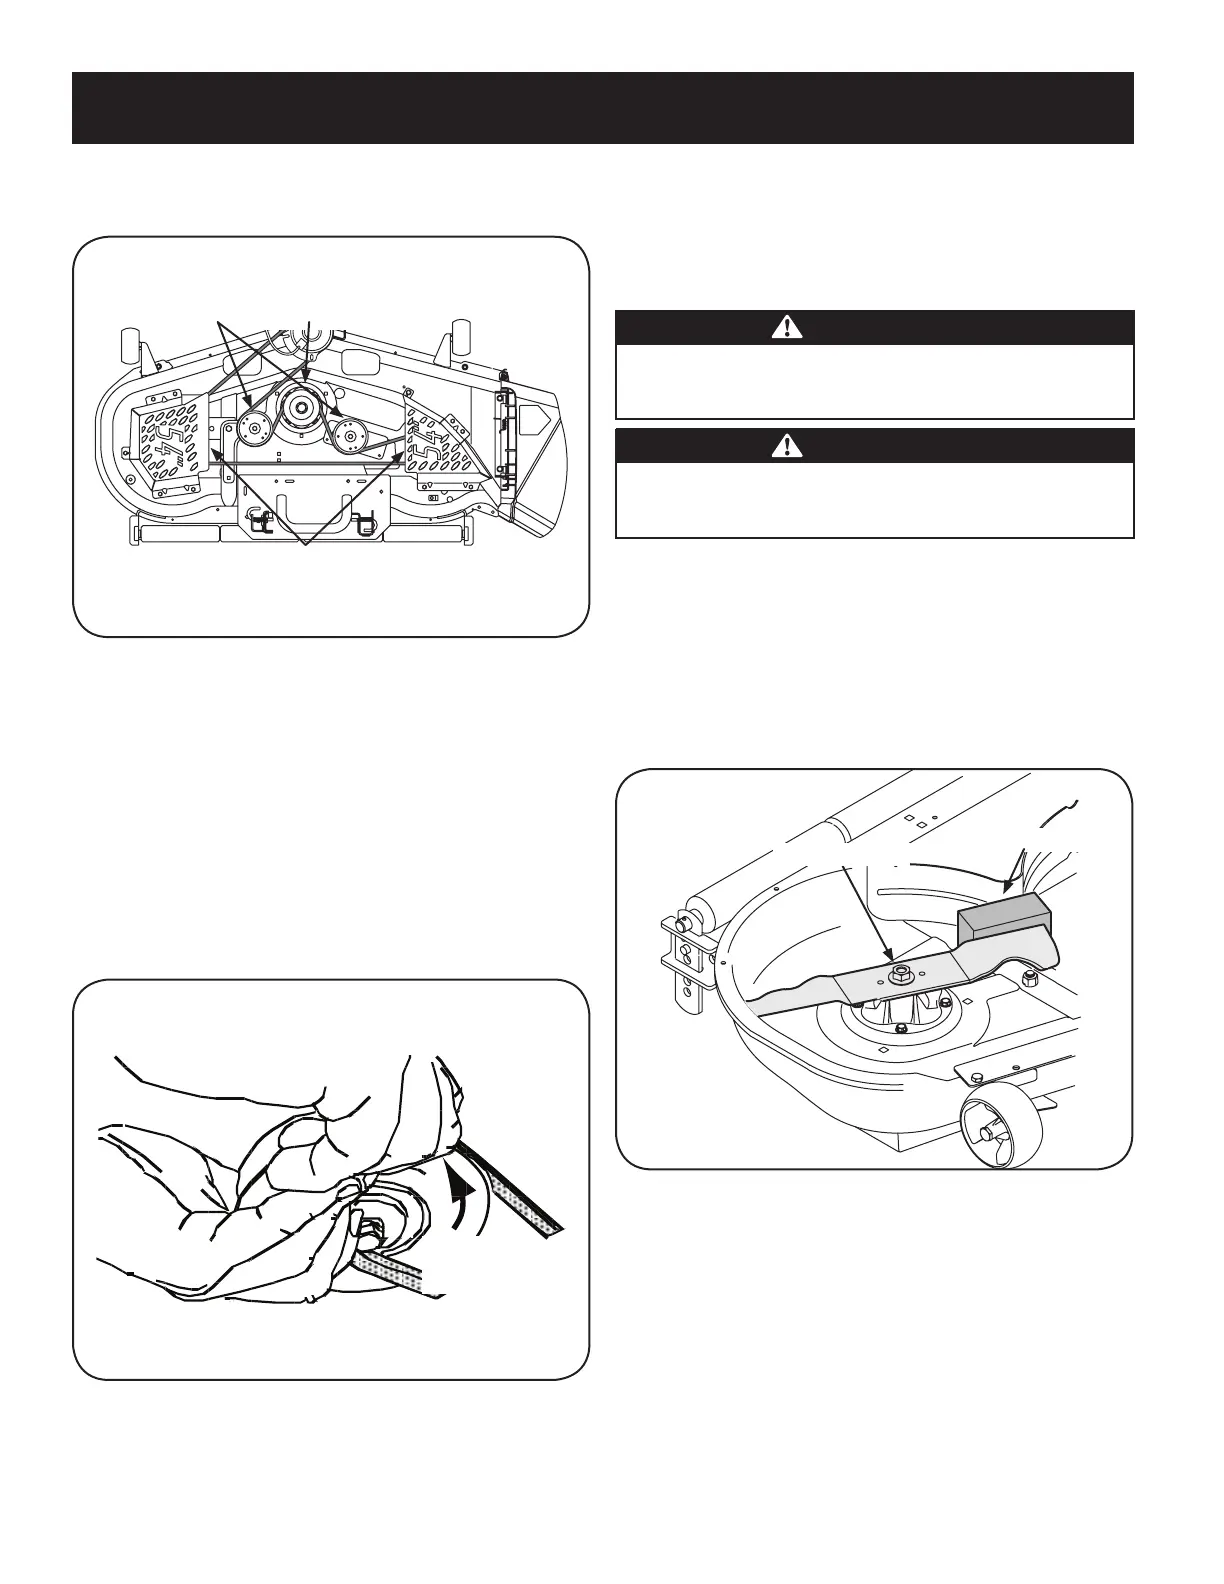
To place the new belt, begin by routing the belt around the two 5.
outer spindle pulleys, then around the front spindle pulley as
shown in Figure 16.
Route the belt around the two deck idler pulleys as shown in 6.
Figure 16.
Retighten the belt keeper rod loosened earlier.7.
Remount the outer spindle belt covers removed earlier.8.
Reinstall the deck making sure the belt remains routed around the 9.
pulleys as instructed.
Reinstallthedeckswayrod(SeeFigure13)anddeckstabilizer10.
rod (See Figure 14).
Pull the right side of the belt and place the narrow V side of 11.
the belt into the PTO pulley. See Figure 10 in CUTTING DECK
REMOVAL and Figure 17 below.
While holding the deck belt and PTO pulley together, rotate the 12.
pulley to the left (See Figure 17). Continue holding and rotating
the pulley and belt until the belt is fully rolled into the PTO pulley.
Replace the PTO Pulley belt guard removed in step 4 of CUT-13.
TING DECK REMOVAL.
NOTE: Insert the belt guard into the belt guard slot of the PTO pulley.
See Figure 10.
CUTTING BLADES
WARNING
Shut the engine off and remove ignition key before removing the
cutting blade(s) for sharpening or replacement. Protect your hands by
using heavy gloves when grasping the blade.
WARNING
Periodically inspect the blade and/or spindle for cracks or damage,
especiallyafteryou’vestruckaforeignobject.Donotoperatethe
machine until damaged components are replaced.
To remove the blades, proceed as follows.
Remove the deck from beneath the tractor, (refer to Cutting Deck 1.
Removal on page 21) then gently flip the deck over to expose its
underside.
Place a block of wood between the center deck housing baffle 2.
andthecuttingbladetoactasastabilizer.SeeFigure18.
Remove the hex flange nut that secures the blade to the spindle 3.
assembly. See Figure 18.
Front Spindle
Pulley
Outer Spindle
Pulleys
Deck Idler
Pulleys
Figure 16
Deck
Belt
Rotate PTO
Pulley
Figure 17
Flange Lock Nut
Block of Wood
Figure 18






 To Next Page