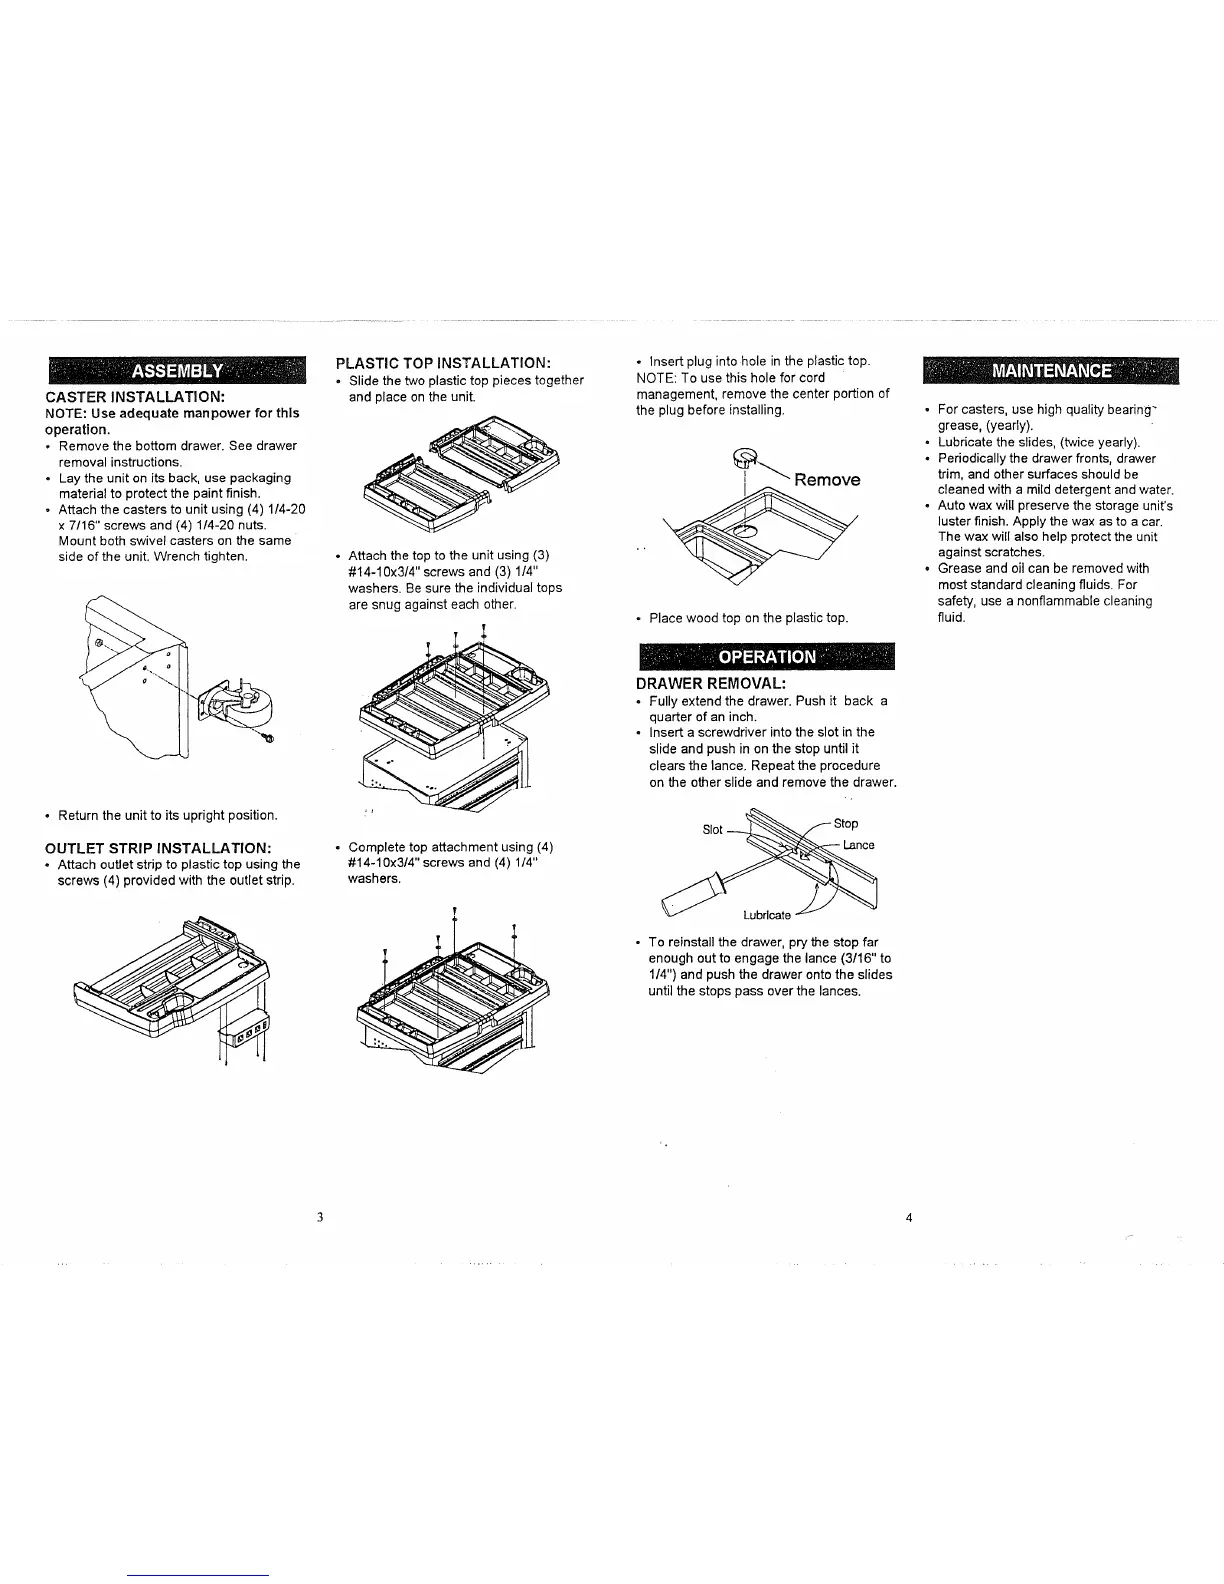
CASTER INSTALLATION:
NOTE: Use adequate manpower for this
operation.
o Remove the bottom drawer. See drawer
removal instructions.
* Lay the unit on its back, use packaging
material to protect the paint finish.
- Attach the casters to unit using (4) 1/4-20
x 7/16" screws and (4) 114-20 nuts.
Mount both swivel casters on the same
side of the unit. Wrench tighten.
• Return the unit to its upright position.
OUTLET STRIP INSTALLATION:
° Attach outlet strip to plastic top using the
screws (4) provided with the outlet strip.
PLASTIC TOP INSTALLATION:
• Slide the two plastic top pieces together
and place on the unit.
• Attach the top to the unit using (3)
#14-10x3/4" screws and (3) 1/4"
washers. Be sure the individual tops
are snug against each other.
° Complete top attachment using (4)
#14-10x3/4" screws and (4) 1/4"
washers.
• Insert plug into hole in the plastic top.
NOTE: To use this hole for cord
management, remove the center portion of
the plug before installing.
. Place wood top on the plastic top.
DRAWER REMOVAL:
• Fully extend the drawer. Push it back a
quarter of an inch.
• Insert a screwdriver intothe slot in the
slide and push in on the stop until it
clears the lance. Repeat the procedure
on the other slide and remove the drawer.
Lance
Lubricate
° To reinstall the drawer, pry the stop far
enough out to engage the lance (3/16" to
1/4") and push the drawer onto the slides
until the stops pass over the lances.
A
° For casters, use high quality bearing"
grease, (yearly).
• Lubricate the slides, (twice yearly).
° Periodically the drawer fronts, drawer
trim, and other surfaces should be
cleaned with a mild detergent and water.
° Auto wax will preserve the storage unit's
luster finish. Apply the wax as to a car.
The wax will also help protect the unit
against scratches.
• Grease and oil can be removed with
most standard cleaning fluids. For
safety, use a nonflammable cleaning
fluid.