OPERATING THE COUPLER
The coupler enables the use of various optional attachments.
_ WARNING: Before using any attachment, read and I
understand the manual that came with the attachment.
J
Follow all safety information contained within.
_ WARNING' To avoid serious personal injury and l
damage to the unit, shut the unit off before removing or
installing an attachment.
NOTE: To make installing or removing the attachment easier, place
the unit on the ground or on a work bench.
installing the Attachment
NOTE: Remove the protective cap and gray spacer from the upper
and lower shafts prior to assembling the attachment.
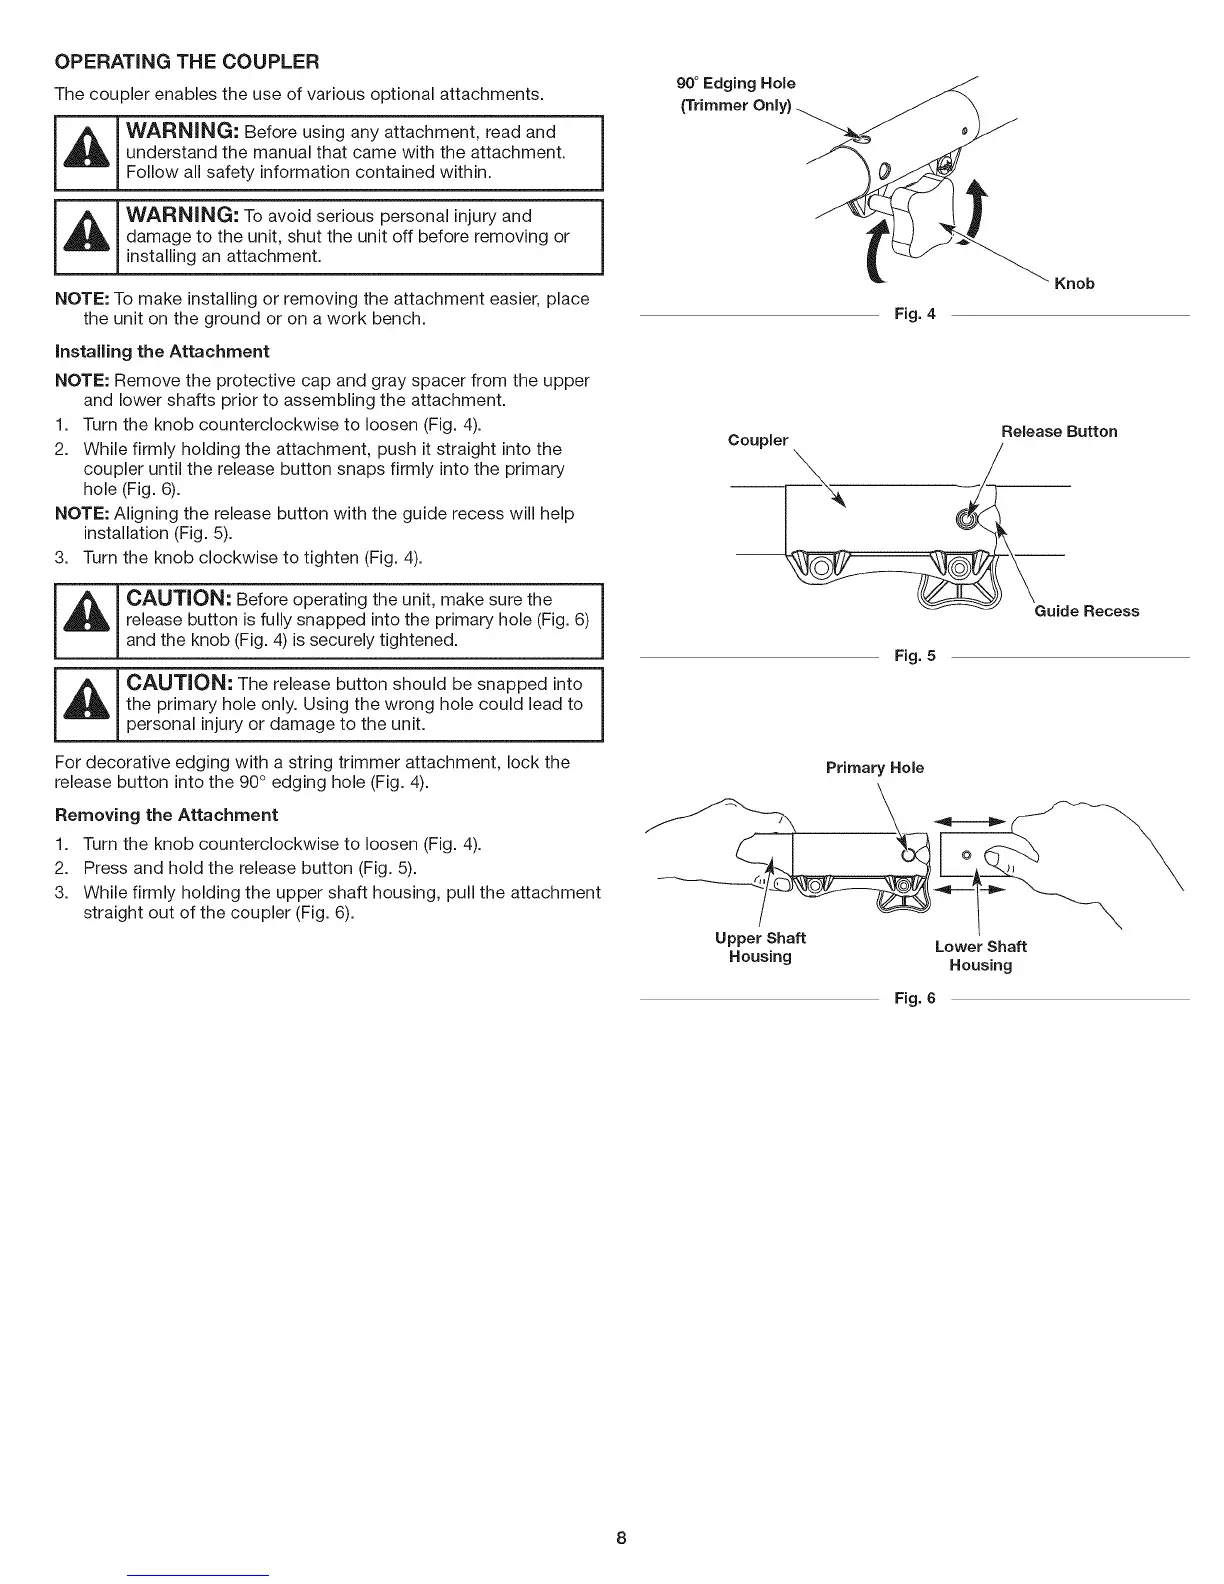
1. Turn the knob counterclockwise to loosen (Fig. 4).
2. While firmly holding the attachment, push it straight into the
coupler until the release button snaps firmly into the primary
hole (Fig. 6).
NOTE: Aligning the release button with the guide recess will help
installation (Fig. 5).
3. Turn the knob clockwise to tighten (Fig. 4).
i, 1c,o,,o°; e,o,eo e,at,n theun,t a esu'ethe!
release button is fully snapped into the primary hole (Fig. 6)
and the knob (Fig. 4) is securely tightened.
_ CAUTION: The release button should be snapped into l
the primary hole only. Using the wrong hole could lead to
personal injury or damage to the unit.
For decorative edging with a string trimmer attachment, lock the
release button into the 90° edging hole (Fig. 4).
Removing the Attachment
1. Turn the knob counterclockwise to loosen (Fig. 4).
2. Press and hold the release button (Fig. 5).
3. While firmly holding the upper shaft housing, pull the attachment
straight out of the coupler (Fig. 6).
g0° Edging Hole
(Trimmer Only)
Fig. 4
Knob
Release Button
Coupler
Guide Recess
Fig. 5
PrimaryHole
\
Upper Shaft Lower Shaft
Housing Housing
Fig. 6





 To Next Page