131313131313
13
Maintenance / Storage
PowerFlo ™ - Owner's Manual
Recharging the Battery
• This unit comes with 2 charging options (A and B) please see below *
OPTION A
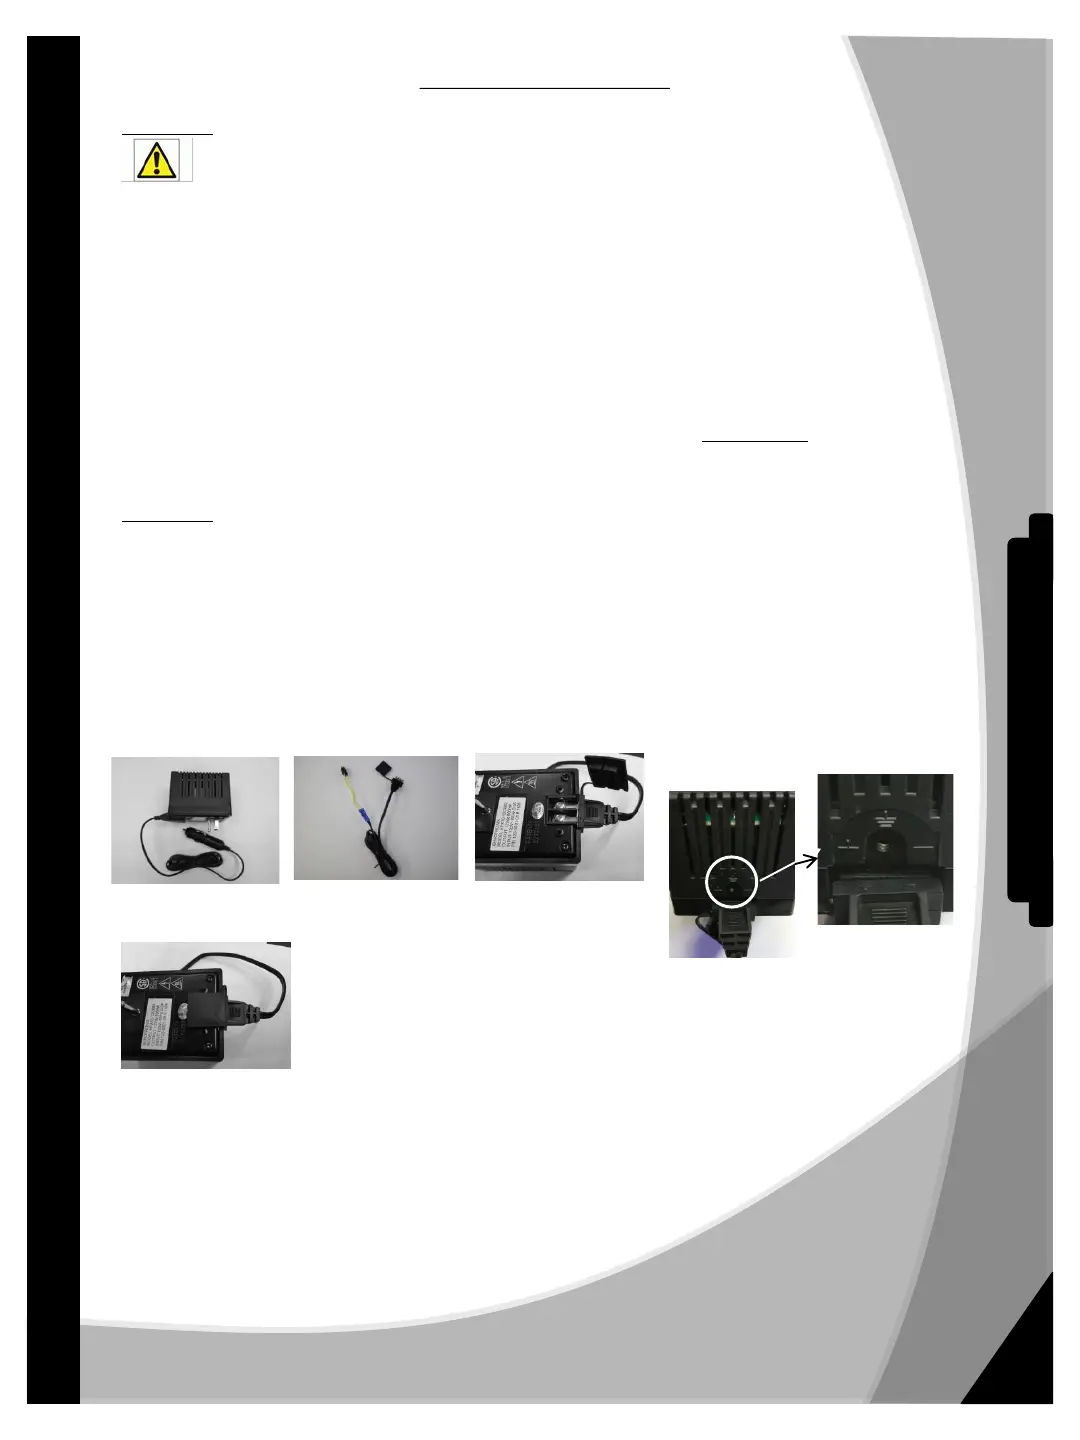
Quick Charging “In cabinet” (**Recommended figure 1**)
Warning: In order to prevent accidental injury, open door while charging battery.
• The battery is left in the cabinet while charging. This is the ideal charging scenario to protect your internal
wires from undue wear and tear.
• Plug the charger into a 125 Volt outlet and insert the charging plug into the unit charging port located on the
upper right side of the cabinet behind the drinking nozzles.
• Observe the charging light. If a yellow light appears, the battery is charging. If a red light appears, unplug the
charger from the outlet and check that the battery leads are connected to the battery correctly. The red wire
always goes to the red post on the battery.
• When the light is green, the battery is at full capacity. Disconnect the charger from the unit and unplug the
charger from the wall socket.
***Note: Due to the self-discharge characteristics of this type of battery, it is imperative that it is fully charged. We
recommend charging your PowerFlo 50™ battery immediately before use and at least every 3 months during the off-
season storage. Do not subject batteries to freezing temperatures. Failure to keep your battery fully charged will reduce
battery useful life.***
OPTION B “Bench/Counter” Charging
• Using this charging method allows for removal of the battery and charging at another location.
• In order to use this charging option you must first make the proper adjustment to your charger setup.
• Charging system stock setup has the Option A adapter installed for the quick charging system as seen in
figure 1. To use the Bench charging option, find the bench charging adapter (see figure 2).
• With the charger unplugged from the unit and the wall socket, remove protective cover, loosen the two
holding screws shown in figure 3 and remove the Quick Charge adapter.
• Replace the quick charging adapter with the Bench adapter.
• It is important to ensure that the (+) and (-) signs align properly as seen in figure 4.
• Tighten the screws and replace cover and your charger is now ready to use in bench charging. (Fig 5)
Figure 1 Figure 2 Figure 3
ENLARGED
Figure 4
• Disconnect battery from the cabinet by unplugging the harness from inside the unit.
• Take the battery out and place it in your charging location.
• Plug the battery harness into the charger cord plug.
• Plug the charger into a 120 volt wall outlet.
• Observe the charging light. If a yellow light appears, the battery is charging.
If a red light appears, unplug the charger from the outlet and check that the
battery leads are connected to the battery correctly. The red wire always goes to the
red post on the battery. If still red, check the cord leads on the charger (fig. 4) to make
sure positive post is under positive screw.
• When the light is green, the battery is at full capacity. Disconnect the charger
and place battery in unit behind the battery pad and plug the battery
harness into the cabinet connector. The unit is now ready for use.
+
_
+
_
Figure 5
 Loading...