8
ENGLISH
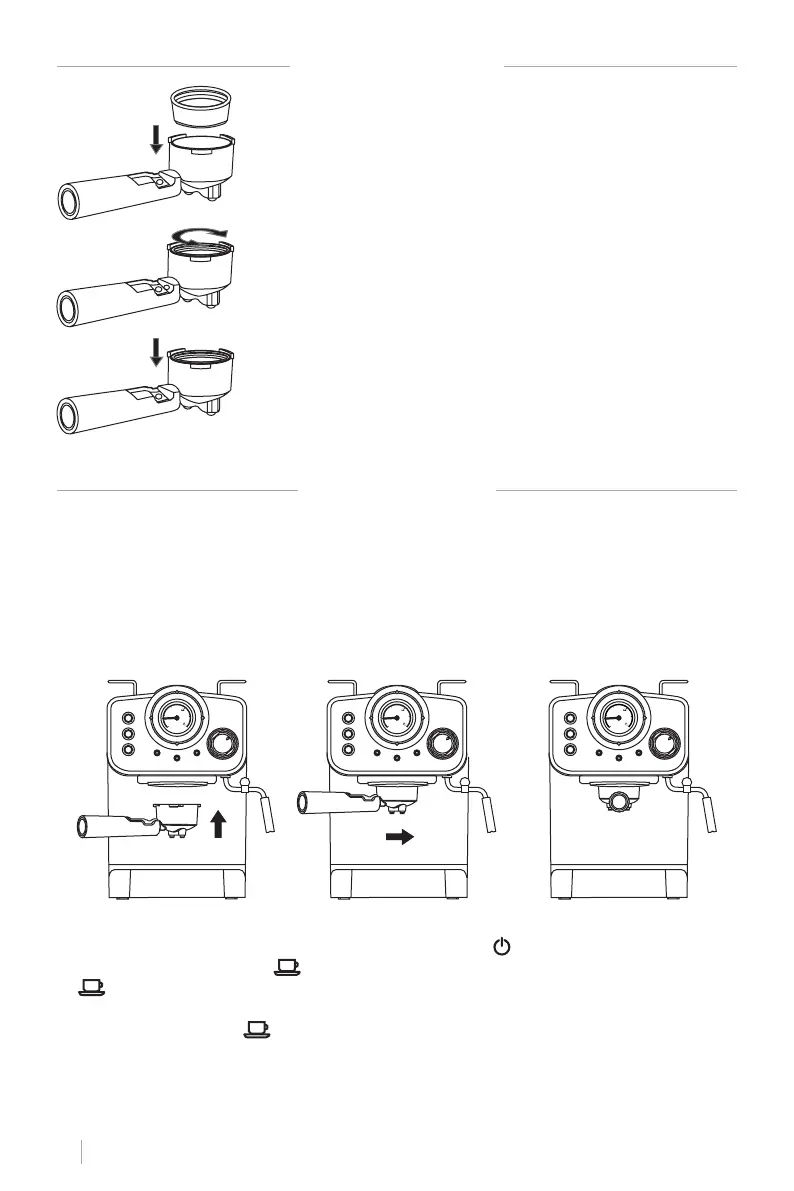
PLACING THE FILTER
BEFORE FIRST USE
• To ensure you get the best coffee possible, please rinse the coffee maker before its rst use.
• Fill up the tank with water without exceeding the “MAX” line marked on the tank. Then cover
the water tank.
Note: The appliance is supplied with a detachable tank to allow for easy cleaning. You can
detach the tank to ll it up and then place it back into the appliance.
• Place the lter in the lter holder (make sure there’s no coffee in the lter).
• Place a mug on the drip tray.
Note: The appliance is not equipped with a mug; please use your own coffee mug.
• Plug the coffee machine in and press the ON/OFF button “ ”. A red indicator light will turn
on. Press the coffee button “ ”. As soon as water starts coming out press the coffee button
“ ” again and the machine will start preheating. When the coffee indicator lights green, it
means the temperature is hot enough.
• Press the coffee button “ ” and allow the entire tank of water to ow out. Once the machine
is no longer dripping, pour out the processed water and clean the container thoroughly. Now
you can start brewing.
Note: There may be a noise when pumping the water out for the rst time, it is normal; the appli-
ance is simply releasing trapped air. After approximately 20 seconds, the noise will disappear.
1. To insert the lter in the lter holder, please align the notch on
the lter with the ridge inside the lter holder.
2. Now turn the lter to lock it in place. This will secure the lter in
the lter holder.
80
40
0
ºC
80
40
0
ºC
80
40
0
ºC
3. Lift the tab to hold the lter holder and shake out the coffee
after use without removing the lter.