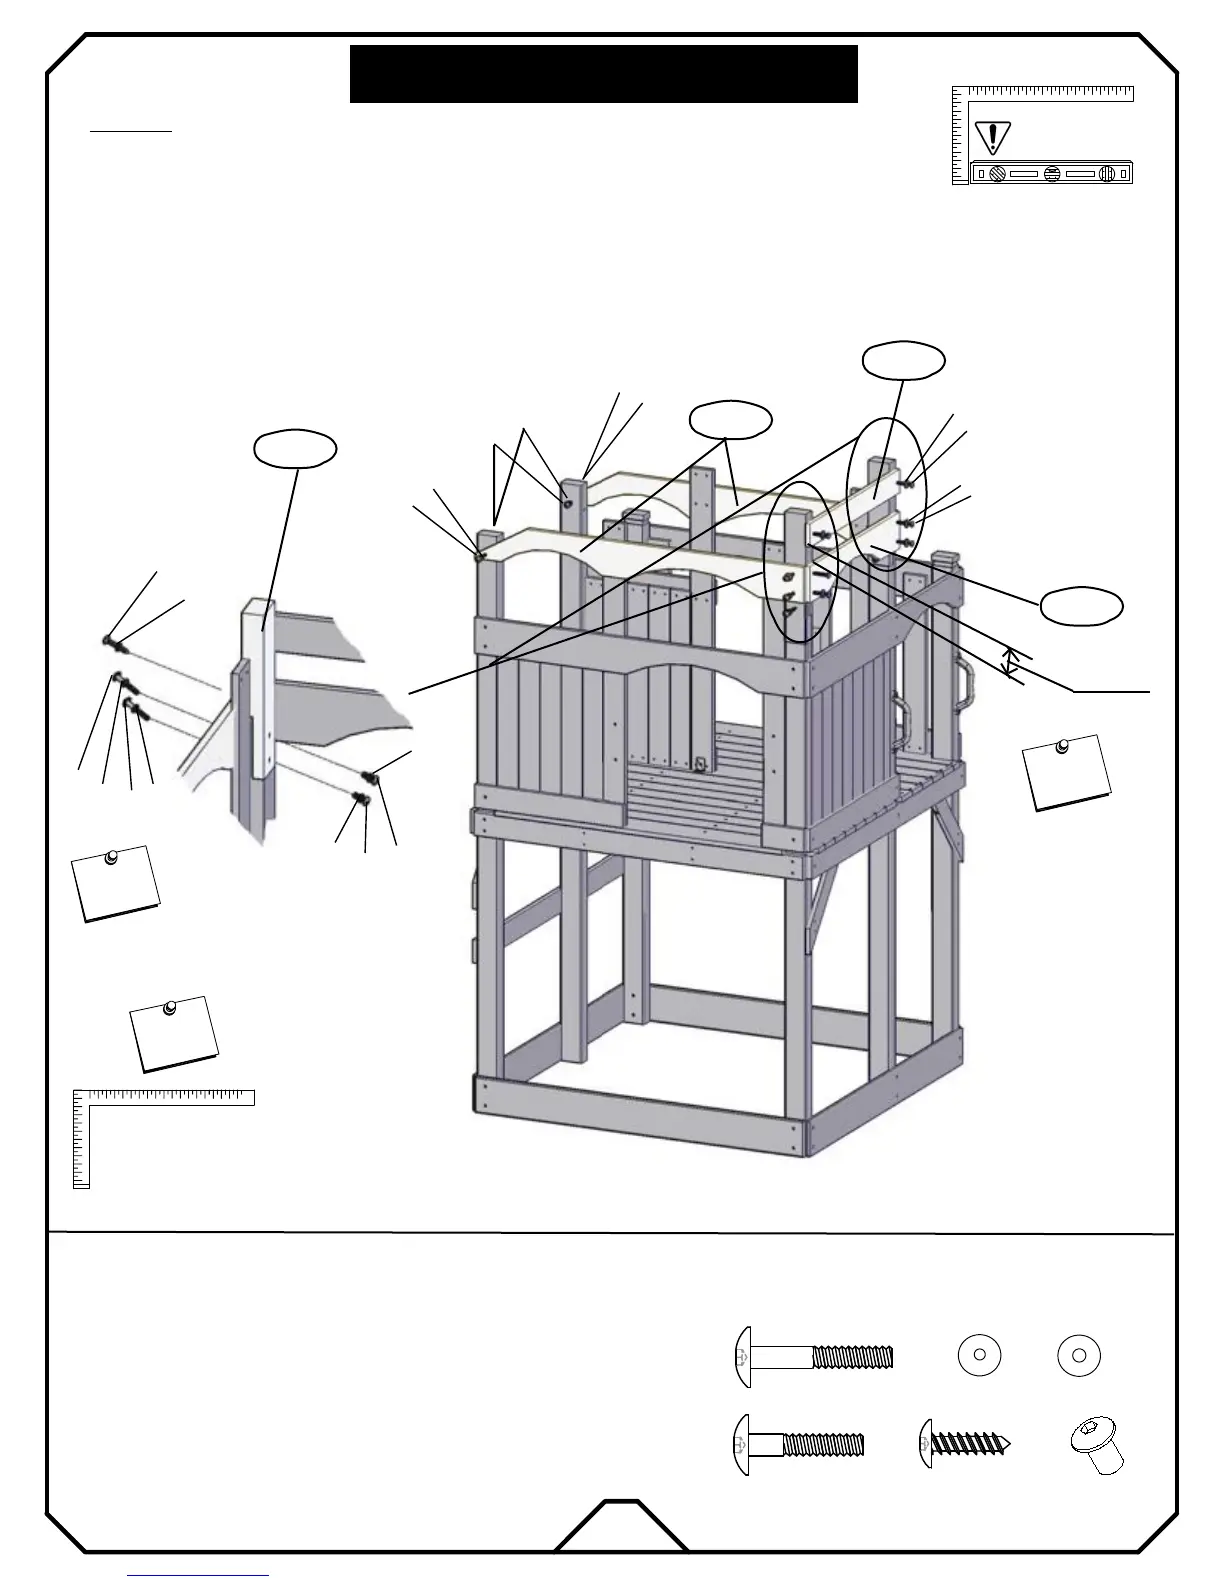
Note: It is vital that the fort
be level after this
phase!
11STEP
:
e6
e8
k1
d1
d1
k2
b2
k2
k1
k2
e6
k1
d1
k2
WF18
WF19
WD20
ITEMS NEEDED
(2) WF18 Top Double Arch Board 1×6×54
(1) WF19 Top Arch Board 1×6×31
(1) WD20 Top Brace 1×4×31
WQ32
(2) WQ32 Upright-G 3×4×15 29/32
b2
k2
N
o
t
e
!
I
m
p
o
r
t
a
n
t
MAKE SURE FRAME IS
SQUARE BEFORE
PROCEEDING TO
NEXT PHASE!
b2
k2
(14)
HARDWARE NEEDED
e6
d1
(6)
b2
k2
(8)
(6)
k1
(4)
e8
(2)
WQ06b
WQ06a
Note spacing
3"
* From the inside of the playhouse, place both WQ32 into its place so you can see the
correct orientation.
* Insert two nut barrels "d1" into both WQ32.
* Attach both WQ32 extensions into uprights (WQ06a & WQ06b) with bolt "e8".
* From the inside of the playhouse, insert the two remaining nut barrels "d1" as shown.
* Attach both WF18 with bolts"e6" and wood screws "b2" from the front and back of the playhouse.
* Attach WF19 with wood screws "b2".
e6
k2
BACK
TOWER ASSEMBLY
* Attach WD20 with wood screws "b2" about 3" front the top.
N
o
t
e
!
I
m
p
o
r
t
a
n
t
N
o
t
e
!
I
m
p
o
r
t
a
n
t
Be ware of the different bolts and screws
NEXT PHASE!
27