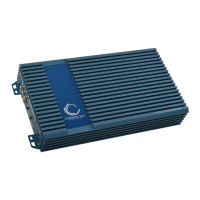
This document describes the Crescendo Evolution Seven 7A6 amplifier, a device designed for high-quality audio reproduction in car environments, suitable for both daily use and SQ (Sound Quality) competitions.
Function Description
The Crescendo Evolution Seven 7A6 is a multi-channel amplifier that accepts low-level audio signals from a head unit, preamplifier, or other signal processor. It amplifies these signals to drive speakers and subwoofers, enhancing the overall sound system performance in a vehicle. The amplifier features various filter modes (High Pass Filter, Low Pass Filter, and full range) to allow for precise frequency management, enabling users to tailor the audio output to their specific speaker setup and listening preferences. It also includes safety indicators and protection mechanisms to ensure reliable operation.
Important Technical Specifications
The Evolution Seven 7A6 amplifier offers a robust set of specifications:
- Output Power (RMS) at 4 Ohm:
- 6 x 75 Watt Stereo
- 3 x 250 Watt Bridged
- Output Power (RMS) at 2 Ohm:
- Minimum Speaker Load:
- 2 Ohm at Stereo
- 4 Ohm at Bridged
- Input Sensitivity: 0.2 – 5.0 Volt
- Frequency Response: 10 Hz – 25 kHz
- Total Harmonic Distortion (THD) at 4 Ohm load: < 0.05%
- Signal to Noise Ratio (SNR): > 90 dB
- Low Pass Filter (LPF) for Ch. 5/6: 10 Hz (OFF) – 750 Hz
- High Pass Filter (HPF) for Ch. 1/2/3/4: 10 Hz (OFF) – 200 Hz
- High Pass Filter (HPF) for Ch. 5/6: 10 Hz (OFF) – 750 Hz
- Overheat Protection: Protects at 80° C / 176° F
- Low Voltage Protection: Yes, protects if voltage drops below 8 Volt
- Short Circuit Test at Max Power: Tested
- Dimensions (L x W x H): 353 x 202 x 60 mm
- Weight: 2.00 Kg
- Fuse: Not available (external fusing required)
- Remote On/Off: No "pop" noise when turning on/off
Usage Features
The amplifier is designed for flexible integration into various car audio setups:
- Mounting: When choosing a mounting location, it is crucial to select a spot where air can circulate freely around the amplifier to dissipate heat effectively. The amplifier should not be covered with carpet, acrylic, or hidden behind trim panels. Mounting screws are provided for installation.
- RCA Input Connections: The amplifier accepts low-level RCA input signals. It is recommended to use high-quality RCA cables with interlocking jacks for optimal performance. A critical safety note advises against connecting or disconnecting RCA inputs while the amplifier is running.
- Power Connections: High-quality power cable connections are essential for maximizing performance. The negative (ground) and positive power cables should be of the same gauge. The recommended power cable size is 4 AWG, which is also the maximum size the amplifier can accept. The positive power cable must be fused with a maximum 100 Ampere fuse, placed within 40 cm of the main battery. If an additional battery is used, it also requires a fuse within 40 cm and should be placed no more than 40 cm from the amplifier. If the additional battery is further than 40 cm, it needs a fuse within 40 cm of the battery. The positive power cable should always be the last connection made during installation.
- Speaker Cable Connections: The recommended speaker cable size is between 18 and 12 AWG, with 12 AWG being the maximum acceptable size.
- Remote Cable Connections: While less critical than power and RCA cables, a remote cable with good isolation is recommended to prevent future issues, considering the extreme temperatures and vibrations in a car environment.
- Gain Sensitivity Adjustment: The input sensitivity can be adjusted from 5 Volt to 200 mVolt to match the output power of the head unit. A higher gain setting (towards +) is for sources with smaller voltage output, while a lower setting (towards ) is for sources with higher voltage output.
- Filter Mode Selection: A switch allows users to select between High Pass Filter (HPF), Low Pass Filter (LPF), or full range (no filter).
- High Pass Filter (HPF): Weakens frequencies below a set point. Available frequencies are 10 Hz (OFF) to 200 Hz for channels 1-4, and 10 Hz (OFF) to 750 Hz for channels 5-6. "OFF" means no low frequencies are filtered.
- Low Pass Filter (LPF): Weakens frequencies above a set point. Available frequencies are 10 Hz (OFF) to 750 Hz for channels 5-6.
- LED Indicators:
- ON LED: Lights up when the amplifier is operating normally.
- FAULT LED: Flickers if an installation error occurs and lights up continuously if the amplifier is damaged.
Maintenance Features
The manual provides a troubleshooting guide to help users diagnose and resolve common issues:
- Amplifier Fails to Turn On: Check ground wiring, battery condition, power cables, and all fuses. If the fault indicator LED is flashing, refer to the next troubleshooting step.
- Fault Indicator LED Flashing: Check for short circuits on speaker leads. Ensure the speaker load is not below the minimum impedance (4 Ohm bridged for the 7A6). If the LED still flashes without speakers connected, the amplifier may require repair.
- No Sound Output: Verify RCA output from the source unit, gain settings, RCA cables, and speaker cable connections.
- Low Sound Output: Adjust the gain control and check crossover settings.
- High Hissing Noise: Check if RCA cables are shorted to the ground or amplifier body. Verify proper grounding of the amplifier and source unit.
- Sound is Distorted: Ensure gain control is correctly adjusted to match the source unit's output level (avoid setting it higher than necessary). Check all frequency settings on the crossover section. Look for shorts from speaker leads to the car body.
- Amplifier Builds a Lot of Heat: Confirm that the speaker load is not below the minimum impedance (4 Ohm bridged for the 7A6). Ensure good air circulation around the amplifier and consider adding an external cooling fan if needed.
The Crescendo Evolution Seven 7A6 comes with a 1-year warranty. For issues not covered by the troubleshooting guide, users are advised to contact an authorized dealer for assistance.