26
2nd step: Put the rear holes of the rain
cover over the ends of the upper frame
tubes until the holes in the tube provi-
ded for the spring clip are once again
uncovered.
4th step: Pull the rear of the rain
cover tight in a downward direction.
3rd step: Fit and secure the handlebar
as described in Section 1.1.4.
5th step: Carefully pull the rain cover
tight towards the front.
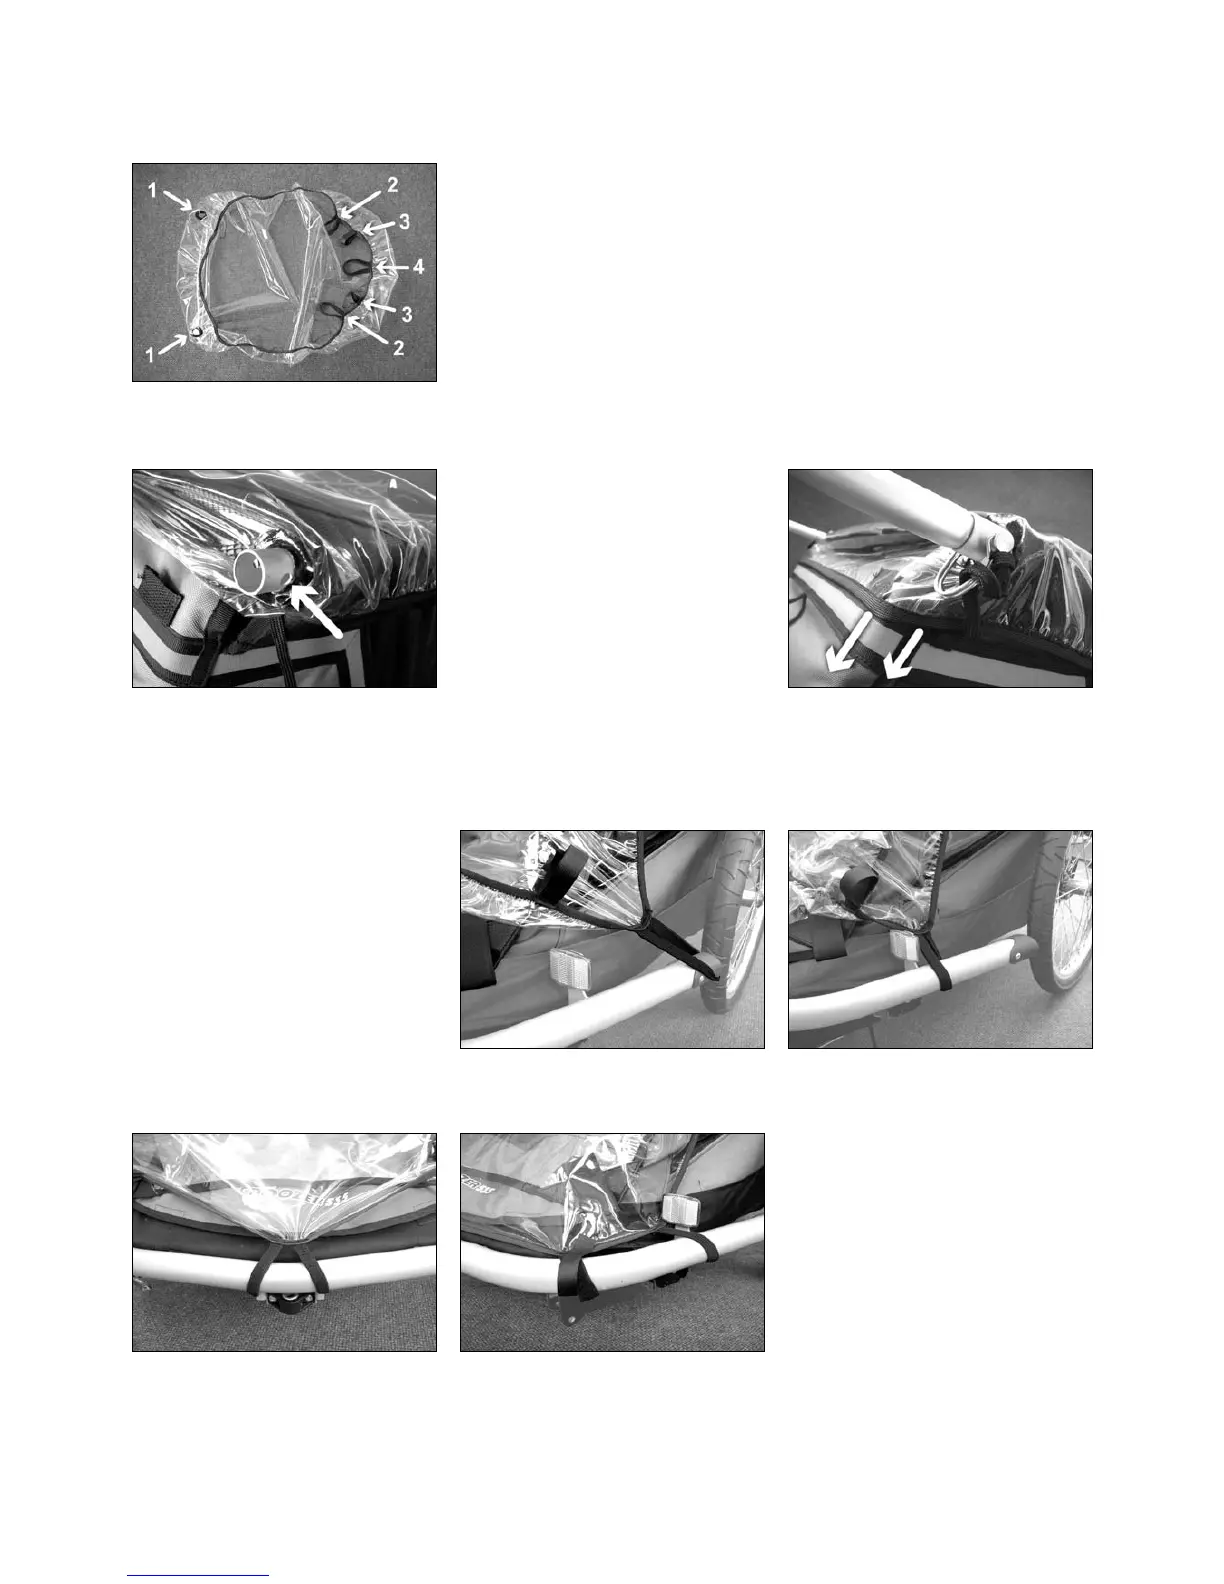
1.4. The Rain Cover
Fitting the rain cover (accessory, not supplied as standard)
The rain cover has the following fitting attachments:
Holes to the rear with welded seals (1),
elasticated loops to the front of the sides (2), velcro fasteners (3),
and an elasticated loop in the middle (4).
6th step: Pull the elasticated loops on each side over the rear ends of the bumper
bar.
1st step:
Remove the handlebar
7th step: Pull the elasticated loop in
the middle over the buggy wheel brak-
ket.
8th step: Fasten both sides of the rain
cover to the bumper using the velcro
fasteners.
Make sure that the reflectors are not
obscured.