Figure 1
Figure 2
Figure 1
Figure 2
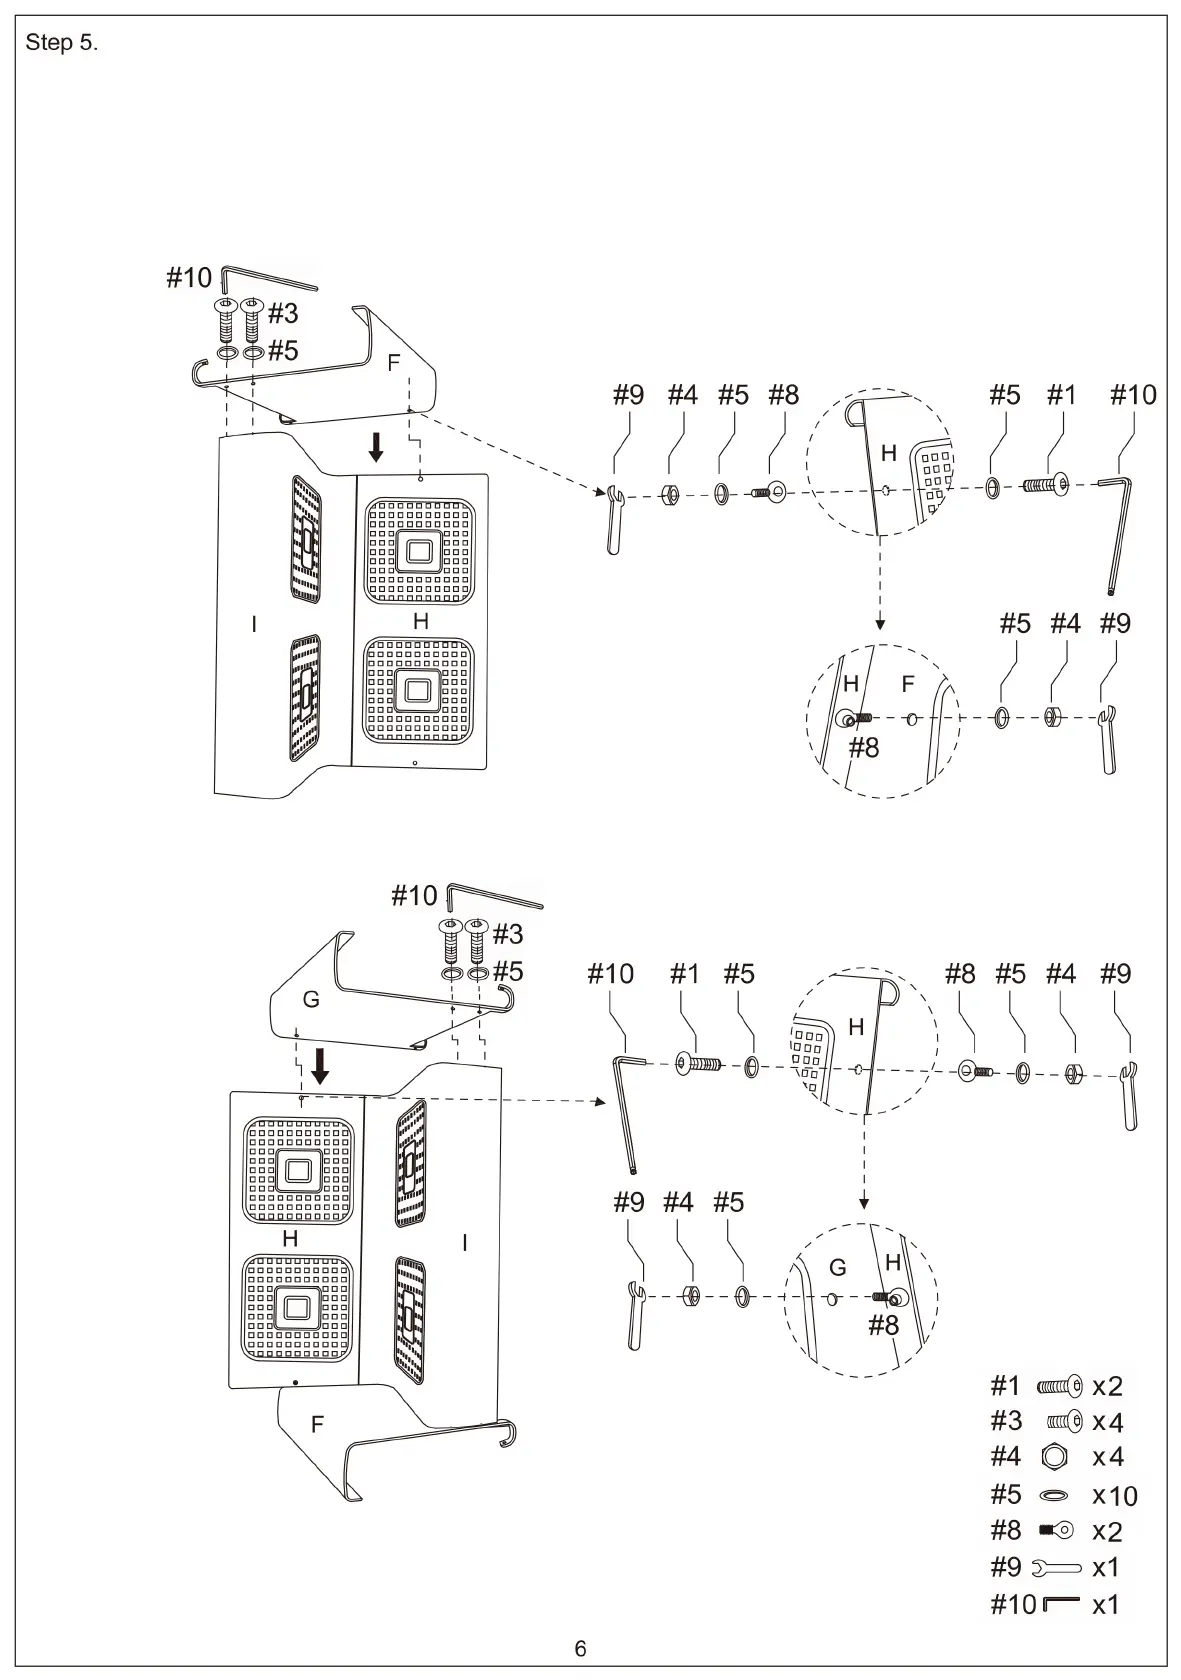
Install long bolts (part #1), metal washers (part #5), connecting screws (part #8) and self-locking nuts (part #4) to back
nuts (part #4), wrench (part #9) and allen wrench (part #10). Ensure assembled unit (parts H & I) is tilted at an angle to
panel (part H) using wrench (part #9) and allen wrench (part #10). See Figure 1. Ensure connecting screws (part #8)
are on the back of back panel (part H) and sticking out. See Figure 2. Next, connect arms (parts F & G) to assembled
unit (parts H & I) using installed connecting screws (part #8), short bolts (part #3), metal washers (part #5), self-locking
line up properly with arms (parts F & G).
NOTE: Please do not fully tighten bolts until unit is fully assembled.
 Loading...