54
Getting Started & Basic Operation
Set Up
Unpacking
1 Remove packing materials from unit.
Note: Save all packing materials.
2 Remove plastic bag covering radio.
3 Remove plastic safety cover from A/C plug.
4 Remove tie from A/C POWER CORD (9) and
untie FM WIRE ANTENNA (10) on back of
radio.
5 Open lid and remove styrofoam shipping
material from turntable.
6 Remove black tie-wrap from under the TONE
ARM (12).
7 Remove white protective needle cover by gently
pulling towards the front of the unit.
1 Plug A/C POWER CORD (9) into appropriate
outlet.
Note: This product may be equipped with a
polaized alternating-current line plug (a
plug having one blade wider than the
other.) This plug will fit into the power
outlet only one way. This is a safety
feature. If you are unable to insert the plug
fully into the outlet try reversing the plug,
if the plug should still fail to fit, contact
your electrician to replace your obsolete
outlet. Do not defeat the safety purpose
of the polarized plug.
2 Untie the FM WIRE ANTENNA (10) and allow
it to hang down in a straight line for optimum
FM reception. If you have trouble tuning in an
FM station, move the external FM WIRE
ANTENNA (10) for best reception. Do not
connect FM WIRE ANTENNA(10) to outside
antenna.
AC
Polarized Plug
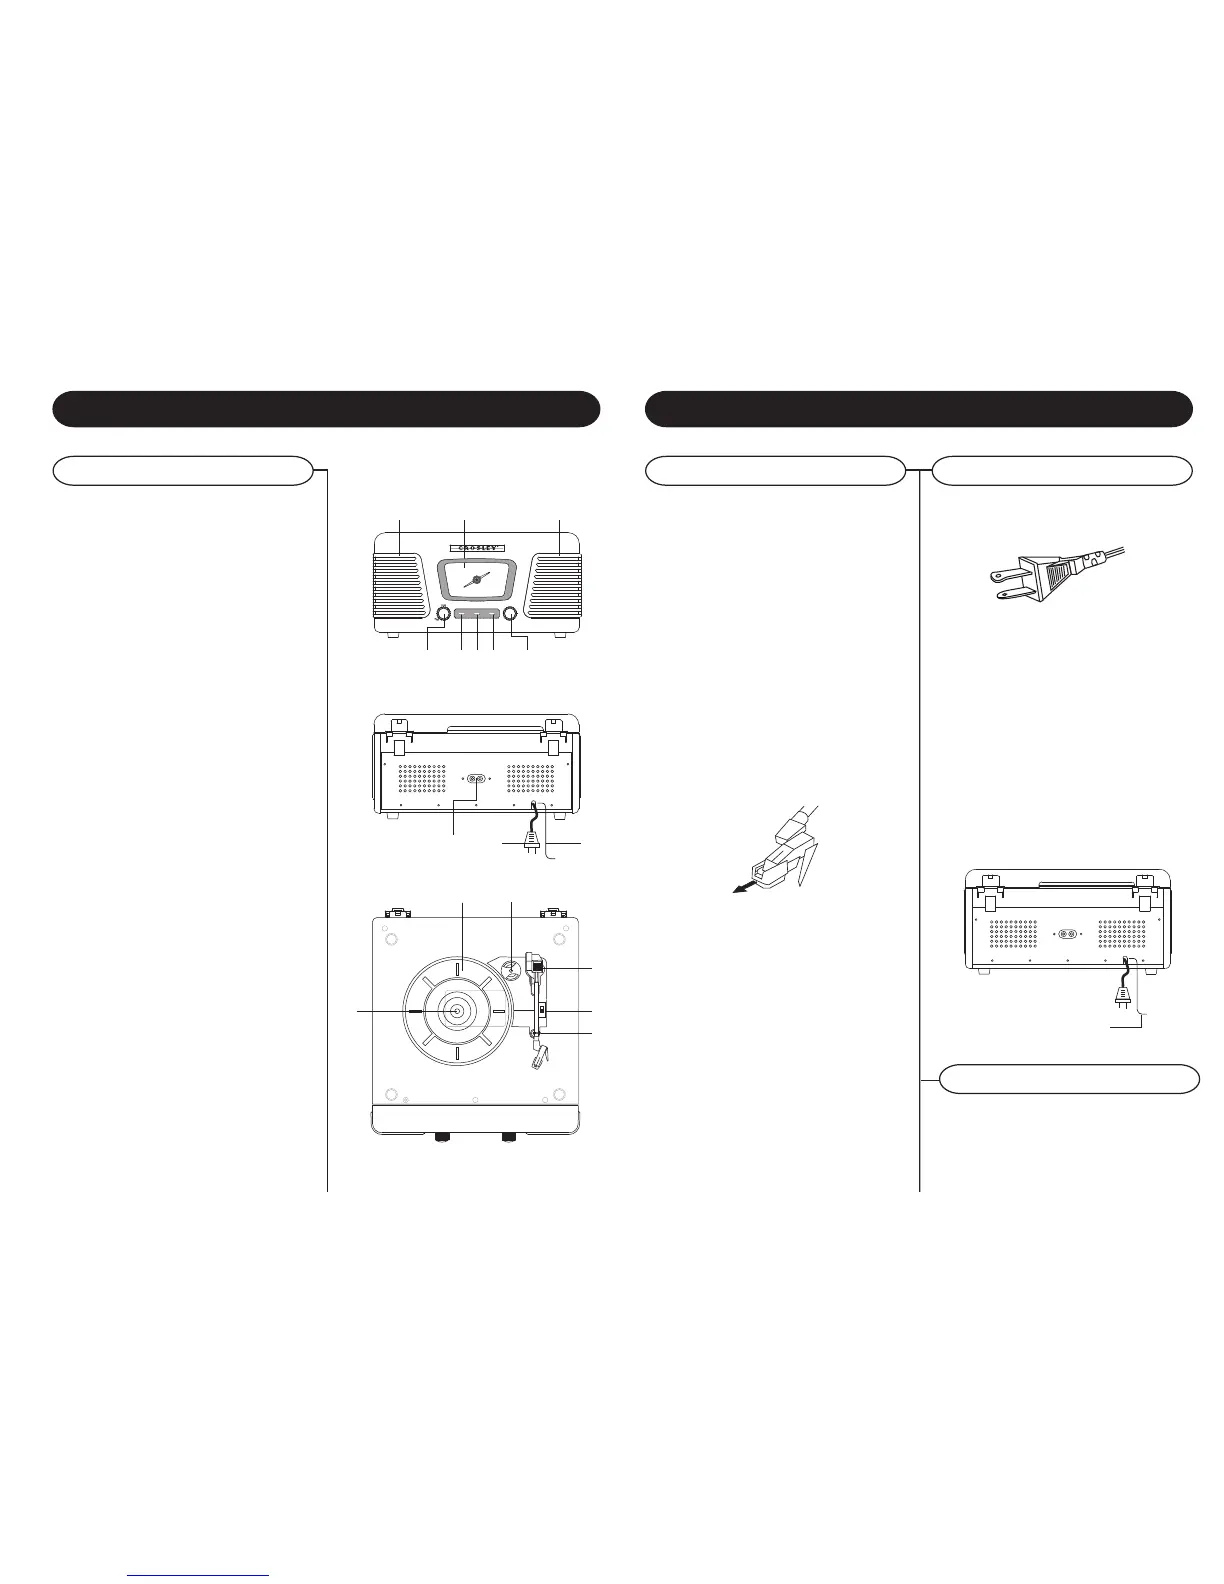
Control Locators
Unit Controls
1 Speaker
2 Dial Display
3 On-off Switch / Volume Control Knob
4 Phono Button
5 FM Button
6 AM Button
7 Tuning Knob
8
Line Out Jack
9 AC Power Cord
10 FM Wire Antenna
11 Adapter For 45 rpm Records
12 Tone Arm
13 Speed Control Switch
14 Tone Arm Rest
15 Turntable
16 Spindle
Unwind the AC POWER CORD (9) at the back of
the unit and connect it to a power outlet. Your new
Crosley is equipped with a On-Off Switch. Please
switch the On-Off Switch on to power up your
Machine.
21 1
3 4 5 7
TUNING
 Loading...