TS 074 R04
fig. 13
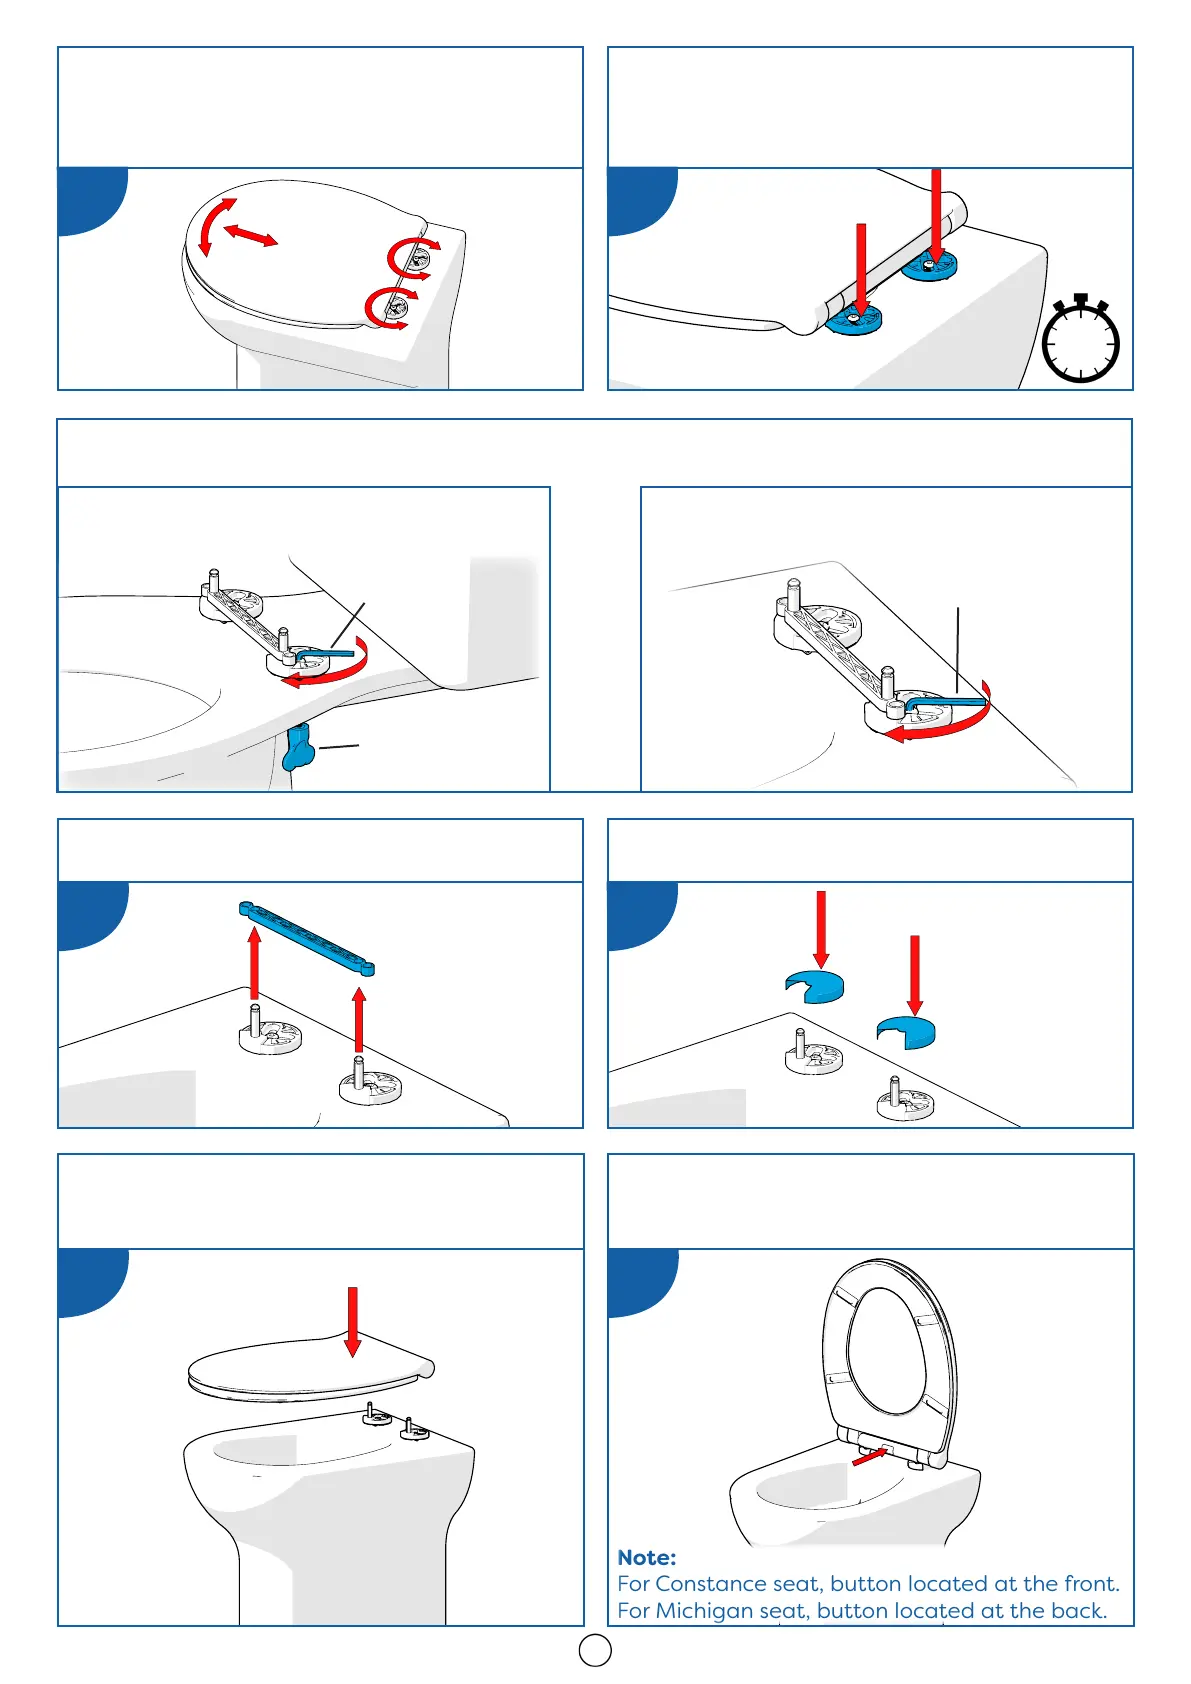
7.
Remove the spacer (K) from the Flexi Fix
Bracket. (See Fig. 13)
fig. 14
8.
Place the chrome caps (A) onto the
brackets.(See Fig. 14)
fig. 16 fig. 15
9.
Attach the seat onto the hinges to
complete the installation. You should hear
a click to confirm it is engaged. (See Fig. 15)
10.
To activate the quick release function,
press and hold the button, then lift the
seat away. (See Fig. 16)
Note:
For Constance seat, button located at the front.
For Michigan seat, button located at the back.
4
TOP FIX INSTALLATIONBOTTOM FIX INSTALLATION
6.
Carefully remove the seat without disturbing the bracket positions and fully tighten the screws (J) to
firmly secure the hinge brackets. (See Fig. 11 and 12). Do not to over-tighten.
(Fig. 11)
(Fig. 12)
OR
NUT KEY (H)
fig. 9
4.
Align the seat with your toilet pan by
rotating and sliding the Flexi Fix brackets.
If required, lift the seat o the pillars to help
with the adjustment. (See Fig. 9)
BRACKETS SHOULD BE SYMMETRICAL
5.
Once you are confident with the position of
your seat, apply pressure on each Flexi Fix
bracket and collapse the supports.
Hold down for 20 seconds. (See Fig. 10)
fig. 10
HEX KEY (I)
HEX KEY (I)
FULLY TIGHTEN.
FULLY TIGHTEN.
20s
 Loading...