3.
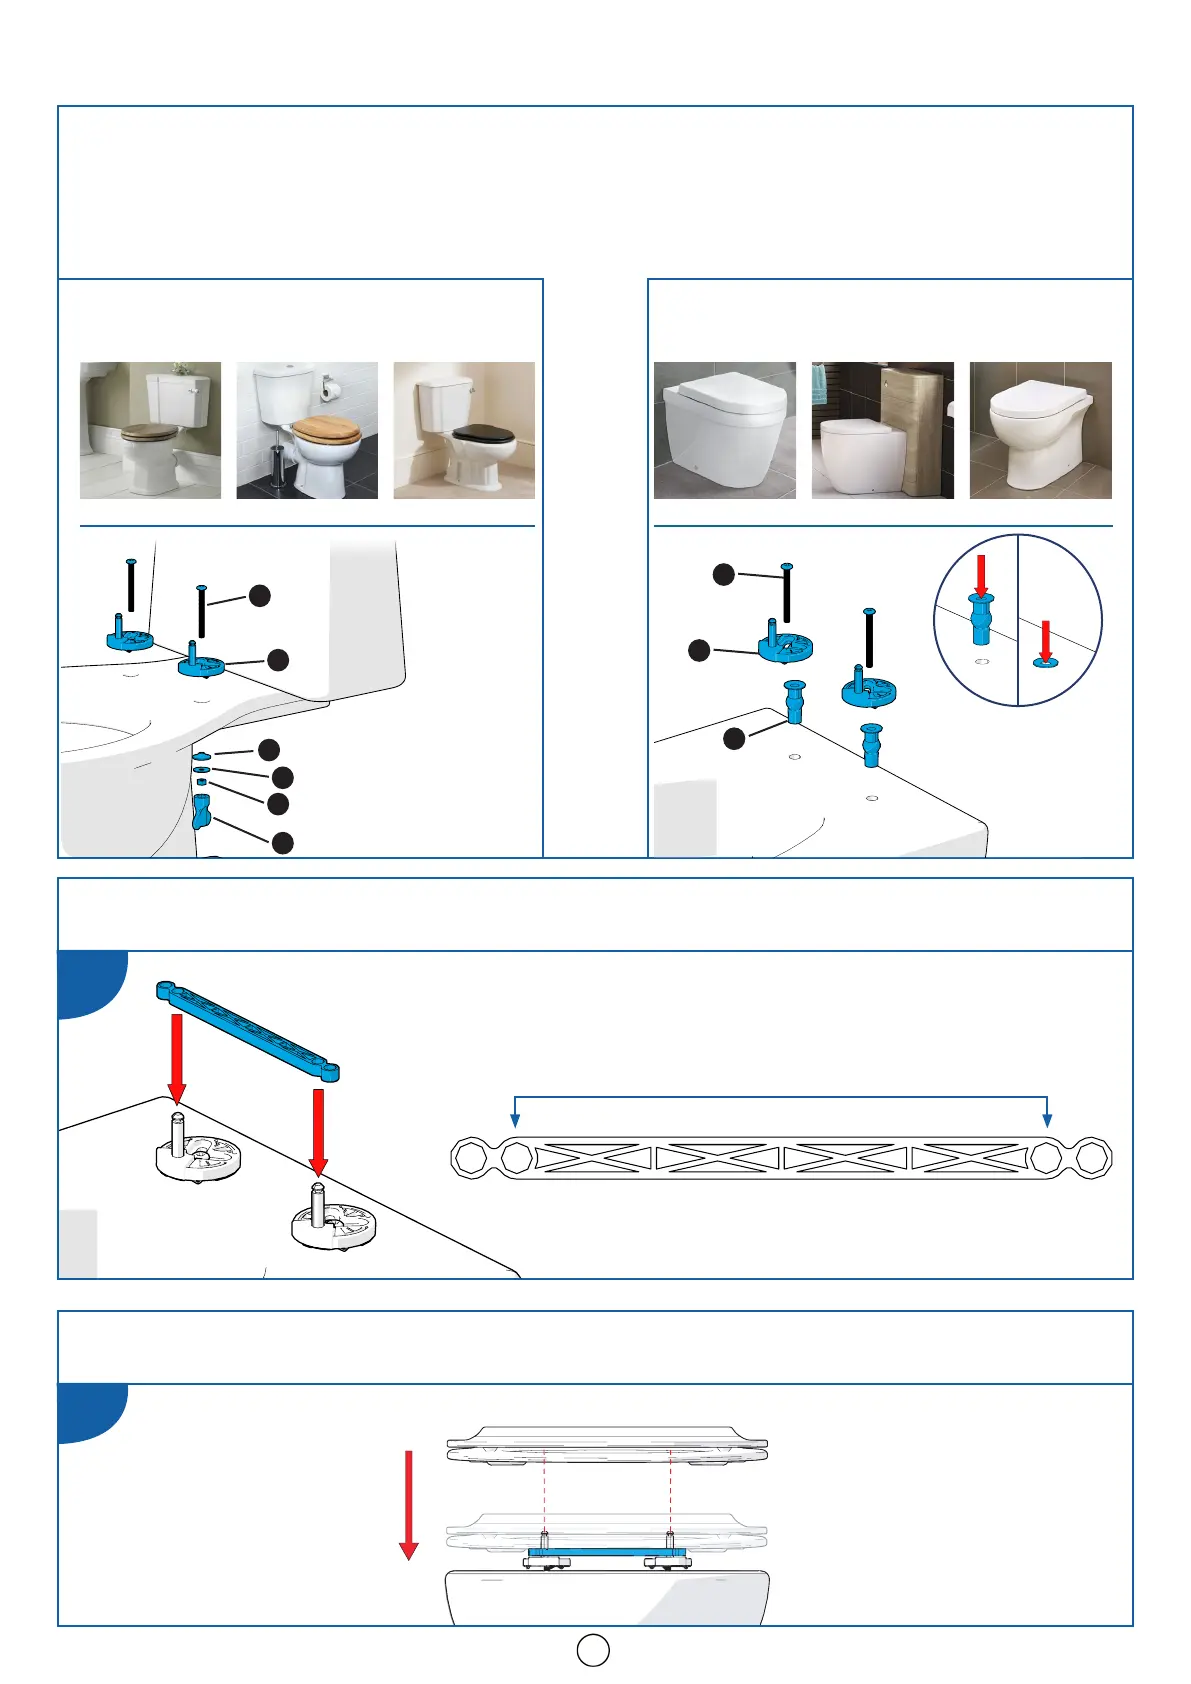
Lay the seat onto the pillars and rest it on the spacer (K). (See Fig. 8)
fig. 8
TS 074 R04
fig. 7
2.
Slide the spacer onto both pillars. Rotate the Flexi Fix brackets if necessary.
(See Fig. 7)
3
CONICAL
WASHER (E)
MUST FACE
UPWARDS
This installation is designed to be used on ‘standard’
toilets with access below the toilet pan.
CHOOSE BETWEEN
OR
BOTTOM FIX INSTALLATION
This installation is designed to be used on ‘back to
wall’ toilets with no access below the toilet pan.
TOP FIX INSTALLATION
Examples of Bottom Fix toilet pans.
Examples of Top Fix toilet pans.
1.
Identify your toilet pan style. Loosely install the flexi fix bracket (B) through the mounting
holes using either bottom fix installation (See Fig. 5) or top fix installation (See Fig. 6). DO NOT
DEPRESS THE BRACKETS, THIS MAY RESULT IN THE TAPE STICKING BEFORE YOU ARE SATISFIED
WITH THEIR POSITION.
(Fig. 6)
(Fig. 5)
E
H
G
F
B
J
J
B
D
INNER POSITION
Inner hole positions can be used for this seat.
INSTALLATION
DO NOT FULLY TIGHTEN.
BRACKETS SHOULD BE
ABLE TO MOVE.
DO NOT FULLY TIGHTEN.
BRACKETS SHOULD BE
ABLE TO MOVE.
 Loading...