EasyManua.ls Logo

CRX CRX325A - User Manual

Default Icon
20 pages
Go to English
Print Icon
To Next Page IconTo Next Page
Loading...
Onnittelut tämän laadukkaan CRX-tuotteen valinnasta. Lue käyttöohjeet huolellisesti ennen
laitteen käyttöä ja noudata kaikkia annettuja ohjeita. Säilytä ohjeet myöhempää tarvetta varten.
TURVAOHJEET
Varoitus!
Tätä laitetta voivat käyttää vähintään 8-vuotiaat lapset ja sellaiset henkilöt, joiden fyysiset, aistinvaraiset tai henkiset
ominaisuudet ovat alentuneet tai joilla ei ole kokemusta ja tietoa, jos heitä valvotaan tai heitä on opastettu
käyttämään laitetta turvallisesti ja jos he ymmärtävät laitteen käyttöön liittyvät vaarat. Lapset eivät saa leikkiä
laitteella. Lapset eivät saa puhdistaa laitetta eivätkä he saa tehdä laitteen hoitotoimenpiteitä ilman valvontaa.
Kaasut
Kaasujen vapautumisesta johtuen voit havaita nesteen kuplimista akun ollessa latauksessa. Koska kaasut ovat hyvin
herkästi syttyviä, avotulta ei tulisi käyttää akun läheisyydessä, ja ladattavan akun ympärillä olevalla alueella tulisi olla
hyvä ilmanvaihto. Tämän kaasujen räjähdysvaaran takia kytke ja irrota akkujohtimet ainoastaan verkkovirransyötön
ollessa katkaistuna.
Akkutyypit
Tämä akkulaturi soveltuu ainoastaan tavallisille lyijyakuille, suljetuille akuille, vapaa-ajan akuille ja geeliakuille.
Varoitus! Tätä akkulaturia ei saa käyttää NiCd-akkujen tai muun tyyppisten akkujen lataamiseen, kuin mitä
edellä on lueteltu.
Huomautus
- Kun akkulaturi ei ole käytössä, säilytä sitä kuivassa paikassa niin, ettei kosteus pääse vahingoittamaan
muuntajaa.
Korjaus
- Akkulaturia ei saa avata. Mikä tahansa käyttäjän toimesta suoritettu akkulaturin muutos- tai korjausyritys mitätöi
takuun.
- Tämän laitteen verkkovirtajohtoa ei voi vaihtaa; mikäli johto vaurioituu, laite tulee poistaa käytöstä.
Vaara!
- Vältä akkunesteen pääsyä iholle tai vaatteille. Akkuneste on syövyttävää happoa ja voi aiheuttaa palovammoja.
Mikäli akkunestettä joutuu iholle tai vaatteille, huuhtele altistunut alue välittömästi juoksevalla vedellä. Mikäli
akkunestettä joutuu silmiin, huuhtele silmiä välittömästi juoksevalla kylmällä vedellä vähintään 20 minuutin ajan ja
hakeudu välittömästi lääkärin hoitoon.
- Älä koskaan lataa jäätynyttä akkua. Mikäli akkuneste (elektrolyytti) on jäätynyt, tuo akku lämpimään sisätilaan ja
anna sen ensin sulaa täysin ennen kuin aloitat lataamisen. Älä koskaan aseta akkua laturin päälle tai päinvastoin.
- Älä pääshauenleukaliittimiä koskettamaan toisiaan laturin ollessa käytössä.
- Älä koskaan käytä akkulaturia, jos siihen on kohdistunut voimakas isku, se on pudonnut tai muulla tavoin
vaurioitunut. Toimita akkulaturi valtuutettuun huoltoliikkeeseen tarkastusta ja korjausta varten.
- Sijoita laturin verkkovirtajohto siten, ettei sen päälle voi astua, ettei siihen voi kompastua tai ettei se vahingoitu
muulla tavoin.
- Älä koskaan irrota pistoketta pistorasiasta virtajohdosta nykäisemäl. Johdosta vetäminen voi vahingoittaa
virtajohtoa tai pistoketta.
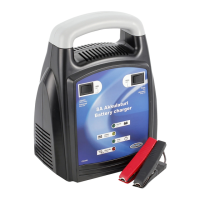
CRX325A FI
YLLÄPITOLATURI
Käyttöohje (Alkuperäisten käyttöohjeiden käännös)
Question and Answer IconNeed help?

Do you have a question about the CRX CRX325A and is the answer not in the manual?

Overview

This document describes the CRX325A Smart Battery Charger, a device designed for charging various types of 12V batteries.

Function Description

The CRX325A is an intelligent 9-stage charging system controlled by an AD microprocessor. It is suitable for charging batteries in automobiles, motorcycles, snowmobiles, tractors, personal watercraft, and boats. The charger automatically adjusts the charging process based on the battery's condition and type, ensuring optimal charging and extending battery life. It features a power supply mode, providing a constant voltage of 13.8 V and current up to 5 A, which can be used to power the computer system of a modern car when replacing the battery. This prevents damage to the charger.

The 9-stage charging process includes:

  1. Battery test: Checks the battery voltage, connections, and battery condition. Charging can begin.
  2. Desulphation: Detects sulphated battery. Removes sulphate from the battery electrodes with pulse current and voltage to restore battery capacity.
  3. Soft start: Initial battery test to determine battery condition. If the battery is severely discharged, the charger will begin the soft start stage. Charging starts with reduced current until battery voltage reaches a normal condition for charge.
  4. Bulk: Main charging stage where the battery receives the majority of its charge. During this stage, the battery is brought to 75-80% of its charge. The charger delivers maximum current until the terminal voltage has risen to the full charge level for normal battery.
  5. Absorption: Completes the charge up to virtually 100% at a constant voltage. The current tapers off after the current has reached the set level.
  6. Recondition: The charger charges by higher voltage to recondition a deeply discharged battery.
  7. Analysis: Tests if the battery can hold charge. A battery that cannot hold charge will be deemed an invalid battery and must be replaced.
  8. Float: Power supply at low constant voltage and minimal charge current. Battery is fully charged.
  9. Pulse: Maintaining the battery at 95-100% capacity. The charger monitors the battery voltage and gives a pulse when necessary to keep the battery fully charged.

The device also incorporates several safety features, including protection against reverse polarity, short circuits, and overheating. It automatically adjusts the charging voltage based on ambient temperature to prevent overcharging or undercharging.

Important Technical Specifications

  • Suitable for: 12 V (10 - 120 Ah) normal lead acid batteries, sealed batteries, leisure batteries, and gel batteries.
  • Supply voltage: ~220-240V, 50Hz
  • Max. input power: 150W, 1.5A
  • Charging current:
    • 14.4V – 2A DC (3A RMS)
    • 14.4V – 8A DC (12A RMS)
    • 14.7V – 8A DC (12A RMS)
    • 13.8V – 5A DC (7.5A RMS)
  • Protection class: IP65
  • Temperature compensation: Automatically adjusts charging voltage for ambient temperatures between -20 °C and +45 °C.

Usage Features

The CRX325A is designed for ease of use with an intuitive LED display that shows the charging status.

Operation Steps:

  1. Preparing the battery: First, remove the caps from each cell and check the liquid level. If it is below the recommended level, top up with de-ionized or distilled water. Ensure the cell caps are not replaced until charging is complete.
  2. Connection: Connect the positive charging lead (red) to the positive terminal of the battery and the negative charging lead (black) to the negative terminal. Ensure good contact with respective terminal posts. Then connect the charger to the mains supply. The orange LED-light will illuminate, and the charger is automatically detecting the battery. The standard charging mode is 12 V slow charging. Press the "MODE" button to select the desired charging mode (fast, AGM/leisure batteries).
  3. Charging: The charger will proceed through the 9-stage charging process. The LED display will indicate the current stage.
    • Green LED 8 - 9: Charging completed.
    • Orange LED 5: Battery can start engine.
    • Orange LED 1 - 7: Charging.
    • Red LED: Error.
    • Green LED POWER SUPPLY: Power supply mode.
    • Green LED RECOND: Recondition mode.
  4. When charging is complete: The green LED will illuminate, indicating the battery is fully charged. Disconnect the negative crocodile clamp (black) and finally the positive crocodile clamp (red). Inspect the liquid level in each cell and top up if necessary. Replace the caps.

Safety Instructions:

  • Always ensure good ventilation when charging, as batteries can produce explosive gases.
  • Never charge frozen batteries.
  • Avoid getting electrolyte on your skin or clothes. If contact occurs, rinse with water for at least 20 minutes and seek medical attention.
  • Do not touch the crocodile clamps together when the charger is on.
  • Never operate the charger if it has received a hard blow, been dropped, or otherwise damaged.
  • Ensure the power cord is properly positioned to prevent tripping or damage.
  • Do not pull the plug by the cord when unplugging the charger.
  • Never smoke or allow a spark or flame in the vicinity of the battery or engine.
  • Remove personal metal items such as rings, bracelets, necklaces, and watches when working with a lead acid battery.

Maintenance Features

Battery Care:

  • Regularly check battery terminals for dirt or loose connections. Clean dirty terminals and apply petroleum jelly to prevent corrosion.
  • Ensure the electrolyte covers the cells. Do not overfill. Use distilled or de-ionized water for topping up.
  • Regularly check the battery's condition, especially during winter months. Cold weather can significantly reduce battery capacity.
  • If the battery is not regularly maintained and kept fully charged, it can cause problems and breakdowns.

Checking the condition of your battery:

  • Use a hydrometer to check the specific gravity of the electrolyte in each cell. The hydrometer will register the condition of that cell. Put the fluid back into the cell after testing, taking care not to splash the fluid about.
  • A faulty cell can be identified if the reading is lower than others. A faulty cell is enough to ruin your battery.

Storage:

  • Store the charger in a dry area to avoid moisture damaging the transformer.
  • The cell caps should not be replaced until charging is complete. This allows any gases formed during charging to escape. It is inevitable that some minor escape of acid will occur during charging.
  • For permanently sealed batteries, it is not necessary to carry out the above checks.

CRX CRX325A Specifications

General IconGeneral
BrandCRX
ModelCRX325A
CategoryBattery Charger
LanguageEnglish

Related product manuals