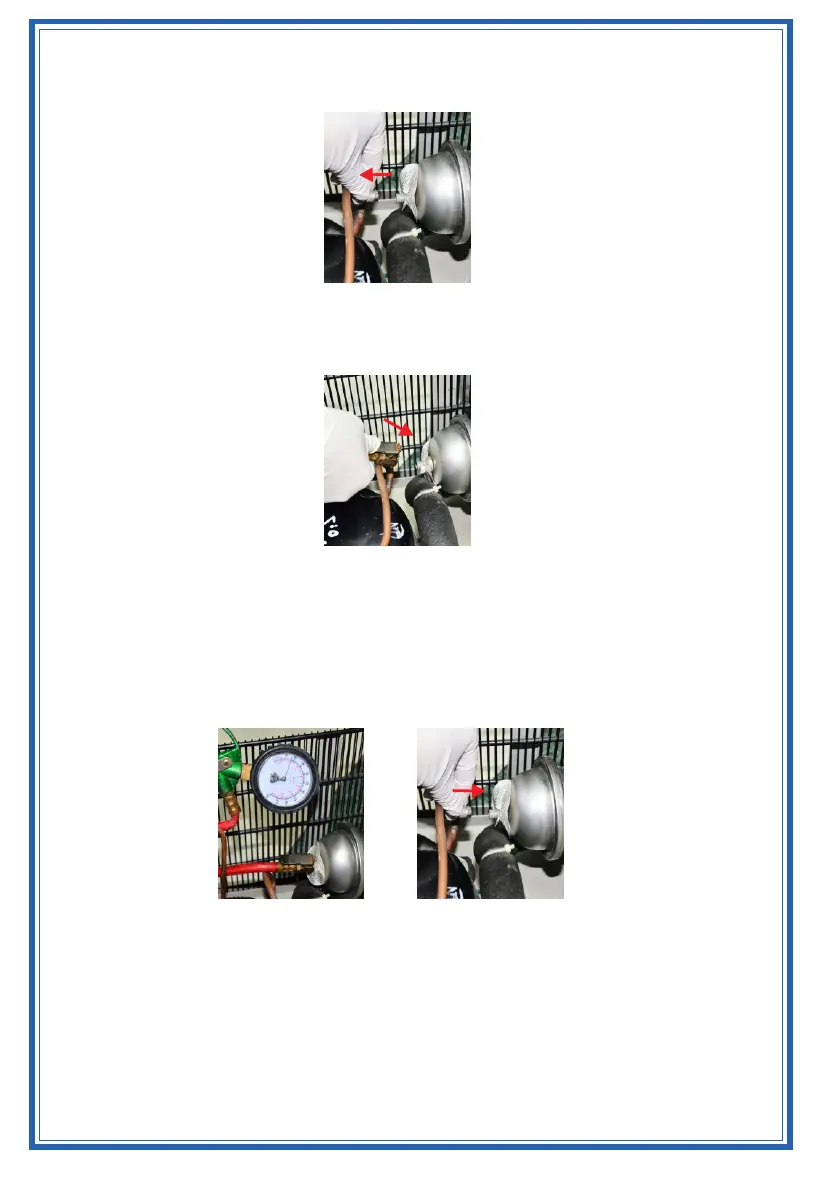
3. Remove cap from Shock Arrestor (Figure 7).
4. Connect pressure meter to charge valve (Figure 8).
5. Check the Shock Arrestor Pre-Charge to verify that the internal pressure is within 20% of the values
indicated on the label (50 psi / 3.45 Bar if not otherwise stated) (Figure 9). Remove charge valve and
replace cap (Figure10).
Note: In the event that the Shock Arrestor will not hold pressure, a replacement will be required (see
replacement instructions)
6. Install in reverse order, and connect water inlet tube and turn on water supply valve.
Figure 8
Figure 7
Figure 9 Figure 10
 Loading...