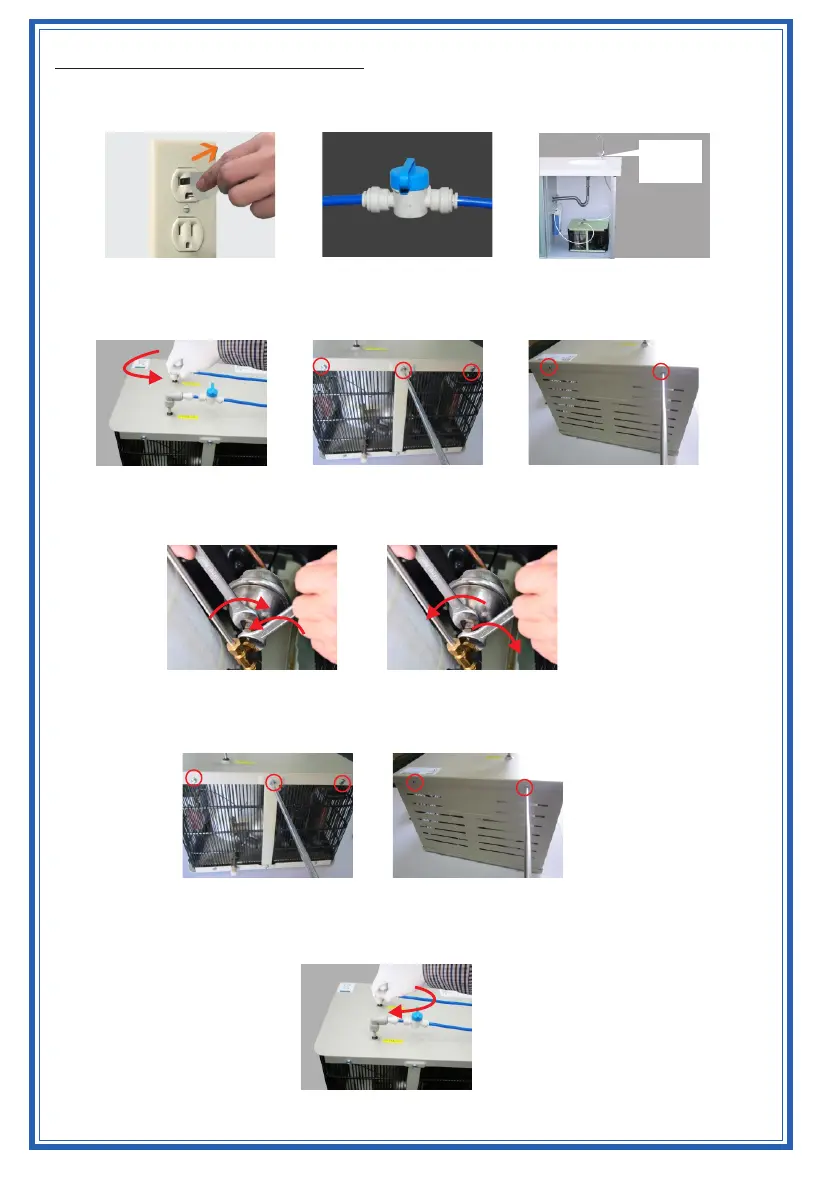
REPLACEMENT OF SHOCK ARRESTOR
1. Disconnect power supply cord (Figure 11), turn off water supply valve and open the faucet to release the
water pressure (Figure 12 and Figure 13).
2. Disconnect the 2 connectors on top of the cooler (Figure 14), remove the screws from the front/back of the
top cover (Figure 15 and Figure 16).
3. Use a wrench to hold the copper nut, and a second to disassemble the Shock Arrestor (Figure 17), and install
the replacement component (Figure 18).
4. Install the top cover (Figure 19 and Figure 20).
5. Reconnect the water connectors and tighten accordingly (Figure 21).
Figure 14 Figure 15 Figure 16
Figure 11 Figure 12 Figure 13
Open
faucet
Figure 17
Figure 18
Figure 21
Figure 19 Figure 20
 Loading...