-24-
RD5 Features
Intended Use
The measuring tool is intended for swift finding
of rotating laser beams in the wavelength listed
in the “Technical Data”.
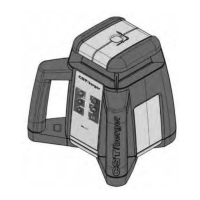
Product Features
The numbering of the product features shown
refers to the illustration of the measuring tool on
the graphic page. (See page 23) Laser Detector
1. Button for adjustment of the measuring
accuracy
2. Audio signal button
3. Reception area for the laser beam
4. Display
5. Sensor for Strobe ShieldTM function
6. Direction LED “move downward”
7. Center-indication LED
8. Center mark
9. Direction LED “move upward”
10. On/Off button
11. Speaker
12. Serial number
13. Battery lid
14. Retainer openings for holder
15. Holder
16. Locking screw for leveling rod
17. “Cut & fill” rod*
18. Fastening screw for bracket
19. Spirit level holder
*The accessories illustrated or described
are not included as standard delivery.
Indicator elements of laser receiver
a) “Fine” adjustment indicator
b) “Medium” adjustment indicator
c) “Coarse” adjustment indicator
d) Direction indicator “move downward”
e) Center indicator
f) Direction indicator “move upward”
g) Battery low indicator
h) Audio signal indicator
Technical Data
Laser Detector RD5
Article Number F034K9012
Receivable wavelength 635–650 nm
Receivable rotation speed
2
>150RPM
Receiving angle 45°
Working Range
1
Up to 1400-ft
Measuring accuracy
3
– “Fine adjustment”
– “Medium adjustment”
– “Coarse adjustment”
±0.75mm
±1.5mm
±3mm
Operating Temperature +14ºF to 122ºF (-10ºC to +50ºC)
Storage Temperature -4ºF to 158ºF (-20ºC to +70ºC)
Batteries 2 x 1.5 V LR06 (AA)
Operating Time Approx. 30 Hours
Weight 9 oz.
Dimensions
(Length x width x height
3.1 x 1.2 x 6"
Degree of Protection IP57 Dust Proof & Water Tight
1) The working range (radius) can be reduced due to unfavourable
ambient conditions (e.g. direct sunlight).
2) depends on clearance between laser receiver and rotational laser
level.
3) @ 100 m.
Please observe the article number on the type plate of your measuring
tool. The trade names of the individual measuring tools may vary.
The measuring tool can be clearly identified with the serial number 14
on the type plate.
Assembly
Inserting/Replacing the Battery
Alkaline batteries are recommended for the
measuring tool. To open the battery lid 13,
press on the latch 12 and fold the battery lid up.
Insert the batteries. Install batteries with correct
polarity. Close the battery door and engage the
latch.
When the batteries are low, the battery low
indicator g appears on display 4 and a short
audio signal sounds. From this point on, the
measuring tool can still be operated for approx.
2 to 4 h. When the batteries are empty, another
audio signal sounds; afterwards, the measuring
tool switches off. Always replace all batteries
at the same time. Only use batteries from one
brand and with the identical capacity.
Remove the batteries from the measuring tool
when not using it for extended periods. When
storing for extended periods, the batteries can
corrode and discharge themselves.