24
NOTE
For best results, fill to the “FULL” mark on the
dipstick as opposed to adding a given quantity
of oil. Always check the level on the dipstick
before adding more oil.
Refer to the LUBRICATION TABLE for information re-
garding the proper type of oil to add to the crankcase.
1. Place the tractor on a level surface and engage the
brake pedal lock. Stop the tractor engine and
remove the ignition key.
2. Clean the area around the oil fill cap and fill tube to
prevent debris from entering the crankcase.
3. Remove the oil fill cap/dipstick from the oil fill tube
and SLOWLY pour oil into the oil fill tube. Fill the
crankcase until the oil level reaches the “FULL”
mark on the dipstick (Refer to Figure 19).
4. Reinstall the oil fill cap/dipstick securely onto the
oil fill tube.
CAUTION
The oil fill cap/dipstick MUST BE INSTALLED
SECURELY ONTO THE TUBE AT ALL TIMES
WHEN THE ENGINE IS OPERATING. Severe
engine damage could result from failure to do so.
DRAINING OIL AND REPLACING OIL FILTER
NOTE
The engine oil and oil filter should be changed
after the first 24 hours of operation, and after
every 100 hours of operation thereafter.
WARNING
If the tractor has recently been operated, the
engine and surrounding areas may be hot. Use
caution not to burn yourself when removing the
side panels, draining the oil from the crankcase,
and changing the oil filter.
NOTE
The oil filter should be changed at every oil
change interval. The filters can be obtained
through your Cub Cadet dealer under part
number ME-122-0737-02.
Refer to the MAINTENANCE CHART and the
LUBRICATION TABLE for information regarding the
frequency of required oil changes and the quantity and
type of oil needed.
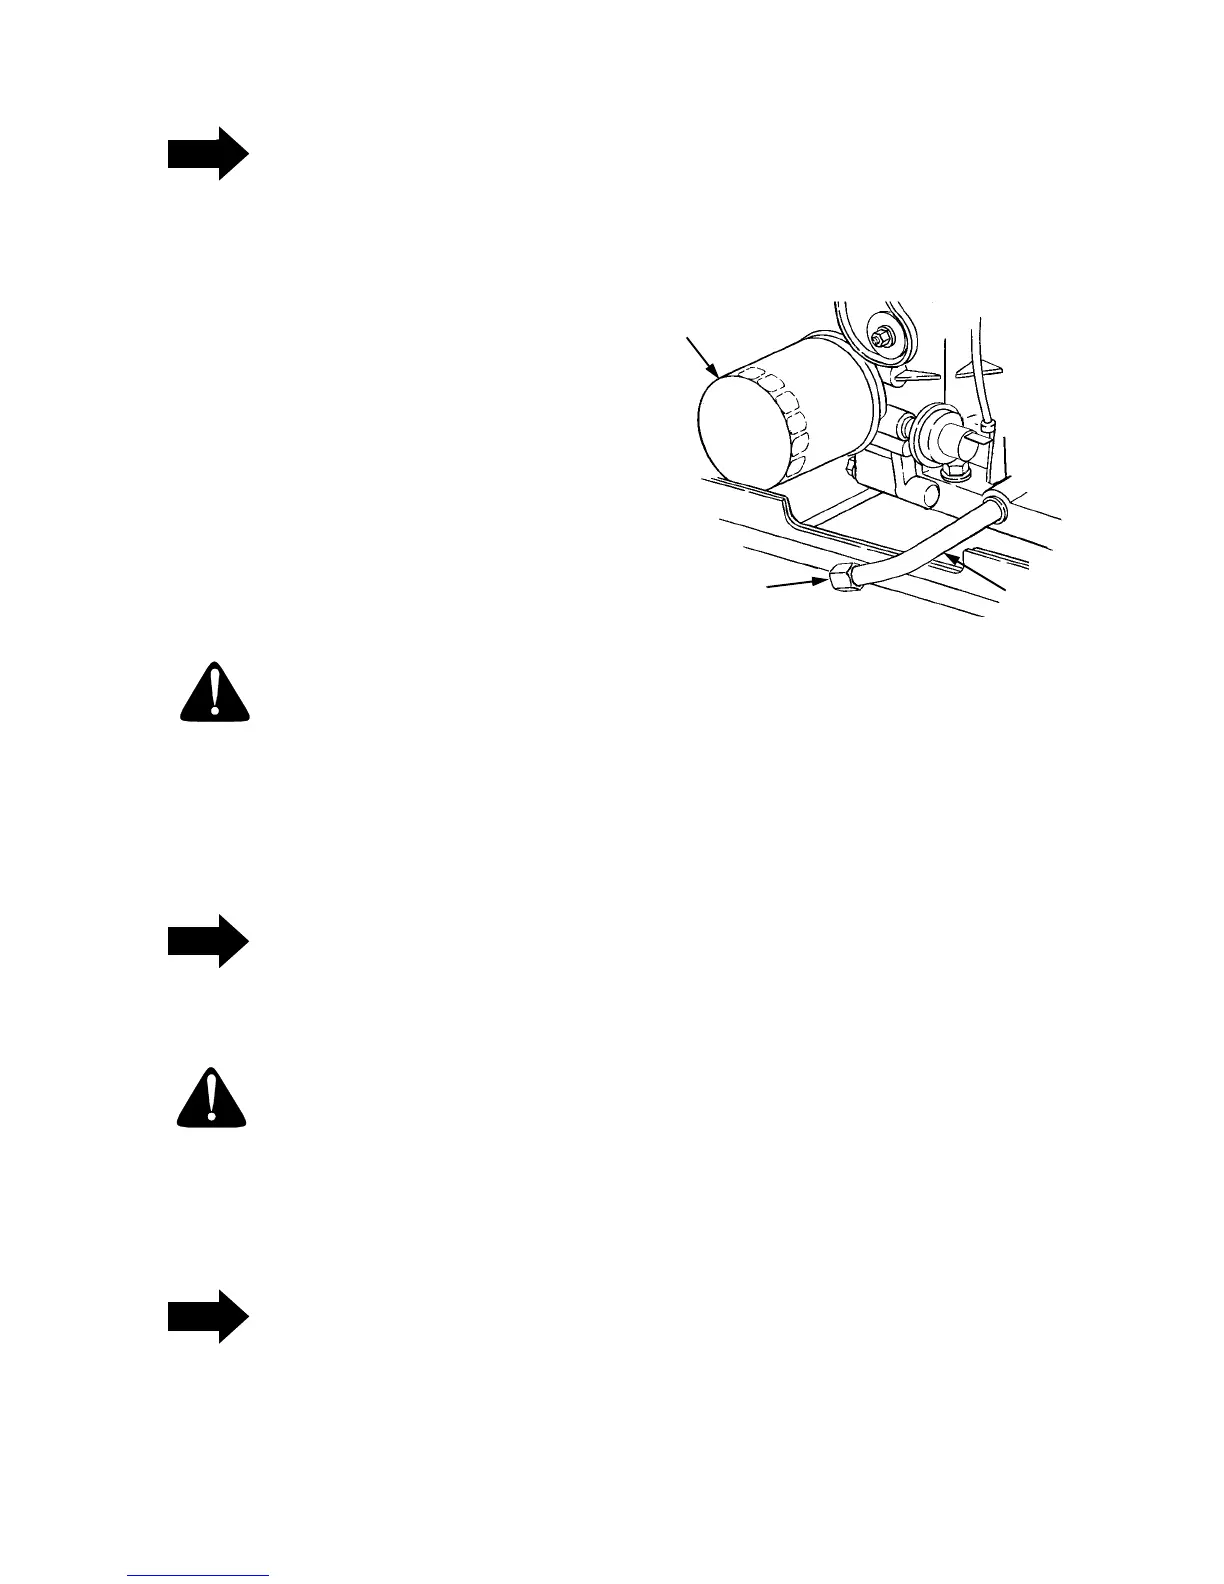
The oil filter is located behind the left side panel and is
mounted on the engine (See Figure 20).
Figure 20
Run the engine for a few minutes to allow the oil in the
crankcase to warm up. Warm oil will flow more freely
and carry away more of the engine sediment which
may have settled at the bottom of the crankcase. Use
care to avoid burns from hot oil.
While the engine oil is warm, refer to Figure 20 and
proceed as follows:
1. Place the tractor on a level surface and engage the
brake pedal lock. Stop the tractor engine and
remove the ignition key.
2. Clean around the base of the oil filter, the oil fill
cap/dipstick, and the oil fill tube to prevent debris
from entering the crankcase.
3. Place an appropriate container below the end of
the oil drain pipe to collect the old oil.
4. Secure the drain pipe to prevent it from turning in
the engine and remove the drain cap from the pipe.
5. Remove the filter by turning it counterclockwise
using an automotive type filter wrench to loosen.
6. Allow the old oil to completely drain from the
engine crankcase into the container below; then
secure the drain pipe and reinstall the oil drain cap
onto the pipe.
7. To assure a continuous flow of oil to all critical
lubrication points within the engine, pour some
new oil into the threaded center hole of the filter
and allow time for the oil to be absorbed into the
filter material.
DRAIN
PIPE
OIL
DRAIN
CAP
OIL
FILTER
 Loading...