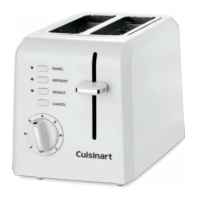
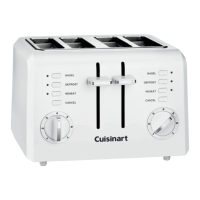
To stop cycle
When the defrost cycle is complete, the toaster will raise the bread.
If you wish to stop the cycle before it is nished, simply press the
Cancel button to interrupt.
After use, unplug the toaster from the electrical outlet.
Reheat button
The reheat feature allows you to reheat bread without browning
or toasting.
1. Insert slice(s) of bread.
2. Press the Reheat button. Blue LED indicates feature is activated.
3. Press the toast button to start.
To stop cycle
When the reheat cycle is complete, the toaster will raise the bread.
If you wish to stop the cycle before it is nished, simply press the
Cancel button to interrupt.
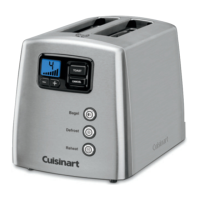
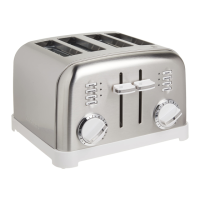
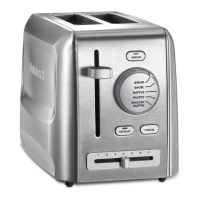
Bagel button
The bagel feature reduces heat on one side of the toasting slot.
This toasts the cut side of the bagel slightly more than the other side.
An embossed icon located on the top of the toaster,
just above the control panel, shows you the right way
to insert your bagel. (The cut side should always face
toward the center of the pair of toasting slots.)
1. Insert slice(s) of bread or halved bagels
2. Press the Bagel button. Blue LED indicates feature is activated.
3. Press the toast button to start.
To stop cycle
When the bagel cycle is complete, the toaster will raise the bagel(s).
If you wish to stop the cycle before it is nished, simply press the
Cancel button to interrupt.
Fail-Safe
• Shouldtheunitsensethatitisover-heatingitisdesignedto
activate a “Fail-Safe” to ensure it can cool down quickly
and be able to return to a safe, usable state.
• WhentheFail-SafeisactivatedalltheLCDandLEDlights
will come on and the unit will sound (3) one-second audible
tones. The LCD and LED lights will remain on until the unit is
unplugged and re-plugged into the outlet.
CLEANING AND MAINTENANCE
Always allow the toaster to cool completely before cleaning.
1. Always unplug the toaster from the electrical outlet before
cleaning.
2. Do not use abrasive cleansers. Simply wipe the exterior with a
clean damp cloth and dry thoroughly. Apply any cleansing agent
to a cloth, not to the toaster, before cleaning.
3. To remove crumbs, slide out the crumb tray and discard crumbs.
Wipe clean and replace. Never operate the toaster without the
crumb tray in place.
4. To remove any pieces of bread remaining in the toaster, turn the
toaster upside down and gently shake. Never insert any hard or
sharp instruments into the slot, as this could damage the toaster
and cause a safety hazard.
5. Never wrap the cord around the outside of the toaster. Use the
cord storage cleats on the underside of the toaster.
6. Any other servicing should be performed by an authorized service
representative.
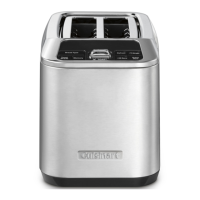
USE AND CARE
Unwind the power cord. Check that the crumb tray is in place and that
there is nothing in the toaster slots. Plug power cord into the wall outlet.
1. Insert slice(s) of bread
2. Set the browning control
+
/
-
Press browning control buttons (+ -) to select desired toast shade:
Browning Control Setting Shade
1-2 light
3-5 medium
6-7 dark
Some notes on browning
Toasting is a combination of cooking and drying the bread. Therefore,
differences in moisture level from one bread to another can result in
varying toasting times.
•Forslightlydrybread,usealowersettingthanyounormallywould.
• Forveryfreshbreadorwholewheatbread,useahighersettingthan
normal.
• Breadswithveryunevensurfaces(suchasEnglishmufns)will
require a higher toast setting.
• Thicklycutpiecesofbread(includingbagels)willtakelongertotoast,
sometimes signicantly longer, since more moisture must be
evaporated from the bread before toasting can occur. Very thick
pieces may require two cycles.
• Whentoastingraisinorotherfruitbreads,removeanylooseraisins,
etc. from the surface of the bread before putting into the toaster. This
will help prevent fruit pieces from falling into the toaster or sticking to
the guide wires in the slot.
• Beforetoastingbagels,sliceeachbagelintotwoequalhalves.
Single slice toasting
If you are toasting a single slice of bread, set the heat selector to a
lighter setting than you normally would. The toaster is designed to heat
the whole toasting chamber for two slices. By lowering the heat for a
single slice, you won’t overtoast.
Frozen waffles, pancakes, french toast and frozen bagels
These breads and pastries should be warmed using the Defrost button.
Toaster pastries
Exercise caution with toaster pastries; the lling can become quite hot,
long before the surface of the pastry becomes browned. Never leave
toaster pastries unattended while toasting or warming.
3. To begin toasting
Press the toast button to lower the carriage into the toasting
chamber.
4. To stop toasting
When the toasting cycle is nished, the toast will be raised.
If you wish to stop the cycle before it is nished, simply press
the Cancel button.
Tips
• Neverforcefoodsintothetoastingslot.Foodsshouldtfreely
between the guide wires.
• Donotplacebutteredbreadsorpastrieswithllingsorfrostingsin
the toaster, as this could create a re hazard.
• Uneventoastingisusuallyduetobreadslicesofuneventhickness.
• Afteruse,unplugyourtoasterfromtheelectricaloutlet.
Defrost button
The Defrost button is designed to rst defrost and then toast the bread,
which extends the toasting cycle slightly.
1. Insert slice(s) of bread.
2. Set the browning control.
Settings 1-2
For refrigerated breads and thinner frozen items such as
frozen pancakes.
Settings 3-5
For toaster pastries, frozen wafes and (thin) French toast,
and refrigerated bagels.
Settings 6-7
For thicker frozen items such as bagels, hand-cut bread and
thick French toast.
3. Press the Defrost button. Blue LED indicates feature is
activated.
4. Press the toast button to start.
5
4
 Loading...