Note: The injector trim codes are nine character
alphanumeric codes located on the solenoid at the
top of the injector.
Note: If a new injector is being installed, a new
fuel connector must be used.
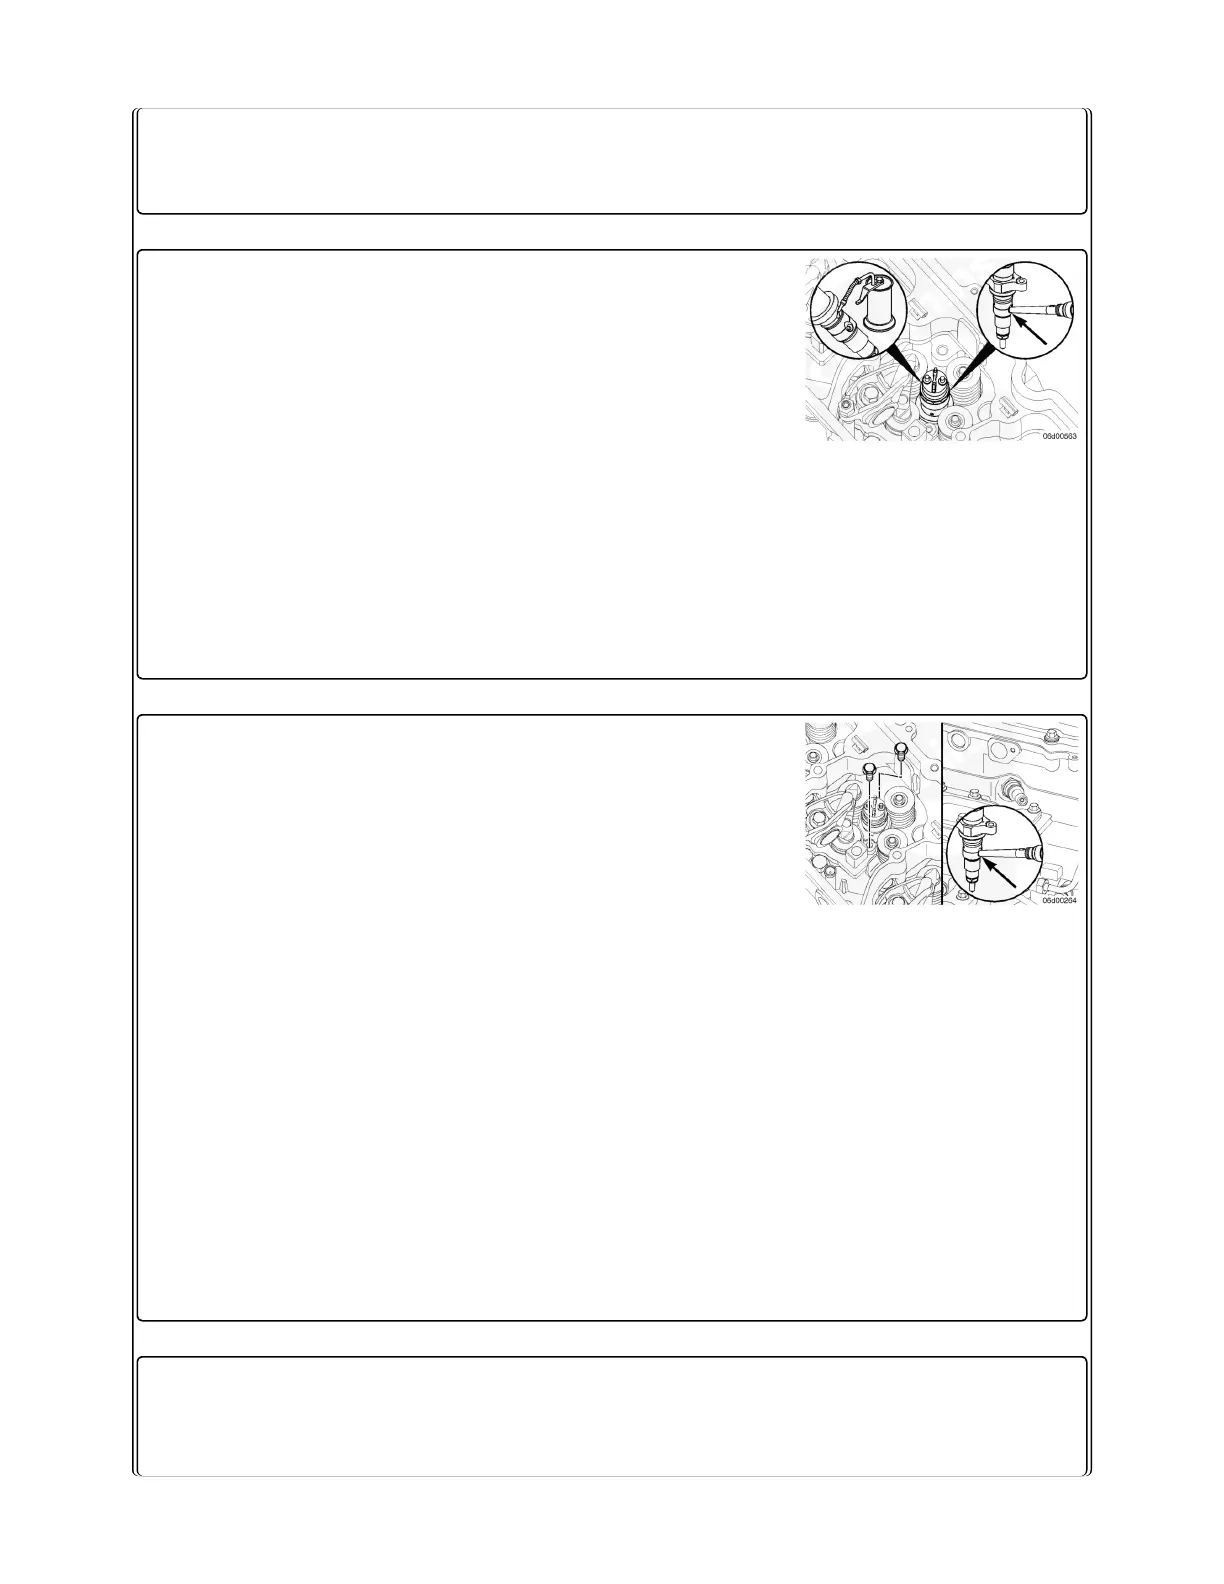
Make sure the injector bore is clean and that only one
(1) sealing washer is installed on the injector nozzle.
Lubricate the injector o-ring with clean engine oil.
Place the injector in the cylinder head in the proper
orientation (fuel inlet toward the high-pressure fuel
connector).
Press down firmly on the injector to make sure it is
seated in the injector bore.
Note: Start the injector hold-down clamp
capscrews, but do not tighten.
Start the injector hold-down clamp capscrews, and
tighten hand-tight.
Install the high-pressure fuel connector, making sure the
end of the high-pressure fuel connector is in the injector
inlet port.
Note: The high-pressure fuel connector should
click into place if it is seated in the injector inlet
port correctly.
Start the high-pressure fuel connector retaining nut and
tighten partially.
TorqueValue: 15 n•m [ 133 in-lb ]
Note: This is not the final torque for the high-
pressure fuel connector retaining nut.
Tighten the injector hold-down clamp capscrews.
Note: Make sure to tighten the hold-down clamp
capscrews evenly. Check to make sure the gap