INSTALLATION INSTRUCTIONS II24
(3*/%&3(&/&3*$*/45"--"5*0/*/4536$5*0/4 "
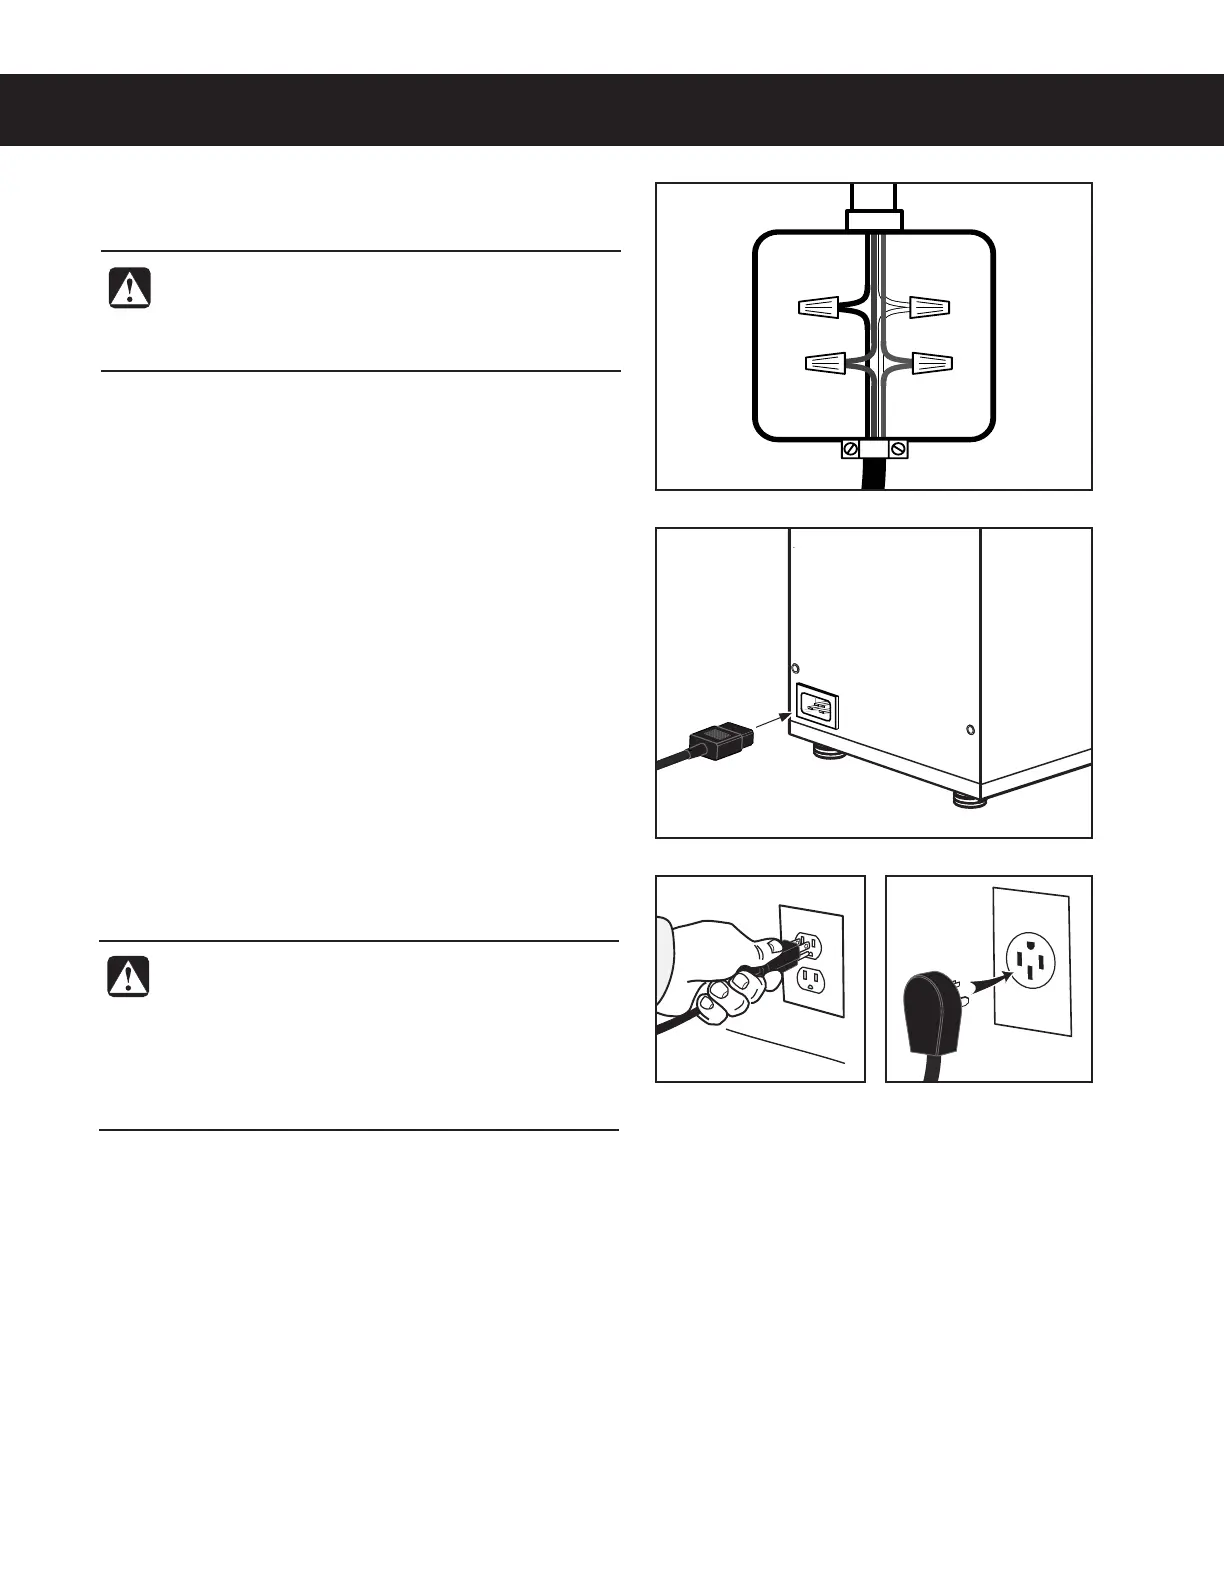
Connecting the Power Cord to A Junction Box
(units with pre-installed power cord, if applicable)
3 *GUIFQPXFSDPSEXJMMCFDPOOFDUFEEJSFDUMZUPUIF
KVODUJPOCPYDPOOFDUUIFQPXFSDBCMFXJSFTUPUIF
UFSNJOBMTJOUIFKVODUJPOCPY4FFUIFELECTRICAL
SCHEMATICGPSUIFQPXFSTVQQMZSFRVJSFNFOUT
WARNING:5VSOPGGQPXFSUPUIFKVODUJPOCPYBU
the circuit breaker panel before connecting the
power cable. Lock out and tag the circuit
breaker.
WARNING:$POOFDU UIFQPXFSDPSEPOMZUP UIF
BQQSPQSJBUFUZQFBOETJ[FFMFDUSJDBMPVUMFU*GUIF
electrical outlet is not compatible with the power
DPSEIBWFJUVQHSBEFECZBMJDFOTFEFMFDUSJDJBO
%P OPU NPEJGZ UIF QPXFS QMVH %P OPU VTF BO
FYUFOTJPO DPSE %P OPU VTF B QPXFS DPSEQMVH
that is damaged.
Style
varies
Back of
unit
Power cable from grinder
Connect the Power Cable
4 On units with a power connector on the back panel,
DPOOFDUB$*&$QPXFSDPSEOPUTVQQMJFE
compatible with the electrical outlet installed in the
GBDJMJUZBOEUIBUNFFUTTQFDJmDBUJPOT
5 $POOFDUUIFQPXFSDPSEUPUIFBQQSPQSJBUFUZQFPG
electrical outlet.
6 Turn on the circuit breaker supplying power to the
FMFDUSJDBMPVUMFUPSKVODUJPOCPY
 Loading...