18 19
Sun Visor and Canopy
Cerrando la Capota
Refermer le pare–soleil
!
WARNING
Always release the canopy stretch-
ers if you wish to close the canopy.
Always attach the fabric from the
canopy to the top of the seat when
the seat is used in the lowest posi-
tion.
!
ADVERTENCIA
Presionar hacia arriba los sopo-
rtes de la capota si desea cerrar
la capota. El forro en la parte de
atrás de la capota tienes que estar
extendido si el asiento está en la
posición baja.
!
MISE EN GARDE
Toujours déclencher les barres de
tension pour fermer le pare-soleil.
Toujours fixer l’étoffe du pare-soleil
au haut du dossier lorsque le siège
est en position abaissée.
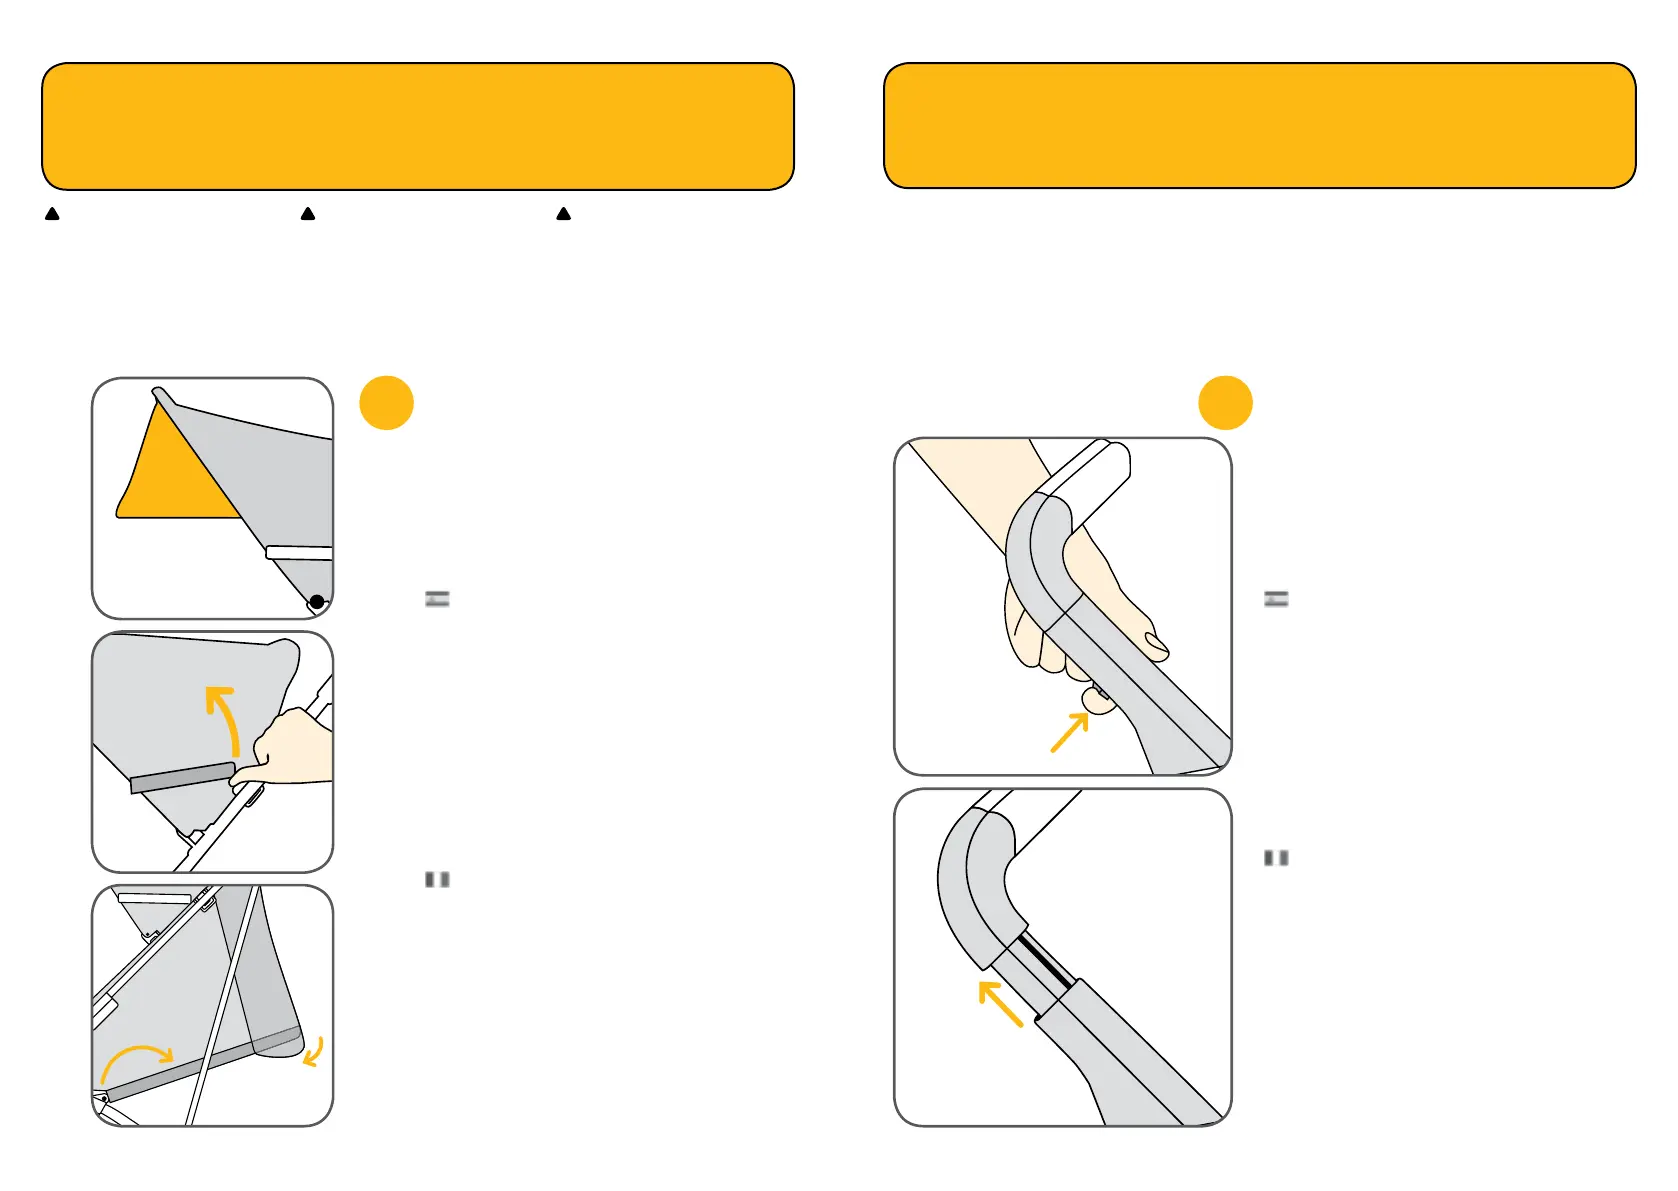
Sun Visor:
There is an sun visor folded up and under
the front of the canopy (a).
Closing the canopy: Lift up on the rear
end of the “canopy stretchers” on both
sides, and pull the fabric backwards
(b). When the seat is used in the lowest
position, the canopy back flap must be
attached (c).
Visera
La capota viene equipada con una
visera doblada hacia adentro de la ca-
pota para una mejor protección del sol.
Cerrando la Capota: Presionar hacia ar-
riba los soportes de la capota en ambos
lados del chasis (a). El forro en la parte
de atrás de la capota tiene que estar ex-
tendido si el asiento esta la posición baja
(b). El forro de atrás es removible – simple-
mente abra el cierre que esta cerca del
arco (c).
Visière: Une visière repliée se trouve
sous l’avant du pare-soleil (a).
Refermer le pare-soleil: Soulever l’arrière
des barres de tension du pare-soleil des
deux côtés, et tirer l’étoffe vers l’arrière
(b). Lorsque le siège est en position la plus
basse, il est impératif que le rabat arrière
du pare-soleil soit attaché (c).
9
c
b
THE HANDLE HAS TWO DIFFERENT HEIGHTS
To extend the handle: while depress-
ing the extension button located below
the handle (a), pull handle upward until
it locks into position (b). To shorten the
handle: while depressing extension button
located below the handle, push handle
downward until it locks into position.
DOS TIPOS DE POSICIÓN DE ALTURA
DEL MANUBRIO
Para extender el manubrio: mientras
presiona el botón que está abajo del
manubrio (a) tire el manubrio hacia arriba
hasta su posición (b) Posición hacia abajo
del manubrio: mientras presiona el botón
que está abajo del manubrio empuje ha-
cia abajo el manubrio hasta su posición
original
LA POIGNÉE OFFRE DEUX HAUTEURS
DIFFÉRENTES
Pour allonger la poignée: tout en appuy-
ant sur le bouton d’extension situé sous la
poignée (a) tirer la poignée vers le haut
jusqu’à ce qu’elle bloque en place (b).
Pour raccourcir la poignée: tout en ap-
puyant sut le bouton d’extension situé
sous la poignée, pousser la poignée
vers le bas jusqu’à ce qu’elle bloque en
place.
Adjusting Handle Height
Mecanismo de Ajuste para los Manubrios
Réglage de la Hauteur de la Poignée
10
a
b
a
 Loading...