Tech note: WPT Battery Replacement
Doc No. 910-00022-01 Rev 01
Page 1 of 7
1. Overview
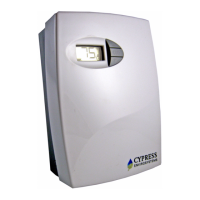
This technical note describes the Wireless Pneumatic Thermostat (WPT) battery
replacement procedures presented in a bulleted list of simple steps. This technical
note covers thermostats with current as well as older firmware versions. A
troubleshooting section provides the necessary steps to reset the WPT if any non-ideal
behavior is noticed.
1.1. Tools Required for Installation
• 1/16” hex Allen wrench
• 2mm hex Allen wrench (older versions)
2. Battery Replacement
The WPT has a battery icon on the LCD display which indicates the current state of the
batteries. Batteries must be replaced anytime the battery icon displays fewer than 4
bars as shown in Figure 1 below.
Figure 1: Low Battery Icon Examples with Fewer than 4 Bars Displayed
When the batteries are too low to function normally, the WPT will enter a fail-safe mode
(Figure 2) until batteries are replaced. The fail-safe mode shuts down all functions of
the WPT except for temperature control which continues to operate at a setpoint of 72
ºF.
Figure 2: LCD Display during the Fail-Safe Mode
Note: With older generation WPT thermostats, the device may go directly to a blank
display and/or stop responding to button presses.
2.1. Battery Installation
After replacing batteries, following tasks must be performed:
• Press any button to power on the WPT.
• Perform a Force Discovery. Refer to Figure 4 or Figure 8 for the menu structure.
• Perform a manual calibration, Refer to section 2.3.1or 2.3.2.
• (Optional) Resend temperature setpoints, setpoint limits and auto calibration
values from the WPT Green Box Controller. Refer to the appropriate WPT Green
Box manual for instructions.
Note: If any of the steps above fail, refer to Section 3 (Troubleshooting) for further
details.