Do you have a question about the D-Link DSL-G2562DG and is the answer not in the manual?
Verify dongle compatibility, ensure correct SIM card placement, and connect to the router's USB port.
Check router interface under Status > WAN > Dongle to confirm the dongle is detected and shows 'Up'.
Adjust WAN Service settings via Basic Setup > WAN Service for the Dongle connection.
Enter the correct APN based on the SIM provider (e.g., TelkomInternet, internet, rain) in the WAN Service settings.
Apply the configured settings and restart the router to make the changes effective.
Verify the connection status in Status > WAN > Network and observe the internet light indicator.
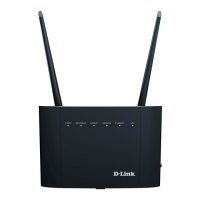
This document outlines the setup and configuration process for integrating a dongle with a D-Link DSL-G2562DG router, enabling internet connectivity through a mobile network. The primary function of this setup is to provide internet access via a 3G/4G dongle, acting as a Wide Area Network (WAN) source for the router. This is particularly useful in scenarios where traditional fixed-line internet services are unavailable or as a backup internet connection.
The setup process begins with ensuring compatibility and proper physical connection.
Once physically connected, the configuration proceeds through the router's web-based management interface.
4. Dongle Detection Verification: After plugging in the dongle, the first step in the router's interface is to verify its detection. Navigate to Status > WAN > Dongle. If the dongle is successfully detected and recognized by the router, its status will display as "Up". This indicates that the router has established a basic communication link with the dongle.
5. WAN Service Configuration: The next step involves configuring the WAN service for the dongle. This is done by navigating to Basic Setup > WAN Service and then selecting "Edit" for the "Dongle" entry. This section allows for detailed configuration of how the router will utilize the dongle for internet access. The WAN ServiceInfo table shows various WAN interfaces, including ATM, PTM, PPPoE, and the Dongle, each with its specific interface type (USB for the Dongle), mode (PPPoE), IP Protocol Type (IPv4), and Service Type (TR069_INTERNET_VOIP).
6. APN Settings: A critical part of the configuration is setting the Access Point Name (APN). The APN is a gateway that allows a mobile device (in this case, the dongle) to connect to the internet.
* For Telkom SIM cards, the APN should be set to "TelkomInternet".
* For most other SIM cards, the APN should be set to "internet".
* For Rain SIM cards, the APN should be set to "rain". It is important to note that Rain's 4G service will only work if the dongle itself supports 4G. After entering the correct APN, the settings must be applied. The screenshot highlights the "APN" field where this information is entered. Other settings in this section include "Connection Name" (Dongle), "Enable" checkbox, "MTU" (1492), "IP Protocol Type" (IPv4), "NAT" checkbox, "Firewall" checkbox, "IPv4 Static DNS", and "PIN". The "Enable" checkbox ensures the WAN service is active, while "NAT" (Network Address Translation) and "Firewall" are typically enabled for security and network address management. The MTU (Maximum Transmission Unit) value of 1492 is a common setting for PPPoE connections.
7. Router Restart: After applying the APN and other WAN service settings, it is necessary to restart the router for the changes to take effect. This ensures that the router reinitializes its network interfaces and applies the new configuration for the dongle.
8. Connection Status Verification: Finally, after the router has restarted, the connection status should be verified. Navigate to Status > WAN > Network > IPv4 WAN Connection Status. Under the "Connection name: Dongle" entry, the "Status" field will indicate the current state of the internet connection.
* "Connected": This indicates that the internet is working correctly through the dongle.
* "Connecting": This means the router is currently attempting to establish a connection to the internet.
* "Disconnected": This suggests that the connection has failed, and a router restart is recommended.
While the document primarily focuses on initial setup, it implicitly suggests several maintenance-related considerations:
In summary, this guide provides a comprehensive, step-by-step approach to configuring a D-Link DSL-G2562DG router to use a 3G/4G dongle for internet access, covering everything from physical connection to detailed software configuration and basic troubleshooting.
| LAN Ports | 4 x 10/100/1000 Mbps |
|---|---|
| WAN Ports | 1 x 10/100/1000 Mbps |
| DSL Port | 1 x RJ-11 |
| USB Ports | 1 x USB 2.0 |
| QoS | Yes |
| Humidity | 5% to 95% non-condensing |
| Wireless Standard | 802.11b/g/n |
| Frequency Band | 2.4 GHz |
| Antenna Type | External |
| Security | WPA/WPA2 |
| DSL Standards | ADSL2/2+, VDSL2 |
| Firewall | NAT, SPI |
| Wireless Speed | Up to 1200 Mbps |
| Device Type | Wireless Router |
| Operating Temperature | 0 to 40 °C |
| Storage Temperature | -20 to 65 °C |