Charging the internal Battery
Before use, please ensure that the internal rechargeable battery is fully charged as
follows:
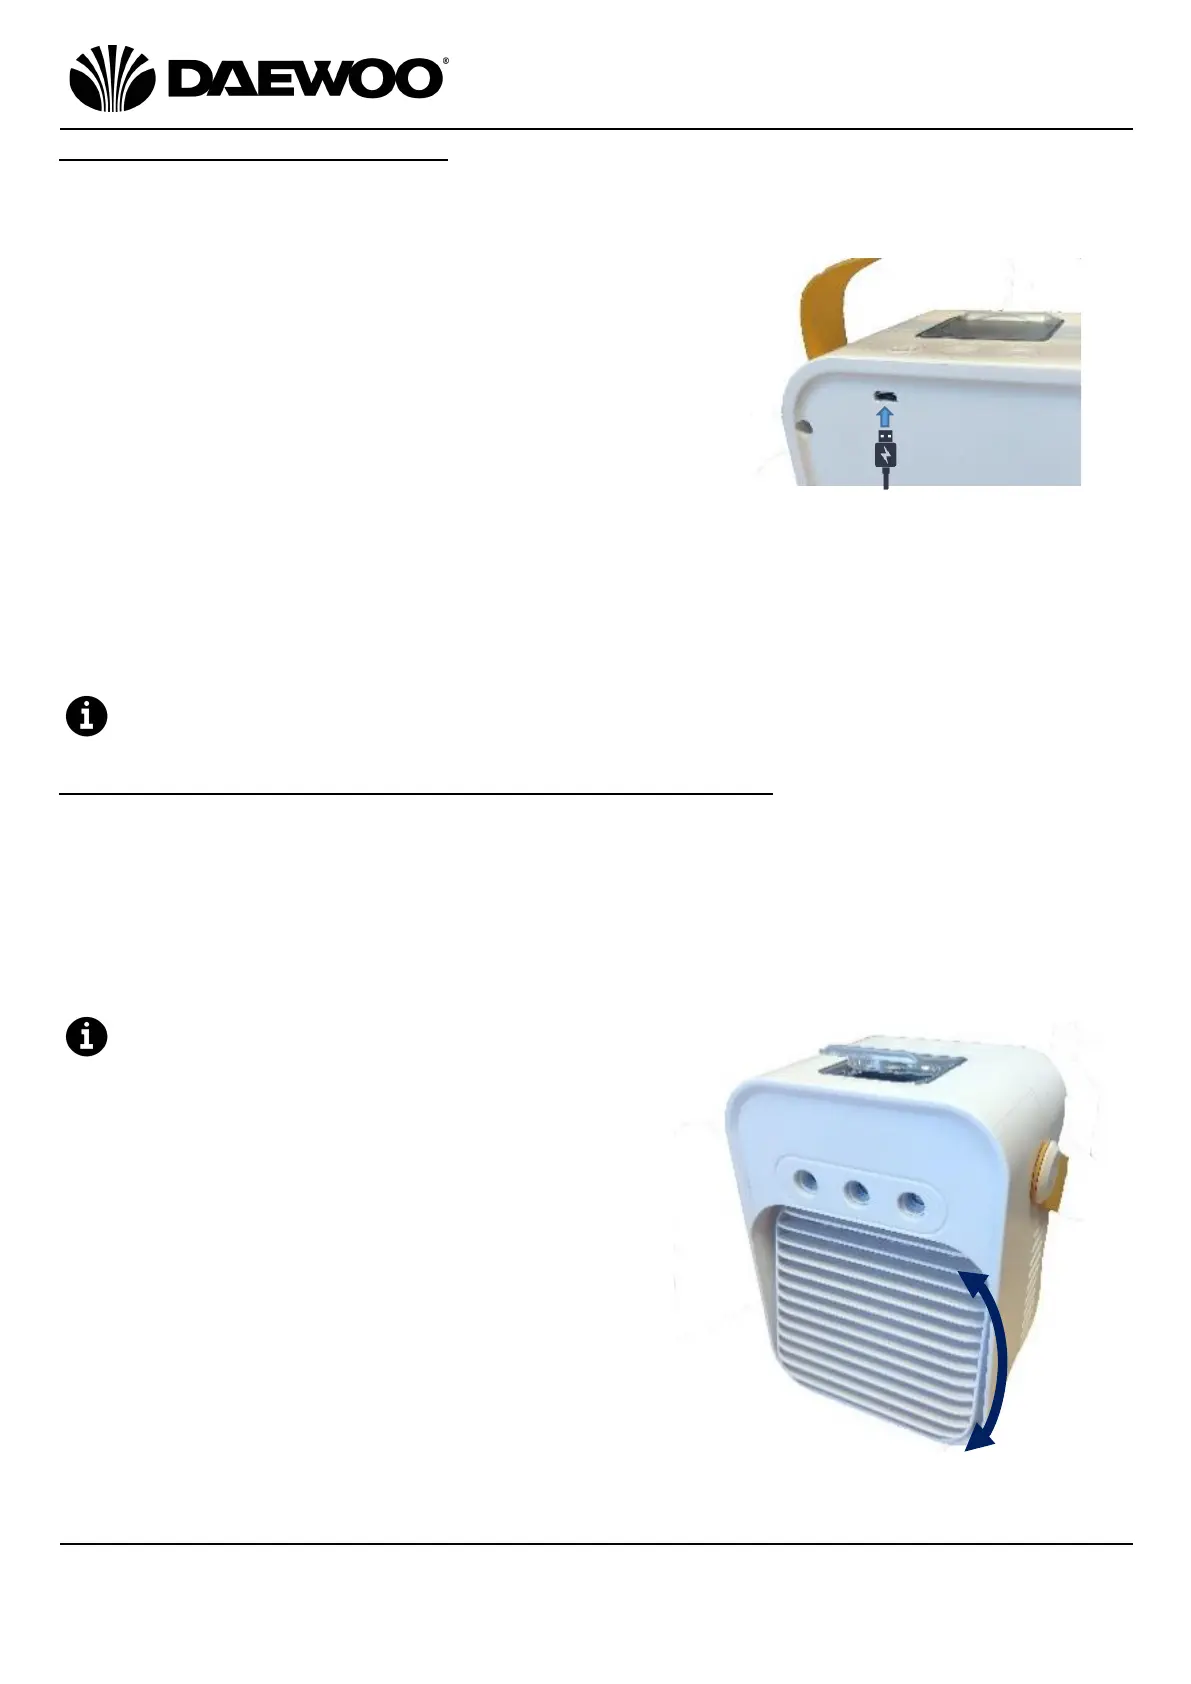
1. Insert the Micro USB plug (14) of the USB
Charging Cable (13) into the USB Charging Port
(11) on the rear panel of the Portable Air Cooler
to charge the internal battery.
2. Insert the Large USB Plug (15) of the USB
Charging Cable (13) into a suitable USB charger
rated at 2 amp minimum such as a dedicated USB
mains charger or USB outlet on a computer.
3. The Charge LEDs (10) will illuminate Red whilst charging. Once the battery is
fully charged, the Charge LEDs (10) will change to Green to show that the
internal battery is fully charged and the USB Charging Cable (13) can be
removed.
4. The internal battery can operate for 2 - 4hours after it is fully charged.
The Portable Air Cooler can be used whilst connected to the USB supply.
Using Your Portable Air Cooler – Using the ‘Fan’ mode
1. Switch on the Portable Air Cooler by pressing the Power/Speed Button (6).
2. Press the Power/Speed Button (6) for fan speed I.
3. Repeatedly press the Power/Speed Button (6) for speeds 2 and 3.
4. The LED Indicators (9) under the button will illuminate Red (speed I), Green
(speed II) and Blue (speed III).
5. Long press the Power/Speed Button (6) after Speed III to switch the unit off.
The airflow direction can be adjusted by
swinging the Louvre (5) up and down.
 Loading...