3
ZF 8/16S-151/181 AND 16S-221 GEARBOXES
Removal and installation of gearbox CF65/75/85 series
4-2
Installing the gearbox
1. Before positioning the gearbox, one gear
should be engaged in order to allow the
input shaft to slide into the clutch plate
during installation.
2. Install the thrust bearing over the gearbox
front cover and check whether the circlip in
the clutch release assembly is closed.
3. Use the jack to move the gearbox towards
the engine and install the attachment bolts
around the gearbox.
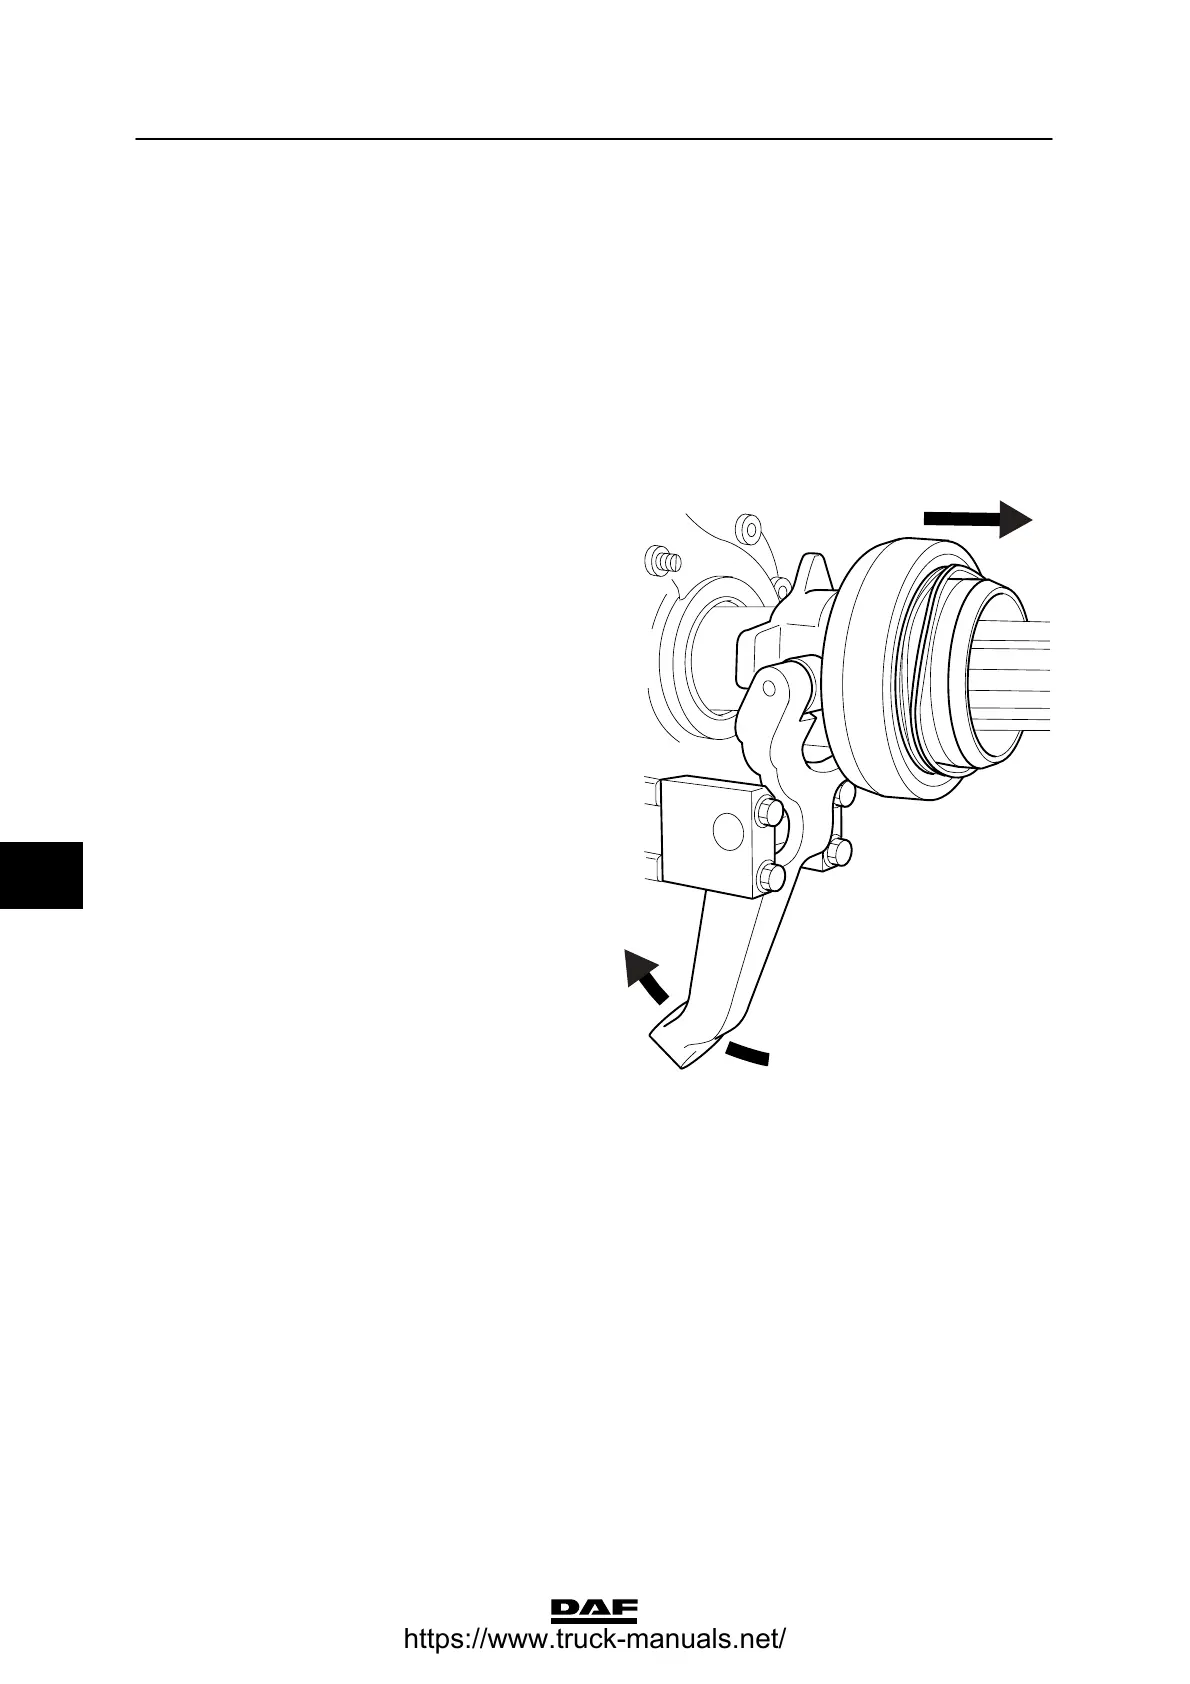
4. Pull on the clutch lever so as to lock the
thrust bearing in the clutch release
assembly. When the thrust bearing has
been installed in the clutch release
assembly, the clutch lever can no longer be
moved by hand.
5. Install the clutch servo and tighten the
attachment bolts.
6. If the exhaust pipe was removed, reinstall it.
7. Connect the connectors of the
gearbox wiring harness.
8. Fit the air pipes from the central air
distribution block at the side of the gearbox,
or, in the case of an integrated air
distribution block on the selector shaft
housing, the central air supply at the side of
the integrated air distribution block.
9. Fit the control rod ball joint to the selector
shaft lever and the nut of the torque rod.
10. Inspect the shift control. See “Inspection
and adjustment”.
11. Connect the negative lead to the battery
terminal.
12. If a gearbox of a different type is mounted,
or a gearbox with a different reduction, this
should be reported. If the correct data are
present, they can be put back into the VIC
using DAVIE XD.
V300442
7
ᓻ 200337
https://www.truck-manuals.net/