3
CF65/75/85 series Removal and installation
AS TRONIC GEARBOX
4-13
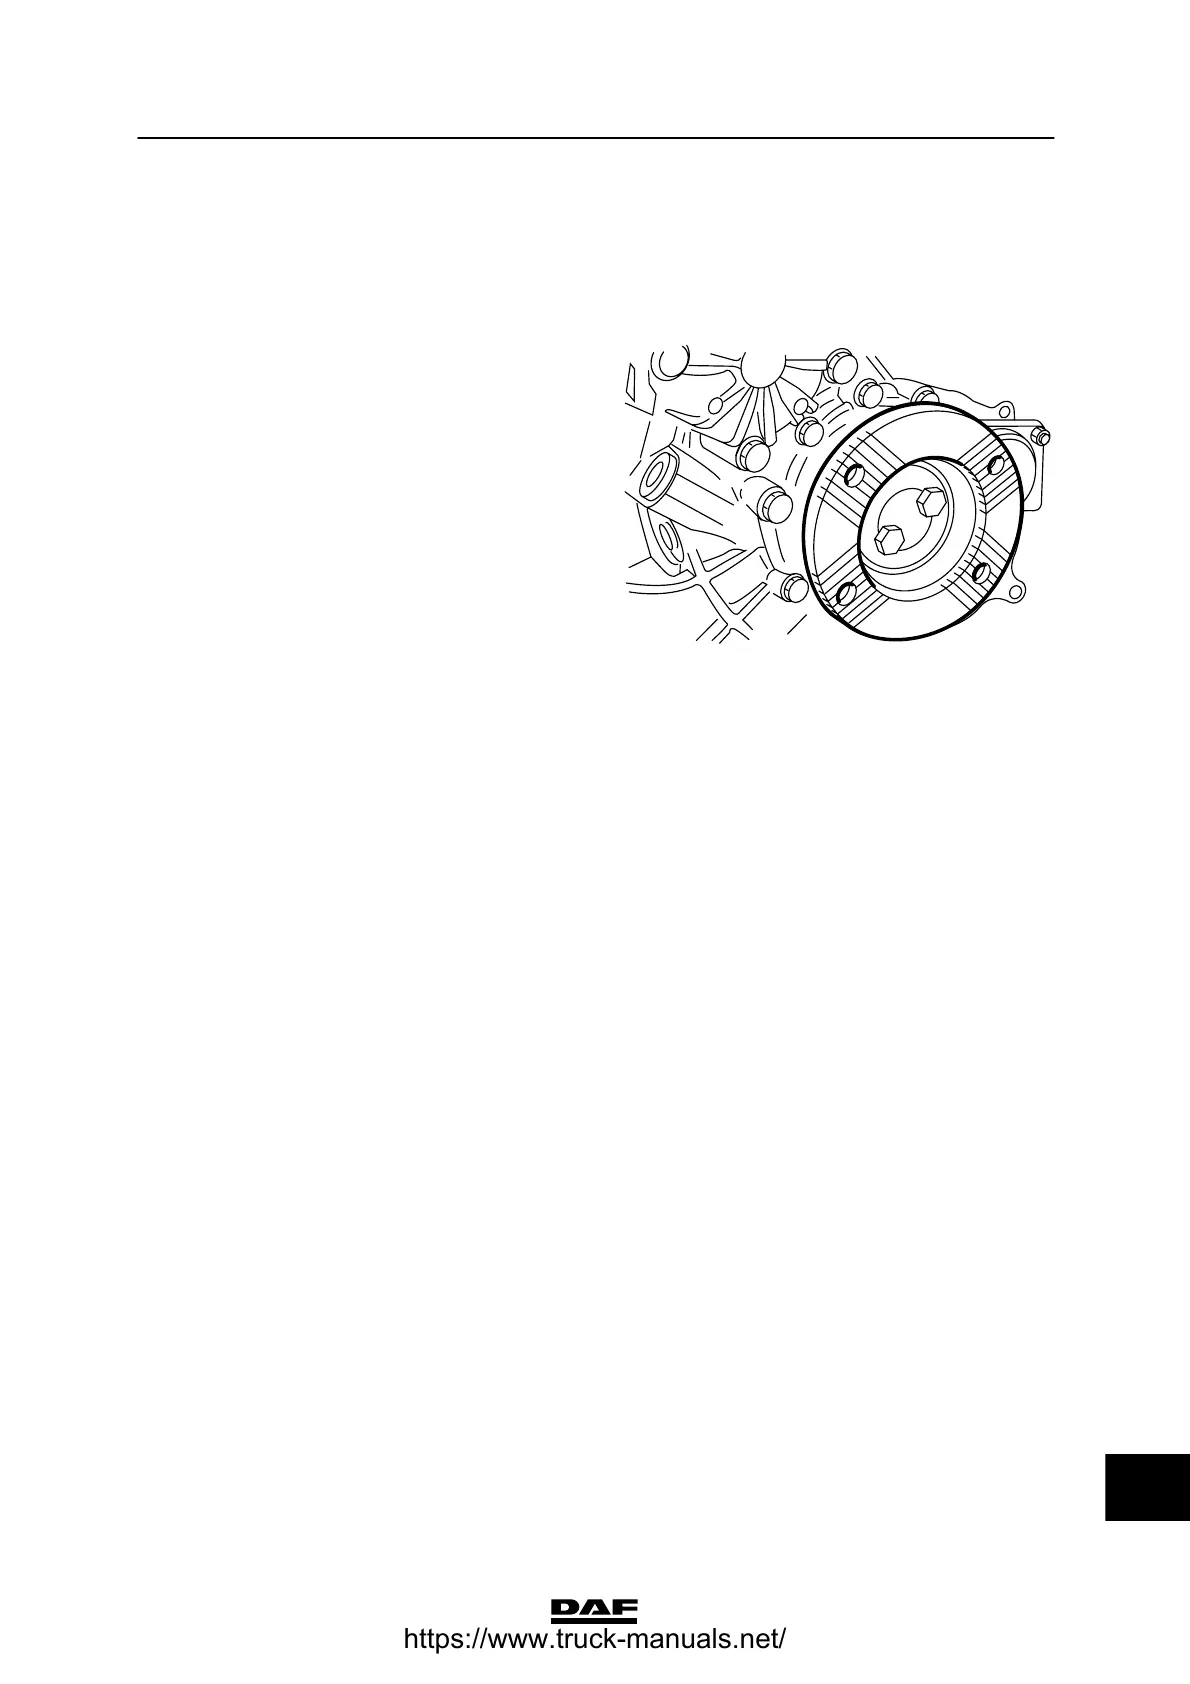
4.4 REMOVAL AND INSTALLATION, DRIVE FLANGE
Removing drive flange
1. Remove the prop shaft from the gearbox
flange and hang it on the chassis.
2. Hold the drive flange in place with the
special tool (DAF No. 0484977).
3. Remove the attachment bolts from the drive
flange.
4. Remove the bolts and locking plate with
seal from the drive flange.
5. Note:
Measure and make a note of the distance
from the drive flange to the shaft. The same
distance must be observed when the drive
flange is reinstalled.
Remove the drive flange and O-ring using a
commercially available puller.
Installing drive flange
1. Lightly oil the sealing ring in the bearing
cover.
2. Heat the drive flange to 70°C. Slide it as far
as possible onto the output shaft. Use the
locking plate and two standard bolts
(M12x75) to pull the drive flange further
onto the shaft.
3. Remove the standard bolts and measure
whether the drive flange has reached the
correct position on the output shaft.
4. Fit a new O-ring into the recess between
the output shaft and the drive flange.
5. Hold the drive flange in place with the
special tool (DAF No. 0484977).
6. Note:
Bolts that will be re-used must be cleaned
and lightly oiled.
Tighten the attachment bolts to the
specified torque. See “Technical data”.
7. Attach the prop shaft.
V300449
14
ᓻ 200337
https://www.truck-manuals.net/