EasyManua.ls Logo

Dahua DH-SD1A203T-GN-W - User Manual

Dahua DH-SD1A203T-GN-W
23 pages
Print Icon
To Next Page IconTo Next Page
Loading...
Network Speed Dome
Installation Manual
V1.0.1
Question and Answer IconNeed help?

Do you have a question about the Dahua DH-SD1A203T-GN-W and is the answer not in the manual?

Summary

Cybersecurity Recommendations

Mandatory Cybersecurity Actions

Essential security steps required for system protection, including strong passwords and firmware updates.

Recommended Security Improvements

Optional but beneficial security measures to enhance network protection and prevent unauthorized access.

Foreword

Manual Introduction and Overview

Introduces the purpose of the manual regarding installation preparation and speed dome installation.

Safety Instructions and Signal Words

Explains hazard signal words (DANGER, WARNING, CAUTION) and provides essential safety information.

Revision History and Updates

Details the manual's version history, including revision content and release dates.

Privacy Protection Notice

Provides guidance on complying with privacy laws for personal data collected by the device.

About the Manual

Contains disclaimers and information about the manual's scope and limitations.

Important Safeguards and Warnings

Qualified Engineer Requirements

Specifies the necessary qualifications and knowledge for installation and maintenance personnel.

Lifting Appliance Requirements

Guidelines for selecting and using lifting appliances safely and effectively during installation.

Installation Preparation

Basic Installation Requirements

Essential prerequisites including adherence to safety regulations and operating environment suitability.

Installation Site Check

Verification steps for the installation environment, ensuring adequate space and structural integrity.

Cable Preparation Guidelines

Specifications for cables, including impedance, material, shielding, and power cord selection.

Speed Dome Installation

Accessory Checking and Package Opening

Procedures for verifying included accessories and safely opening the product package.

Reset Button and Memory Card Slot

Locating and using the reset button for system defaults and the micro SD card slot for data storage.

Ceiling Mounting

Ceiling Mounting Components

Identification of components required for ceiling mounting and the installation position map.

Speed Dome Ceiling Installation Steps

Detailed instructions and conditions for securely mounting the speed dome onto a ceiling structure.

Wall Mounting

Wall Mounting Components

Details on wall-mounted brackets and ceiling brackets used for wall mounting the speed dome.

Speed Dome Wall Mounting Steps

Comprehensive guide on wall mounting conditions and the step-by-step process for installation.

Appendix 1 Lightning Proof and Surge Protection

Outdoor Lightning Protection

Measures and considerations for protecting the speed dome from lightning and surge events in outdoor environments.

Indoor Lightning Protection

Guidelines for grounding and surge protection for indoor installations to ensure system safety.

Appendix 2 12 V DC Cable Diameter and Transmission Distance

Appendix 3 Wire Gauge Reference Sheet

Overview

This document serves as an installation manual for a Network Speed Dome, providing comprehensive guidelines for its setup, operation, and maintenance, with a strong emphasis on cybersecurity and safety. The manual is structured to guide users through the entire process, from initial preparations to advanced security recommendations, ensuring a secure and efficient deployment of the device.

Function Description

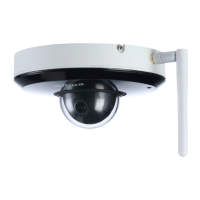
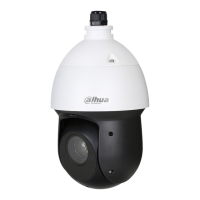
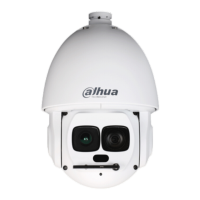
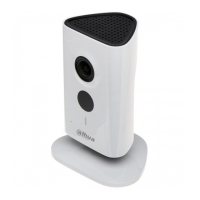
The Network Speed Dome is a surveillance device designed for monitoring various environments, both indoors and outdoors. Its primary function is to capture video feeds, which can be viewed remotely. The device incorporates features for data storage, network connectivity, and system resetting. It is designed to be integrated into a larger CCTV system, working in conjunction with Network Video Recorders (NVRs) or Digital Video Recorders (DVRs). The speed dome supports various mounting options, including ceiling and wall mounting, to adapt to different installation scenarios. It is equipped with a reset button for system restoration and a Micro SD card slot for local data storage, enhancing its versatility and standalone capabilities. The device is built with robust lightning protection technology, capable of preventing damage from pulse signals up to 6000V, making it suitable for outdoor installations in areas prone to thunderstorms.

Usage Features

The Network Speed Dome offers several features that enhance its usability and integration into surveillance systems:

  • Remote Viewing and Communication: The device communicates and transmits video feeds remotely via configurable HTTP and TCP ports. Users can change these default ports to improve network security by making it harder for unauthorized outsiders to guess the active ports.
  • Data Storage: A Micro SD card slot is provided for local data storage. The manual details the proper procedure for installing and removing the Micro SD card, emphasizing the importance of ensuring the card is not in a read/write state during removal to prevent data loss or damage.
  • System Reset: A dedicated reset button allows users to restore the network system to factory default settings. This feature is accessible by opening a cover on the bottom of the device and holding the button for over 10 seconds.
  • Mounting Flexibility: The speed dome supports both ceiling and wall mounting, with detailed instructions and diagrams provided for each method. This flexibility allows for optimal positioning in various environments. The manual specifies conditions for installation, such as the ceiling or wall's ability to sustain the device's weight and the thickness required for expansion bolts.
  • Cable Management: Instructions are provided for routing cables through mounting plates and into wiring channels, ensuring a neat and secure installation.
  • Installation Position Requirements: For optimal image quality and monitoring range, the manual specifies that the cable outlet should be located in an area that does not require monitoring, and there should be no objects obstructing the view within a 50 cm range from the installation position. This ensures that the device's field of view is clear and effective.
  • Power Supply Considerations: The manual includes a detailed appendix on 12V DC cable diameter and transmission distance, helping installers select appropriate cables to ensure stable power delivery and minimize voltage attrition, especially over longer distances.

Maintenance Features

The manual outlines several maintenance and safety features, with a significant focus on cybersecurity:

  • Cybersecurity Recommendations: A comprehensive section is dedicated to cybersecurity, providing mandatory and "nice to have" actions to secure the device and the overall surveillance system.
    • Mandatory Actions:
      • Strong Passwords: Users are strongly advised to change default passwords immediately and use strong passwords (at least 8 characters, combining special characters, numbers, and upper/lower case letters) to prevent unauthorized access.
      • Firmware Updates: Regular firmware updates for the NVR, DVR, and IP camera are recommended to ensure the system benefits from the latest security patches and fixes.
    • "Nice to Have" Recommendations:
      • Regular Password Changes: Periodically changing device credentials helps maintain security.
      • Custom HTTP/TCP Ports: Changing default HTTP and TCP ports to non-standard numbers (between 1025-65535) reduces the risk of external guessing.
      • HTTPS/SSL Enablement: Setting up an SSL Certificate to enable HTTPS encrypts communication between devices and the recorder.
      • IP Filter: Enabling an IP filter restricts access to specified IP addresses, enhancing system security.
      • ONVIF Password Change: For older IP Camera firmware, manually changing the ONVIF password or updating the firmware is necessary to ensure it changes with system credentials.
      • Port Forwarding Control: Only forwarding necessary HTTP and TCP ports, and avoiding DMZ configuration, minimizes exposure. Individual camera ports are not needed if connected to an on-site NVR.
      • Disable SmartPSS Auto-Login: For shared computers, disabling auto-login on SmartPSS adds a layer of security.
      • Unique SmartPSS Credentials: Using different usernames and passwords for SmartPSS than for other online accounts prevents cascading security breaches.
      • Limit Guest Account Features: For multi-user systems, guest accounts should only have rights to features essential for their job.
      • UPnP Disablement: Disabling UPnP is recommended, especially if ports are manually forwarded, to prevent automatic and potentially insecure port forwarding.
      • SNMP Disablement: SNMP should be disabled if not in use, or used only temporarily for tracing and testing.
      • Log Monitoring: The system log can be checked to identify unauthorized access attempts, showing login IP addresses and accessed resources.
  • Physical Security:
    • Device Lock Down: Physically securing the device in a lockbox, server rack, or locked room prevents unauthorized physical access.
    • NVR PoE Port Connection: Connecting IP cameras to the PoE ports on the back of an NVR isolates them from the external network, enhancing security.
    • Network Isolation: Keeping the NVR and IP camera network separate from the public computer network prevents unwanted guests from accessing the security system.
  • General Safety and Handling:
    • Transportation and Installation: Emphasizes avoiding heavy stress, violent vibration, and water splashes. Proper packaging is crucial during transport.
    • Environmental Protection: Keep the product away from strong electromagnetic radiation, smoke, vapor, dust, heat sources (like furnaces or spotlights), and corrosive elements like seawater or rain.
    • Disassembly and Repair: Users are warned against disassembling the product themselves and advised to contact customer service for internal setup or maintenance.
    • Power Management: Instructions include turning off power and disconnecting the cord if water or liquid enters the product, and contacting customer service for abnormalities. It also warns against connecting multiple speed domes to a single power adapter if it exceeds the rated load.
    • Lens Protection: Avoid aiming the lens at intense light sources, including direct sunlight.
    • Cleaning: Use a soft cloth with proper cleaning liquid, avoiding gasoline, dope thinner, or other chemicals that could damage the enclosure.
    • Lightning Protection: For outdoor installations, the manual details TVS lightning protection technology and recommends additional high-power thunder protection devices or lightning rods in areas prone to strong thunderstorms. It also specifies requirements for earth devices, including resistance levels and cable cross-sectional areas, and emphasizes equal-potential wiring. For indoor installations, reliable connection of the GND wire or screw to an indoor equipotential GND terminal with specific copper wire specifications is required.
  • Qualified Personnel: The manual stresses that installation and maintenance should be performed by qualified engineers with CCTV system installation certificates, knowledge of low-voltage cable wiring, and the ability to understand the manual.
  • Lifting Appliance Requirements: For installations requiring lifting, the manual specifies that lifting appliances must be suitable for the environment, have sufficient capacity, and possess high security performance.

Dahua DH-SD1A203T-GN-W Specifications

General IconGeneral
Camera TypePTZ
Image Sensor1/2.8" CMOS
RAM512 MB
ROM128 MB
Scanning SystemProgressive
Max. ApertureF1.6
Aperture ControlAuto/Manual
Manual Control SpeedPan: 0.1°–100°/s; Tilt: 0.1°–60°/s
Preset SpeedPan: 100°/s; Tilt: 60°/s
Presets300
Power Loss MemoryYes
ProtocolDH-SD, ONVIF, PSIA, CGI
Streaming Capability3 Streams
Bit Rate ControlCBR/VBR
Day/NightAuto(ICR) / Color / B/W
BLCYes
HLCYes
WDR120dB
Gain ControlAuto/Manual
Motion DetectionYes
Image Rotation0°/90°/180°/270°
Digital Zoom16x
FlipYes
Streaming MethodUnicast/Multicast
Max. User Access20 Users
BrowserIE, Chrome, Firefox, Safari
Ingress ProtectionIP66
Vandal ResistanceIK10
Effective Pixels1920(H) x 1080(V)
Electronic Shutter Speed1/1s to 1/30, 000s
Minimum Illumination0.005Lux/F1.6 (Color), 0Lux (IR on)
IR Distance30m
Close Focus Distance0.1m~10m
Pan/Tilt RangePan: 0°–355°; Tilt: 0°–90°
PTZ Mode5 Pattern, 8 Tour, Auto Pan
Idle MotionPreset, Tour, Pattern, Auto Scan
Video CompressionH.265; H.264; MJPEG
Resolution1080P (1920 × 1080); 1.3M (1280 × 960); 720P (1280 × 720); D1 (704 × 576/704 × 480); CIF (352 × 288/352 × 240)
White BalanceAuto; indoor; outdoor; manual
Noise Reduction3D
Region of Interest(ROI)Yes
DefogYes
Privacy MaskingUp to 24 areas
Audio CompressionG.711a, G.711Mu, AAC, G.726
Audio1 channel in, 1 channel out
Network InterfaceRJ-45 (10/100Base-T)
NetworkIPv4, IPv6, HTTP, HTTPS, TCP, UDP, RTSP, RTCP, RTP, NTP, DNS, DDNS, SMTP, SNMP, FTP, DHCP, UPnP, ICMP, IGMP, 802.1X, QoS
InteroperabilityONVIF Profile S
Edge StorageMicro SD, up to 256 GB
Management SoftwareSmart PSS, DSS, DMSS
CertificationsCE, FCC
Power Consumption13W
Operating Temperature-30 °C to +60 °C (-22 °F to +140 °F)
Operating Humidity≤95%
Frame RateMain stream: 1080P/1.3M/720P (1–25/30fps), Sub stream 1: D1/CIF (1–25/30fps), Sub stream 2: 1080P/1.3M/720P/D1/CIF (1–25/30fps)

Related product manuals