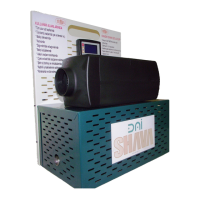
The DAI SHAVA is a first cabin heater unit developed in collaboration with SAKARYA University and supported by TÜBİTAK and KOSGEB. It has been awarded the "Utility Model Certificate" by the Turkish Patent Institute.
Technical Specifications and Application Areas
The SHAVA heater offers a range of technical features and is suitable for various applications. It has a heating capacity of 2500 kcal/h and operates on 12V-24V power. The device is designed for continuous operation for 10-12 hours with 1 liter of fuel consumption (max. 4m³). It includes an electronic control panel, an annunciation (warning) system, and is easy to assemble. The motor-independent operating feature allows for flexible use.
The SHAVA heater is suitable for all long-distance vehicles (Bus, Lorry, Truck), all marine vessels (ship, yacht, boat, etc.), caravans, mountain huts, watchman's and security huts, military vehicles, flower and plant glasshouses, inner city and country mass transportation vehicles, cabin duty vehicles, and tents and all other closed spaces.
Usage Features
The device features an electronic control unit with a digital display for easy operation. The display shows various settings and information with illustrations.
Control Panel Operation:
When the device is in the off position (Figure 1), adjust the display brightness with the "b" and "c" keys. The "b" key increases the brightness, and the "c" key decreases it. While the device is in the off position, the display light turns off after 30 seconds. To turn it on again, press any button.
General Settings (Timer-on and Timer-off):
While the display of the control panel is in the position shown in Figure 1, enter into "Summer/Winter Mode, Time Setting and Auto Start/Stop Time settings" menu by holding down the bottom key "c" for 4 – 5 seconds (Figure 2). The "b" key moves the cursor upward, and the "c" key moves downward. When you press the key "a" (the cursor takes the form ">"), you can select the feature you want to set.
After entering into the mode, the summer mode is set by key "b" and the winter mode by key "c". Press key "a" to confirm the selection.
- Mode: Winter – Heating is active
- Mode: Summer – Heating is not active, only fan is active
General Time Setting:
In the "Settings" menu, scroll and move the cursor to "Time" then press key "a" to enter into time settings. While the part indicating time is active, select the required time value by using key "b" and then press key "a" to confirm. Afterwards, minute is activated in the same way and again the required minute value is set by pressing key "b" and confirmed by key "a". To exit from time settings, press key "a" to save final settings and to exit.
Auto Start Setting:
In the "Settings" menu, scroll and move the cursor to "start" and press key "a" for switching it into adjustable position. The required opening time is set and saved as is explained in the section "General Time Settings". For cancellation, when "open" is active, press key "c" and then again press "a" key to exit from "open" time setting.
Auto Stop Setting:
In the "Settings" menu, scroll and move the cursor to "Close/Off" and press key "a" to switch it into adjustable position. The required closing time is set and saved as is explained in the section "General Time Settings". When auto start or auto stop function is active, an icon of bell can be seen on the main screen (Figure 6).
Exiting from Settings Menu:
To return back to the main display image (Main Menu), move the cursor to the sign of "<<" at the upper left corner of the display and then press key "a" to return back to the main menu.
Attention:
All settings described above can only be made when the device is in the off-position.
Operation of Device and Temperature Setting (Winter Mode):
When the display of the control panel is in the initial position (Figure 1), press key "a" and turn on the device. The device will start heat transfer (hot air blowing) 4 – 5 minutes after the issuance of the "Operate" command.
For the required ambient temperature setting, while the display of the control panel is in the position shown in Figure 7 (in operating position), raise the temperature to the required value by pressing key "b", or key "c" to reduce the value. It is enough to press key "a" once on this screen to turn off the device.
Operation of Device and Temperature Setting (Summer Mode):
When the display of the control panel is in the initial position (Figure 1), press key "a" and turn on the device. The heating feature is not active in the summer mode. Only the fan can be operated to ensure air circulation in the environment.
The speed of the fan is increased by key "b" and decreased by key "c".
Maintenance Features
Considerations:
- When the device is operated for the first time and in case of refilling of empty fuel tank, the fuel pump should be able to be operated manually in order to evacuate the air in the diesel inlet tube. For this, while display of the control panel is in the position shown in Figure 1 (Main Menu), operate the fuel pump by holding down key "b" for 3 – 4 seconds until the sign of pump appears, and then release after the sign appears. Depending on the length of the diesel hose reaching to device from fuel tank, the fuel pump is operated manually for around 15 – 20 seconds. Afterwards, again by holding down key "b" for 3 – 4 seconds, operation of the fuel pump is stopped. And the "pump" sign disappears on the display.
- It is required to use Euro-Diesel or gasoil in the fuel tank of the device as fuel.
- When the device reaches to required ambient temperature value (preset temperature value) in order for both achieving the fuel-efficiency and maintaining the ambient temperature at a certain value, the engine speed falls down and thus the device starts to run slower (sleep mode). If the ambient temperature drops down the required operating temperature, the engine speed increases automatically.
- Occasionally, the ambient temperature may exceed the required temperature value (preset value), in such case, a "sandglass" item appears on the display and the device stops running. And this situation continues until the ambient temperature reaches preset value. When it drops below this value, the device resumes operation.
- If the device will not be used for a long period, it is strongly recommended to empty the fuel tank and disconnect the fuel hoses; because, the chemical matters in fuel precipitates after a long period and as a result of this precipitation solid particles occur. And these particles damage all system, especially the spark plug. When it is required to start the device again, the fuel hoses are reconnected and the fuel tank is filled and air in the pipe is evacuated by manual operation of the fuel pump as described in article "1".
- In order to prevent any damage to the device, a fuse is used against sudden current changes. If the menu image does not appear on the control display, first check if the fuse is in good condition. If replacement of fuse is required, use 10 amperes fuse for 24V SHAVA device and 20 amperes fuse for 12V SHAVA device. Otherwise, in case of any other failure on the device, it does not fall into scope of warranty.
- It is recommended that, at the end of 1st year, the device should be controlled by "SHAVA Authorised Service" at the beginning of winter season before being started-up.
- Failures occurred on the device are viewed on the display together with failure causes.
- Make sure that the connection of the hoses to the device is made correctly. Be attentive not to damage during the handling.
- For your safety, make sure that fresh air is provided in the environment where the device is.
- If the device is installed in a closed space, make sure that the insulation at the part of the exhaust pipe remaining within the closed space is done properly and that the exhaust outlet is open.
Warnings (Appear on display in case of failure):
- FAN Failure: When the motor starting the blower is used to blow hot air into the environment fails, "Blower Failure" expression appears on the display. No air blowing occurs, and the device shuts down automatically. And failure signal continues appearing on the display. In such case, do not try to restart the device.
- Pump Failure: When the fuel pump fails, the expression "Pump Failure" appears on the display. The device automatically shuts down and continues to blow hot air into the environment until it becomes cold. After it has become cold, blowing function stops.
- Overheating (Check the air inlet and outlet): If "overheating, Check the Air Inlet and Outlet" writing appears on the display, please check the air inlet and outlet points of the device. In order to avoid from the occurrence of such situation, do not close, block or put any obstructive item in front of air inlet and outlet points.
WARNING: Do not cover the device with anything in a manner to block the air inlet and outlet, they should remain open.
- Heater Failure: In case of the failure of spark plug (if it does not ignite), "heater failure" signal appears on the display. In such case, do not operate the device again, and contact your authorized service.
- Connection Failure: If at least one of the sockets connected to the main board during assembling is not properly fixed or if there is any loose contact on socket cables, then "connection failure" signal appears on the display. In such case, check the pump connection and if necessary, contact authorized service.
- Sensor Failure: In case of the failure of sensor, "sensor failure" signal appears on the display. In such case, do not operate the device again, and contact your authorized service.
Device Assembling
1. Electrical Connection:
Get energy to the device from the main electric cable not connected to ignition switch in vehicle.
2. Assembling:
While the device is assembled to the vehicle, ensure that there is at least 150 mm clearance in front of the air suction (air inlet) point and at least 300 mm clearance in front of the air outlet point (Figure 9). The location where the device will be connected to the vehicle should be chosen carefully, if required, it should be mounted in a manner not to give damage to electric wiring by referring to operating manual of vehicle. While making holes in vehicle for assembling purposes, care should be taken for not to give damage to any cabling (air, oil) etc. of vehicle. The exhaust pipe of device should not be passed by electric cables.
Scope of Warranty
- Failures which may be caused by faulty assembling do not fall into scope of warranty.
- During the assembling of device, all failures occurred due to failure in leaving minimum clearances specified in "Device Assembling, Article 2" and/or leaving less than those specified are not covered under the scope of warranty.
- All failures to occur due to use of a different fuel rather than fuel types specified in "Considerations, Article 2" are not covered under the scope of warranty.
- As indicated in "Considerations, Article 6", failures to arise due to particles occurred as a result of precipitation are not covered under the scope of warranty.
- Any defect/failure to occur due to handling, assembling and other consumer originated failures (break, crack and etc) is not covered under the scope of warranty.
- As specified in "Considerations, Article 5", failures which may occur as a result of prevention of circulation due to closing of air inlet-outlet points by any item will not be covered by the warranty.
- As specified in "Considerations, Article 7", all failures which may occur due to not using fuses appropriate to device current will not be covered by the warranty.