Do you have a question about the Daikin 5MKS100LSG and is the answer not in the manual?
Unfasten the 3 hooks at the upper and 3 at the middle of the panel.
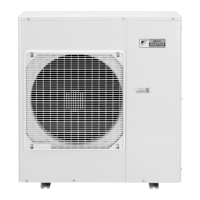
Unfasten bottom hooks and remove the suction grille.
Remove 9 screws and detach the top panel.
Remove 5 screws and detach the right side panel.
Remove the screw and detach front panel (2).
Remove the 4 screws on the discharge grille.
Slide discharge grille upward and unfasten 4 hooks.
Remove the discharge grille.
Remove 7 screws and detach front panel (1).
Detach the clamp for the fan motor lead wire.
Disconnect the connector [S70] for the fan motor.
Release the fan motor lead wire from the 3 hooks.
Remove the nut and then the outdoor fan.
Remove 2 screws and the fan motor fixing frame.
Cut the 2 clamps.
Remove 4 screws and then the fan motor.
Disconnect connecting wires, power supply wire.
Disconnect connecting wires for rooms A through E.
Remove the screw to detach the earth/ground wire.
Remove the 8 screws on the wire fixtures.
Remove the insulation sheets.
Remove 2 screws and then the partition plate (2).
Remove the rear panel.
Remove the 6 screws from the rear panel.
Slide rear panel upward to unfasten 2 hooks.
Unfasten 2 hooks to release outdoor temperature thermistor holder.
Unfasten 2 hooks, open holder, and pull out thermistor.
Detach clamp from fan motor lead wire.
Disconnect the connector [S70].
Release fan motor lead wire from 3 hooks.
Detach the 3 clamps.
Disconnect 5 connectors for electronic expansion valve coils.
Disconnect connectors [S92] and [S93].
Disconnect connector [S80] and pull out clamp.
Disconnect connector [S90].
Pull out 2 clamps fixing thermistor ASSY harnesses.
Disconnect connector [S40].
Disconnect the relay connector for the compressor.
Remove the 2 screws.
Slide the electrical box to the left and remove it.
Unfasten 4 hooks and remove the electrical box cover.
Disconnect connectors [S501], [S502], [S503] from service monitor PCB.
Detach 4 projections and remove the service monitor PCB.
Remove 4 screws of the terminal board.
Remove 2 screws of the power supply terminal board.
Pass harnesses through the hole on the terminal board.
Disconnect the connector [S].
Disconnect the 2 lower connectors (a) and (b) of the room B.
Remove the terminal board.
Remove the control PCB.
Disconnect [HL402] and [HN402] from inverter PCB.
Disconnect connectors [DCP2] and [DCM2].
Disconnect connectors [S401] and [S411].
Disconnect connectors [S206], [S209], [S210] from control PCB.
Remove screw of earth/ground wire under electrical box.
Remove 2 screws and unfasten 4 hooks.
Lift up and remove the control PCB.
Disconnect compressor harness connectors [U], [V], [W].
Remove the 8 screws.
Unfasten hook and remove the inverter PCB.
Remove electronic expansion valve coils.
Cut the 3 clamps.
Pull out the electronic expansion valve coils.
Remove thermistors.
Cut clamps and pull out gas pipe thermistors.
Peel off putty and pull out liquid pipe thermistors.
Cut 2 clamps and pull out outdoor heat exchanger thermistor.
Pull out the outdoor temperature thermistor through the hole.
Open sound blanket and remove discharge pipe thermistor.
Pull out compressor harness clamp from partition plate.
Remove 4 screws and then the partition plate.
Remove the sound blanket (outer top).
Remove the sound blanket (outer).
Remove the sound blanket (inner top).
Remove the sound blanket (inner).
Remove surrounding components before valve removal.
Remove the screw and then the four way valve coil.
Remove the terminal cover.
Unfasten hook and remove the overload protector.
Disconnect the terminals of the compressor harness.
Remove the bushing for the lead wire.
Remove the four way valve.
Remove the terminal cover.
Unfasten hook and remove the overload protector.
Disconnect the terminals of the compressor harness.
Remove the bushing for the lead wire.
Remove the 3 nuts of the compressor.
Remove the putty.
Heat brazed part of discharge pipe and disconnect.
Heat brazed part of suction pipe and disconnect.
Remove the 3 nuts of the compressor.
Lift up the compressor and remove it.
| Model | 5MKS100LSG |
|---|---|
| Category | Air Conditioner |
| Cooling Capacity | 10.0 kW |
| Heating Capacity | 11.2 kW |
| Energy Efficiency Ratio (EER) | 3.21 |
| Power Source | 220-240V, 50Hz |
| Refrigerant | R32 |
| Maximum number of connectable indoor units | 5 |
| Outdoor Unit Noise Level | 52 dB(A) |
| Operating Temperature (Cooling) | -10 to 46°C |
| Type | Multi Split System |
| Indoor Unit Dimensions (HxWxD) | Dependent on connected indoor unit model |
| Indoor Unit Weight | Dependent on connected indoor unit model |
| Indoor Unit Noise Level | Varies by model |