Do you have a question about the Daikin AZQS125B7Y1B and is the answer not in the manual?
Precautions for handling refrigerant, including installation compliance and leak detection.
DANGER: RISK OF ELECTROCUTION. Safety measures for electrical connections and wiring.
Requirements for refrigerant piping material, temper grade, thickness, and diameter.
Details on piping material, temper grade, thickness, and flare connections.
Precautions and guidelines for preparing electrical wiring.
Safety precautions and guidelines for preparing electrical wiring before installation.
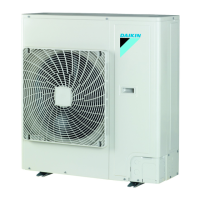
Steps and precautions for securely mounting the outdoor unit.
Safety and installation precautions for mounting the outdoor unit.
Securing the outdoor unit to the foundation using anchor bolts.
Workflow and steps for connecting refrigerant piping.
Overview of the process for connecting refrigerant piping to units.
Important safety warnings and precautions for refrigerant piping connections.
Specific guidelines for making secure and leak-free refrigerant piping connections.
Detailed instructions on how to properly flare pipe ends for connections.
Instructions on how to handle stop valves and service ports.
Step-by-step guide for connecting refrigerant pipes to the outdoor unit.
Procedures and precautions for checking the refrigerant piping.
Overview of checking external refrigerant piping after installation.
Important precautions before and during refrigerant piping checks.
Setup instructions for performing refrigerant piping checks.
Method for checking refrigerant piping for leaks using a bubble test solution.
Steps for performing vacuum drying to remove moisture and air from the system.
Procedures and considerations for charging refrigerant into the system.
When additional or complete refrigerant charging is necessary.
Essential precautions to take when charging refrigerant.
How to calculate the amount of additional refrigerant needed based on piping length.
Table to determine the total refrigerant charge based on model and piping length.
Reference to the setup for checking refrigerant piping.
Safety warnings and guidelines for charging refrigerant.
Procedures for connecting electrical wiring to the units.
Safety precautions for electrical wiring installation.
Step-by-step guide for connecting electrical wiring to the outdoor unit.
| Model | AZQS125B7Y1B |
|---|---|
| Category | Air Conditioner |
| Type | Split System |
| Cooling Capacity | 12.5 kW |
| Heating Capacity | 14.0 kW |
| Energy Efficiency Ratio (Cooling) | 3.21 |
| Power Supply | 3 Phase, 380-415V, 50Hz |
| Refrigerant | R410A |