■English11
Installation Tips
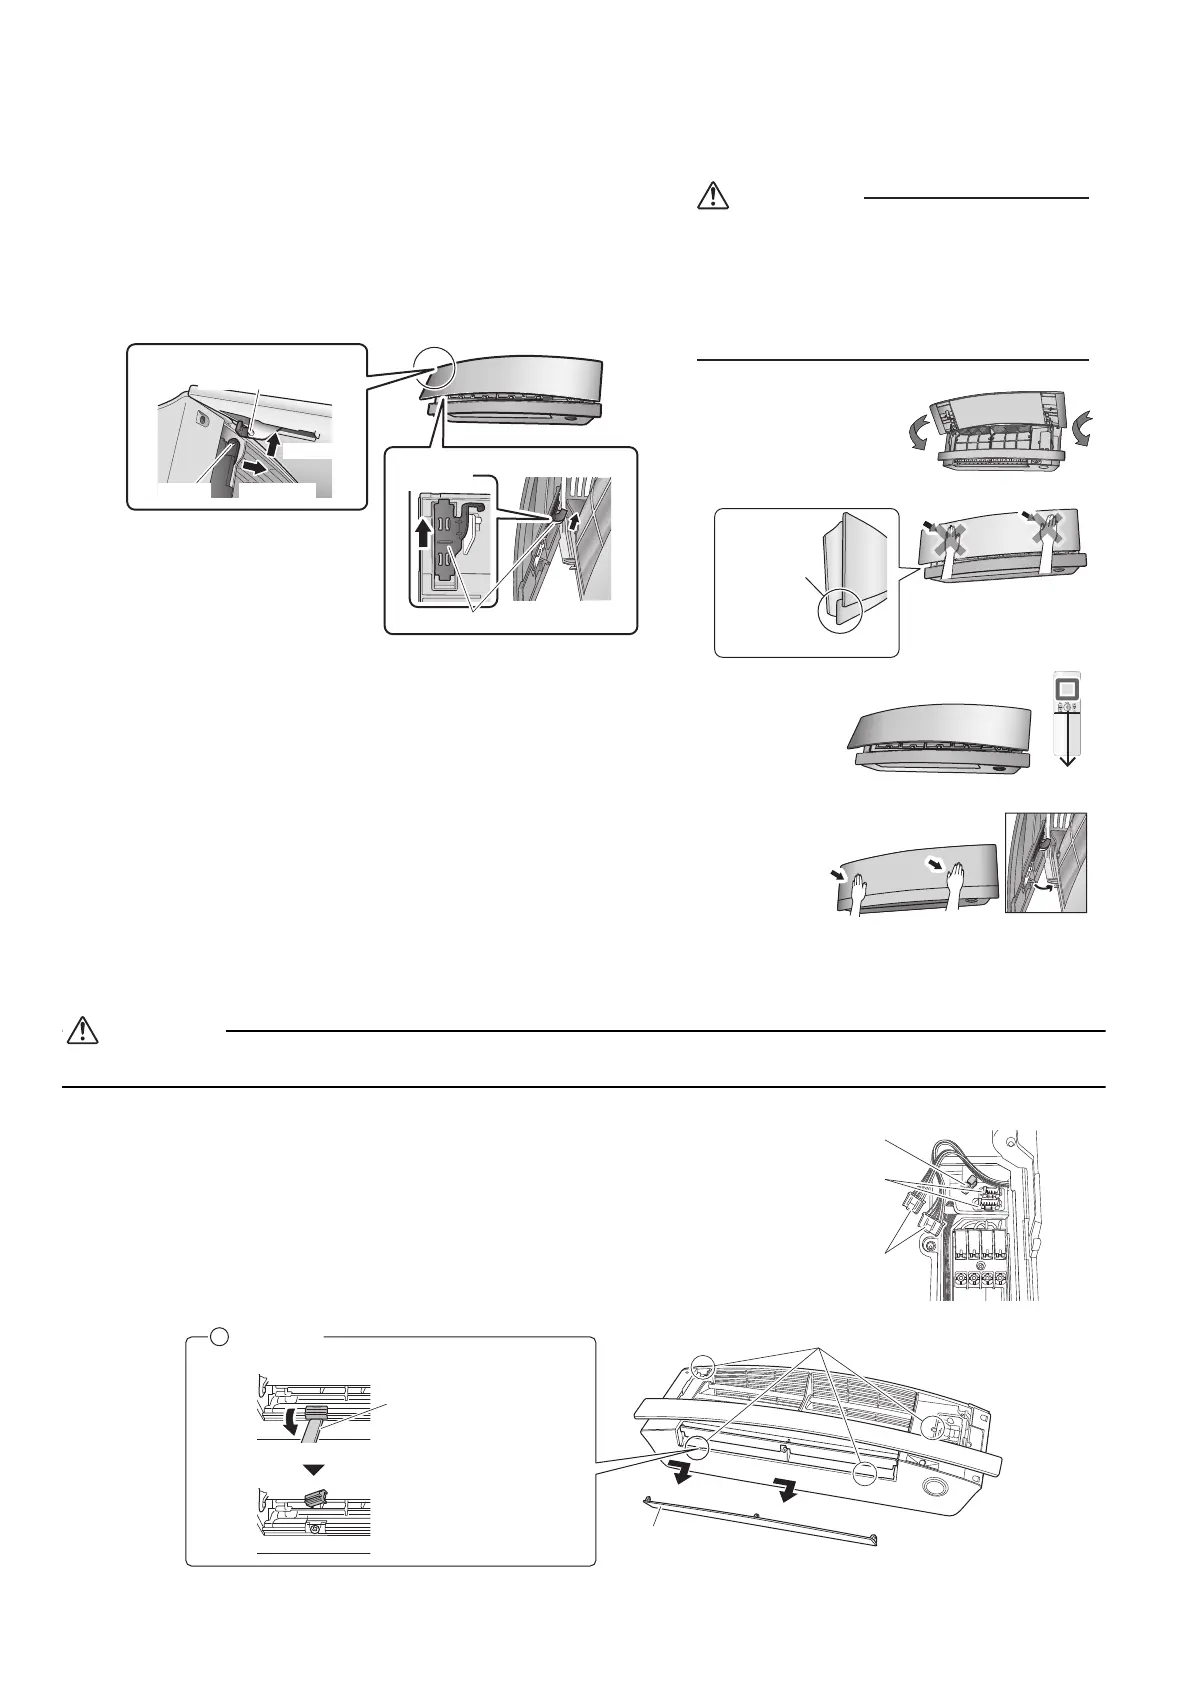
1. Removing and installing the upper front panel
2. Removing and installing the front grille
Be sure to wear protection gloves.
• Removal method
1) Remove the upper front panel and air filters.
2) Remove the service lid. (Refer to the opening method on page 4.)
3) Disconnect the wire harnesses from the wire clamp, and remove the wire
harnesses from the connectors.
4) Push the lower front panel up until it stops.
5) Dismount the flap (large).
6) Open the 2 screw covers, and remove 4 screws from the front grille.
(The screw covers are not factory-mounted.)
Back of the upper front panel
Front panel shaft
3-1) SlideShaft hole
3-2) Pull
Back of the upper front panel
2) Slide
The upper front panel does not
open any more than as shown in
the figure. Do not force it open
any further than that.
Front panel lock
Removal method
1) Open the upper front panel.
2) Slide the front panel locks on the back of the front panel upward
to release the locks (left and right sides).
3) Remove the panel shafts on both sides from the shaft holes, and
dismount the upper front panel.
•
Installation method
1) Slide the front panel locks on the back of the front panel upward to release the
locks (left and right sides).
2) Insert the panel shafts on both sides of the upper front panel into the shaft holes.
3) Slide the front panel locks on each side downward to lock them.
4) Close the upper front panel slowly. (See Fig. 1)
5) Do not push on the panel to close it. (See Fig. 2)
6) Turn on the unit using the remote controller. Wait till the upper and lower front
panels are completely open. Then, turn off the unit using the remote controller
again. (See Fig. 3)
7) Once the both panels close completely, gently push the upper front panel to
hook it into position. (See Fig. 4)
•
Fig. 3
Fig. 4
ON/OFF
“click”
“click”“click”
“click”“click”
Fig. 2
Fig. 5
Fig. 1
Do not attempt to push closed the front panel
with the upper and lower front panels
overlapping. Internal parts may break. (See Fig. 5)
If the front panel must be closed by hand for some
reason (remote controller not functioning owing to
lack of power supply, etc.), follow the instructions
affixed to the indoor unit.
CAUTION
Overlapping
(Viewed from side)
Wire clamp
Connectors
Wire harnesses
Flap (large)
Remove by pushing to the right while bending it slightly
4 screws
• Opening method
Use a long flat plate such as a
ruler and wrap it in a cloth so
as not to damage the product.
Downward
Screw covers
J
01_EN_3P674703-1.fm 11 ページ 2022年3月29日 火曜日 午後3時40分
 Loading...