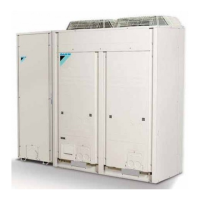
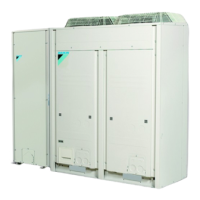
EWAQ+EWYQ005~007ADVP
Packaged air-cooled water chillers and
packaged reversible air to water heat pumps
4PW71885-1 – 10.2011
Operation manual
4
Selection and setting of cooling (cc
cc
) and heating (hh
hh
)
1 Use the = button to select cooling (c) or heating (h).
Icon c or h appears on the display as well as the corresponding
temperature set point.
2 Use the bi and bj buttons to set the correct
temperature.
• Temperature range for heating: 25°C to 55°C
• Temperature range for cooling: 5°C to 20°C
Selecting quiet mode operation (ss
ss
)
1 Use the s button to activate quiet mode operation (s).
Icon s appears on the display.
Displaying temperature values
1 Push the ba button for 5 seconds.
The b icon and the outgoing water temperature are displayed.
The icons l and = are flashing.
2 Use the pi and pj buttons to display:
• The outdoor temperature (u icon is flashing).
• The outgoing water temperature (h or c is flashing).
If no button is pressed for 5 seconds, the controller leaves the
display mode.
2.5.2. Remote ON/OFF and cooling/heating operation
2.5.3. Weather dependent operation (heat pump
models only)
In weather dependent operation (icon a is shown), the controller
calculates the water temperature set point based on the outdoor
temperature.
However, the user can set a "shift value". This shift value is the
temperature difference between the temperature set point calculated
by the controller and the real set point. E.g. a positive shift value
means that the real temperature set point will be higher than the
calculated set point.
Selecting weather dependent operation
1 Press the ba button to select weather dependent operation.
Icon a appears on the display as well as the shift value. The
shift value is not shown in case it is 0.
2 Use the bi and bj buttons to set the shift value.
Range for the shift value: –5°C to +5°C.
2.5.4. Schedule timer operation
In schedule timer operation, the installation is controlled by the
schedule timer. The actions programmed in the schedule timer will be
executed automatically.
The schedule timer always follows the last command until a new
command is given. This means that the user can temporarily overrule
the last executed programmed command by manual operation (Refer
to "2.5.1. Manual operation" on page 3). The schedule timer will
regain control over the installation as soon as the next programmed
command of the schedule timer occurs.
The schedule timer is enabled (
p icon displayed) or disabled (p icon
not displayed), by pressing the pr button.
To set up the SCHEDULE TIMER refer to chapter "2.6. Programming
and consulting the schedule timer" on page 5.
NOTE
The installer may have limited the above mentioned
default ranges at initial installation of the unit.
Function H+th C+th sw
Standard operation
(*)
(*) the unit is controlled by the remote controller
Closed Closed Closed
Remote OFF — — Open
Remote cooling Open Closed Closed
Remote heating Closed Open Closed
Function
Power LED
Icon ee
ee
Compressor operation
Pump operation
ON/OFF with Remote controller
Change mode possible
Quiet mode possible
Auto function possible
Change temperature possible
Standard
operation
ON OFF YES YES YES YES YES YES YES
Remote
OFF
(*)
(*) the unit stops in last operation mode (cooling or heating)
OFF ON NO NO NO NO YES YES
(**)
(**) only if last operation was heating
YES
Remote
cooling
(***)
(***) cooling mode is selected
ON ON YES YES NO NO YES NO YES
Remote
heating
(****)
(****)heating mode is selected
ON ON YES YES NO NO YES YES YES
H C
Terminal block
HC
th
N
89
10
sw
NOTE
■ Only use the pr button to enable or disable the
schedule timer. The schedule timer overrules the
o button. The o button only overrules the
schedule timer until the next programmed action.
■ If the auto restart function is disabled, the
schedule timer will not be activated when power
returns to the unit after a power supply failure.
Press the pr button to enable the schedule timer
again.
■ When power returns after a power supply failure,
the auto restart function reapplies the user
interface settings at the time of the power supply
failure.
It is therefor recommended to leave the auto
restart function enabled.
■ The programmed schedule is time driven. Therefore, it
is essential to set the clock and the day of the week
correctly. Refer to "2.3.1. Setting the clock" on page 3.
■ Manually adjust the clock for summertime and
wintertime. Refer to "2.3.1. Setting the clock" on
page 3.
■ A power failure exceeding 1 hour will reset the clock
and the day of the week. The schedule timer will
continue operation, but with a disordered clock. Refer
to "2.3.1. Setting the clock" on page 3 to adjust the
clock and the day of the week.
■ The actions programmed in the schedule timer will not
be lost after a power failure so that reprogramming the
schedule timer is not required.
 Loading...