43
Care Care
Air lter
1.
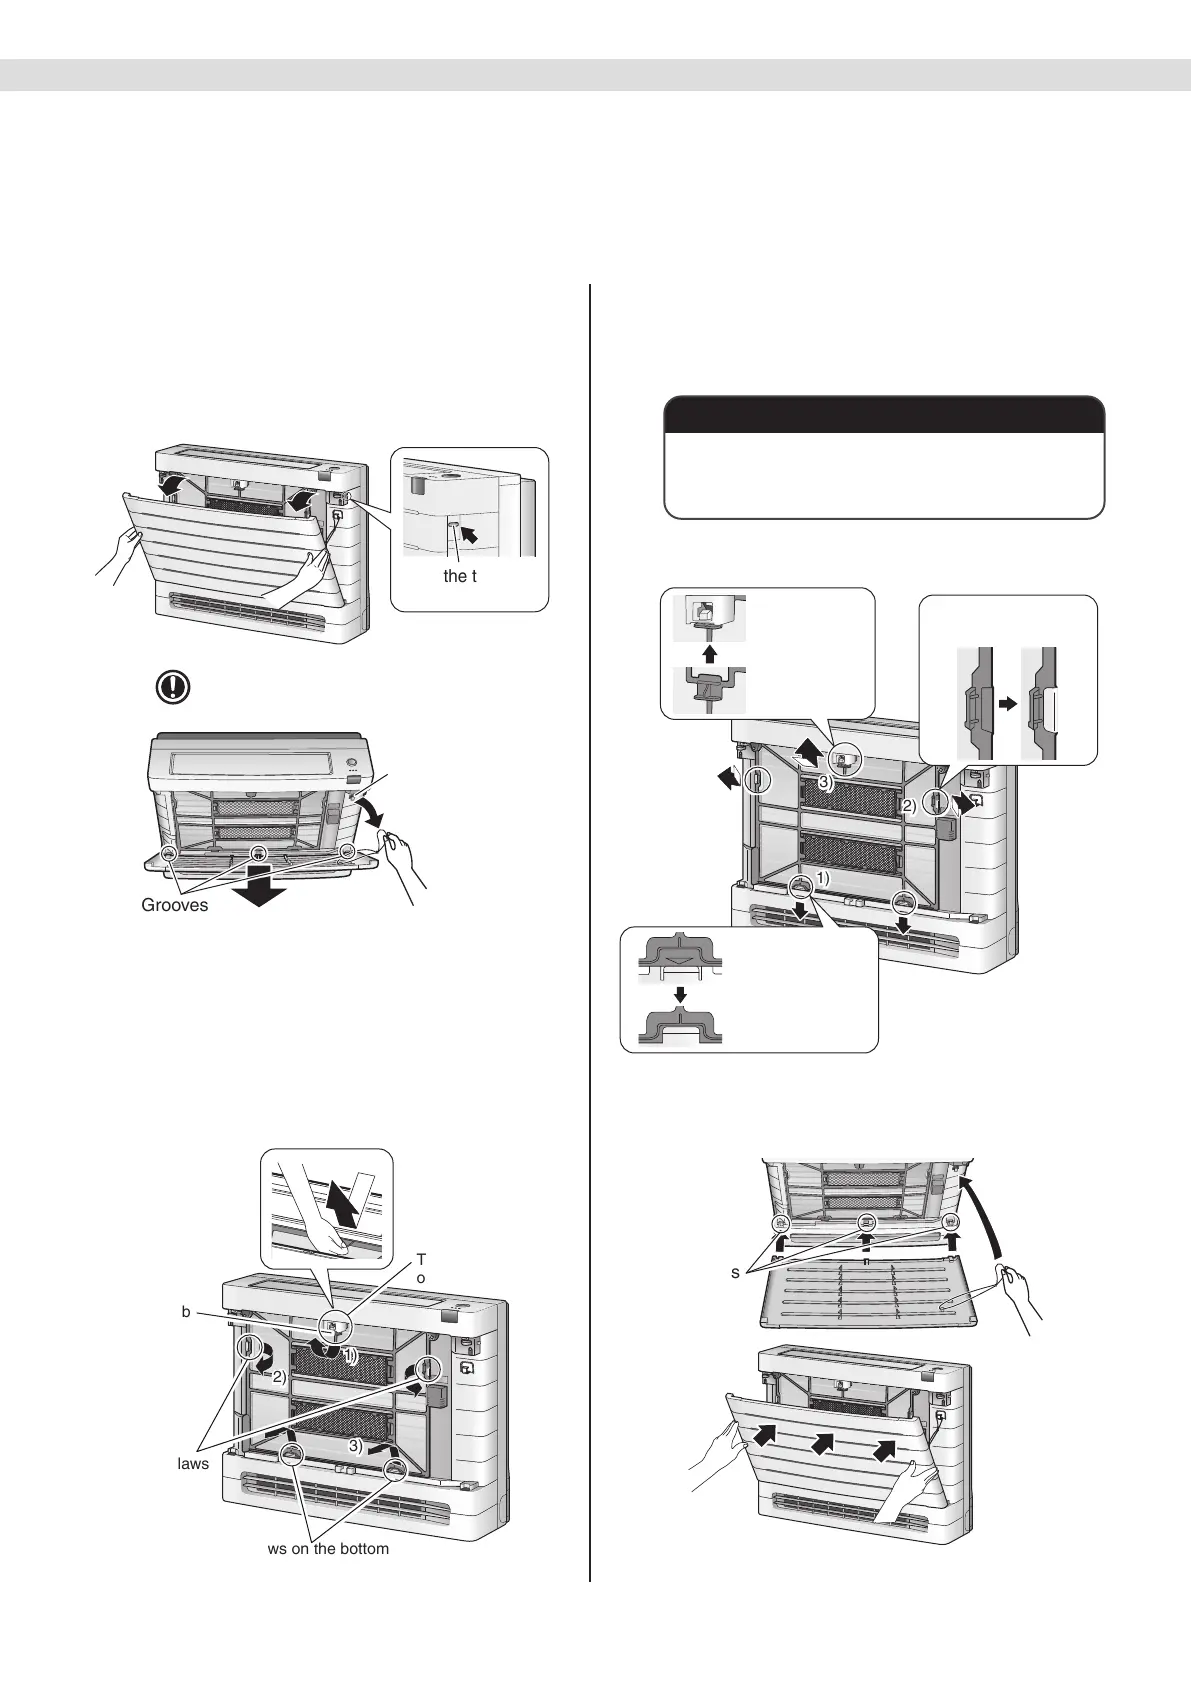
Open and remove the front panel.
• Place your ngers and push the tabs on the unit
(the left and right sides).
• Open the front panel securing strings and remove it
from the grooves of the unit (3 locations).
Careful removing the front
panel attached the string.
Push the tabs
(left and right side)
Claw of string
Grooves
• Remove the front panel.
2. Pull out the air lters.
• Hold the air lter by the lter knob and unhook the
air lter tab from the claw on the top.
•
Remove the air lter tabs from the claws on the sides.
• Pull the lter up to remove the lter tabs from the
claws on the bottom.
1)
3)
2)
Filter knob
Tabs for claws
on the side
Tabs for claws on the bottom
Tab for the claw
on the top
3.
Wash the air lters with water or
clean them with vacuum cleaner.
•
It is recommended to clean the air lters every 2weeks.
If the dust does not come off easily
• Wash the air lters with neutral detergent thinned with
lukewarm water, then dry them up in the shade.
• Be sure to remove the lter (small).
Refer to “Filter (small)” on the next page.
4. Reattach the lters.
3)
1)
2)
Insert the 2 tabs
on the bottom.
Insert the tab
on top
Insert the 2 tabs on
left and right
5. Close the front panel slowly.
•
Insert the front panel into the grooves of the unit (3 locations)
then attach the string and close the front panel.
Grooves
• Make sure that the front panel is securely xed.
Care and Cleaning
01_EN_3P705032-11D.indd 4301_EN_3P705032-11D.indd 43 06-Feb-24 2:20:05 PM06-Feb-24 2:20:05 PM



 To Next Page