Do you have a question about the Daikin FXAQ12MVJU and is the answer not in the manual?
| Brand | Daikin |
|---|---|
| Model | FXAQ12MVJU |
| Category | Air Conditioner |
| Language | English |
Explanation of the meaning of warning, caution, and note symbols used in the manual.
Key safety guidelines for installation, emphasizing professional work, proper foundation, and part usage.
Measures for refrigerant leaks in small rooms to prevent oxygen deficiency and ensure ventilation.
Importance of using correct parts and ensuring adequate foundation strength to prevent unit failure or injury.
Installation must account for environmental factors like winds and earthquakes, and structural integrity.
Guidelines for power supply, wiring, grounding, and avoiding wet conditions to prevent shocks or fires.
Procedures for refrigerant leaks and precautions before touching electrical parts, like turning off power.
List of environments unsuitable for installation due to hazards like oil, corrosive gas, or flammable substances.
Precautions regarding piping insulation, heat exchangers, transportation, and the power off sequence.
Proper methods for moving, unpacking, and handling the unit without causing damage.
Checking refrigerant type, retaining accessories, and referencing other unit manuals.
Environments where installation is not recommended due to specific conditions like high salt air or oil vapor.
Emphasis on entrusting installation to qualified professionals and using correct, specified parts.
Listing of standard accessories provided with the unit and optional accessories available.
Key items to verify after installation completion to ensure proper operation and safety.
Checks to perform at time of delivery and explaining unit operation to the customer.
Important notes for installers and instructions for customers regarding operation and maintenance.
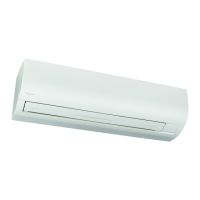
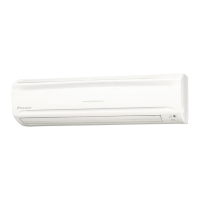
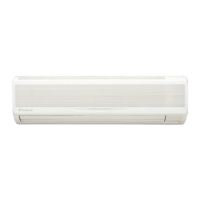
Criteria for selecting an appropriate installation location for optimal performance and accessibility.
Procedures for attaching the indoor unit's mounting panel to the wall securely.
Steps for drilling holes in the wall for routing refrigerant and drain pipes.
Securing the installation panel and modifying the front grill for pipe passage.
Steps to access internal components by carefully removing the front panel and service lid.
Directing pipes to the desired exit and removing the front grill for easier access.
Replacing drain plug/hose and connecting refrigerant piping to the unit.
Attaching the indoor unit to the wall mounting panel and securing it.
Guiding electrical wiring and refrigerant piping and sealing through-holes.
Recommended tools for refrigerant piping and methods to protect tube ends from contaminants.
Guidelines for preventing contamination, leaks, and proper flare nut tightening procedures.
Specifications for tightening torque and procedures for emergency installations without a torque wrench.
Cautions for brazing refrigerant piping, emphasizing nitrogen substitution for protection.
Steps for properly insulating pipe connections inside the unit using tubing and tape.
Correct installation of the drain pipe, ensuring a downward slope and preventing air pockets.
Methods for extending drain hoses using commercial parts and insulating indoor sections.
Guidelines for selecting drain pipe diameter and methods for converging multiple drain pipes.
Performing a drain check and warning against connecting to ammonia-smelling sewage pipes.
Conformity to codes, copper wire usage, authorized electricians, and proper grounding.
Specifications for power supply, MCA, MFA, W, and FLA for each indoor unit model.
Requirements for field-supplied fuses and specifications for wire types and sizes.
Steps for connecting conduit, power, ground, transmission, and remote controller wiring.
Example of wiring for a complete system, including multiple units and outdoor unit.
Wiring examples for using one remote controller per unit and for group control setups.
Wiring configuration example when including a BS unit in the system.
Important notes regarding system power supply and safe grounding practices.
Procedure for configuring two remote controllers to control a single indoor unit.
Wiring specifications and operational selection for forced off and on/off operations.
Requirement to designate group numbers for centralized control of multiple units.
Overview of making field settings via the remote controller based on installation conditions.
How to change mode numbers, first code, and second code for field settings.
Configuring the air filter sign display based on room contamination levels.
Adjusting airflow settings for different levels of increase (little, standard, increase).
Necessary address setting for wireless remote controllers to ensure proper communication.
Ensuring unit lids are closed and referring to the outdoor unit manual for test procedures.
Using the remote controller's display to identify operational errors and malfunctions.
Checking wiring and power supply based on specific indicators shown on the remote controller.
Interpreting specific display codes like 'I', 'U4', 'UH', 'No display', and 'U3' for troubleshooting.