19 English
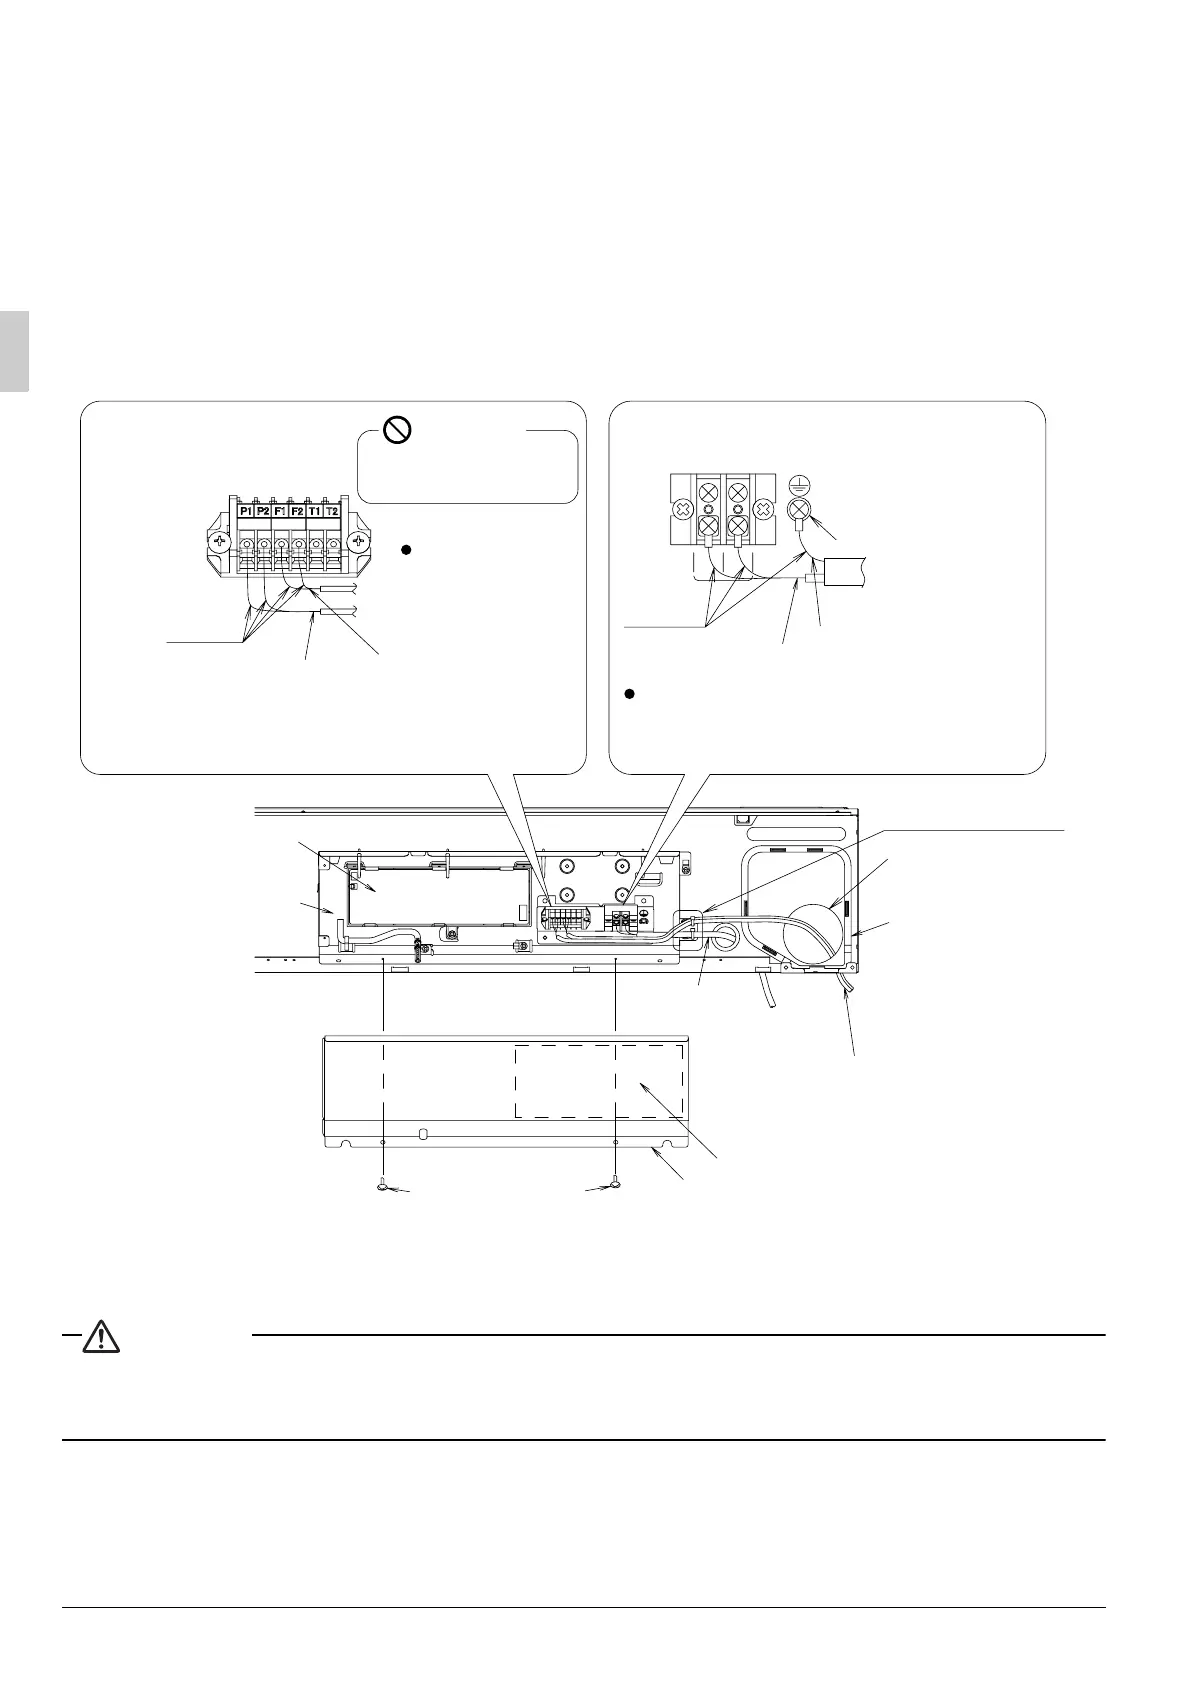
<Power supply wiring • earth wiring • remote controller wiring • transmission wiring connecting
method>
(1) Hold the control box, loosen the fixing screws (2 pieces) and remove the control box lid (Refer to Fig. 31).
(2) Open the knockout hole and put the resin bushing (10) (accessory) on the rear or top side (sheet metal).
(3) Pull the power supply wiring through the penetration hole and connect to the terminal block for power sup-
ply (X2M; dipoles) (Refer to Fig. 31). Connect the earth wiring to the earth terminal. Next, tie into a bundle
and fix by the attached the wiring fixture (11) and clamp (4) so that no tension will be given to the wiring.
(Refer to Fig. 32)
(4) Pull the remote controller wiring and transmission wiring through the penetration hole, and connect the
remote controller wiring to [P1·P2] and transmission wiring to [F1·F2] (no polarity) (Refer to Fig. 32). Next,
tie into a bundle and fix by the included the wiring fixture (11) and clamp (4) so that no tension will be given
to the wiring transmission part. (Refer to Fig. 32)
WARNING
• When wiring, form the wirings orderly so that the control box lid can be securely fastened. If the control
box lid is not in place, the wirings may float up or be sandwiched by the box and the lid and cause electric
shocks or a fire.
L
N
Terminal block for remote
controller / transmission
wiring (X1M)
R10 or
more
R10 or
more
Remote controller wiring
(no polarity)
<Low voltage wiring connection method>
Printed Circuit Board
Do not carry out
soldering finish.
Do not carry out soldering finish.
Terminal block for power supply (X2M)
Earth terminal
Earth wiring
Power supply wiring
<High voltage wiring connection method>
Wiring penetration
hole
Rear piping
penetration cover
Remote controller
and transmission wiring
Wiring diagram Label
Control box lid
Control box lid
fixing screws (2 pieces)
Power supply
wiring and
earth wiring
Transmission wiring
(no polarity)
Control box
Forbidden
Never connect the
power supply wiring.
(Refer to Fig. 32)
Fig. 31
01_EN_3P249378-8N.fm Page 19 Saturday, September 29, 2012 3:02 PM
 Loading...