33
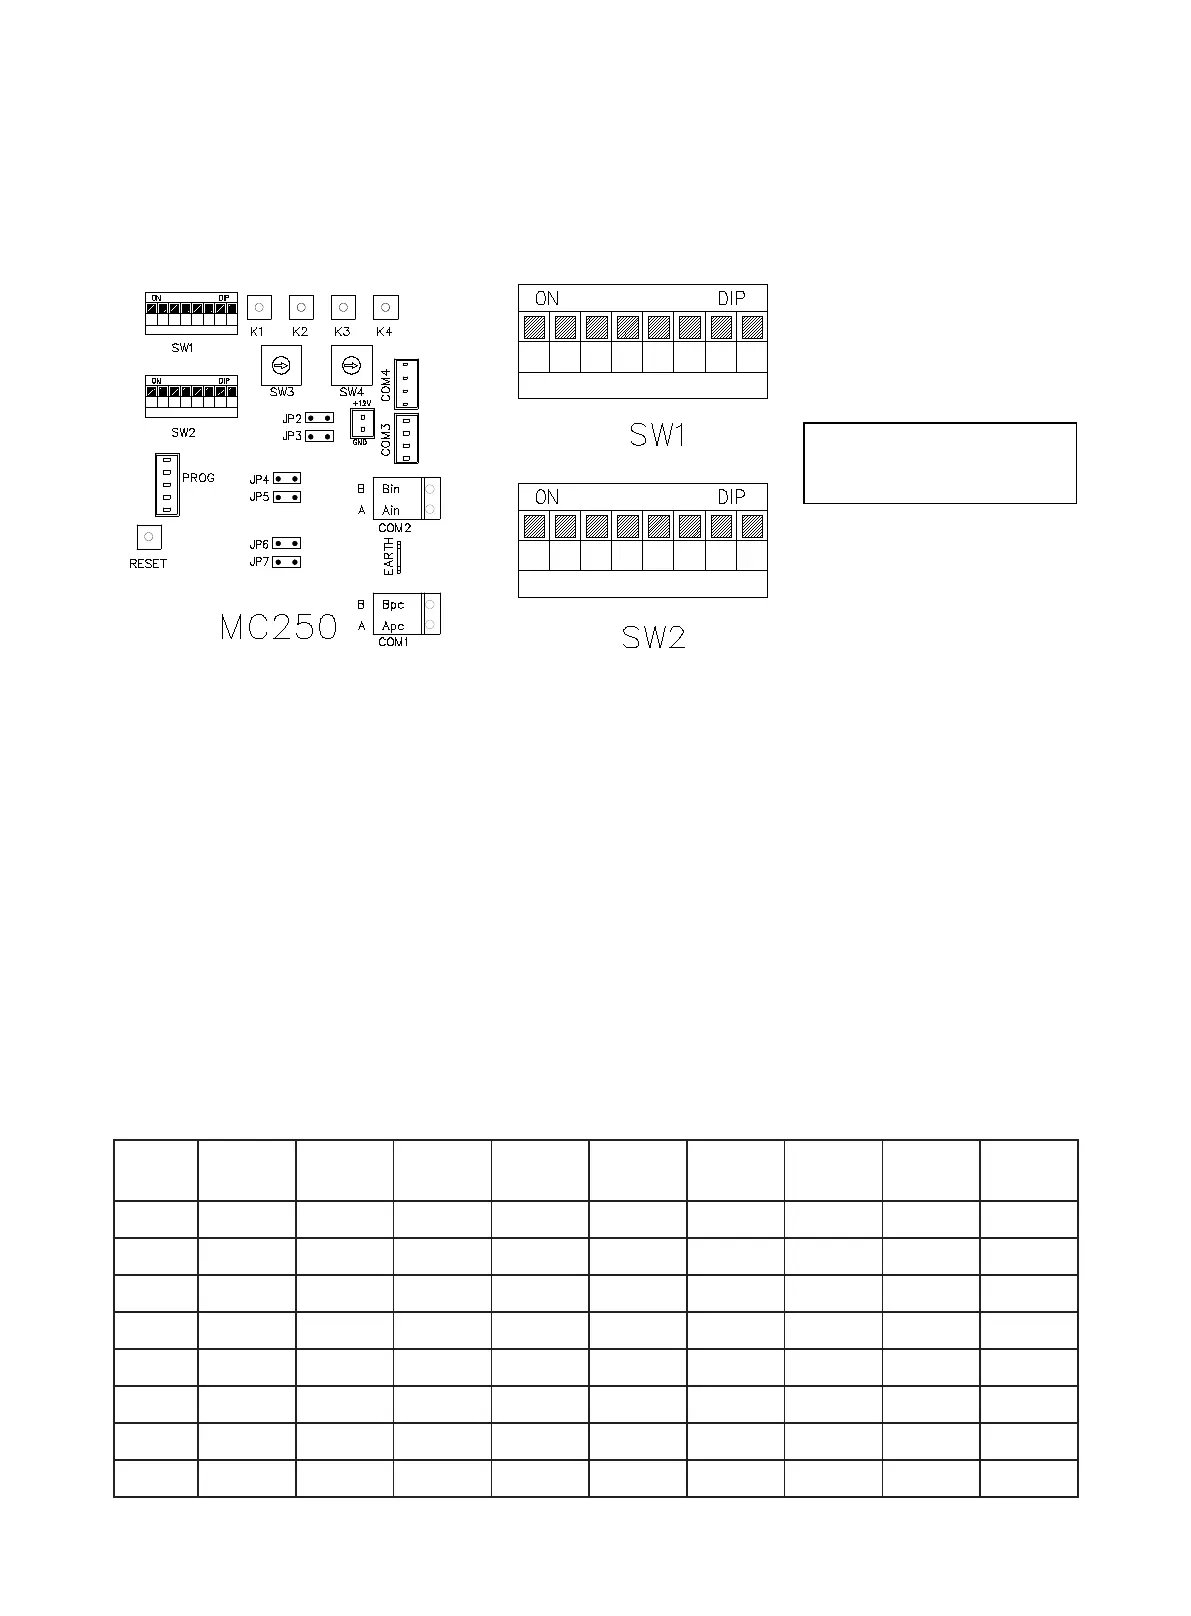
The controller can be used to set the unit's capacity, address and slave unit number. The capacity DIP has
been set at delivery time and cannot be changed. The address DIP and slave number DIP need to be set as
needed after the unit is installed. Customers need to take down the address number and location of the unit
and keep the record in good condition for maintenance reference.
The rst digit of SW1 indicates the DIP of master/slave unit. It is set to ON for the master unit, and set to OFF
for the slave unit.
The second and third digit of SW1 indicates the DIP of unit function, 00: Cooling only, 01: Heat pump,
10: Cooling & Heat recovery, 11: Heat pump & Heat recovery.
The fourth digit of SW1 indicates automatic startup after power restoration. It is set to ON when this function
is used.
The fth digit of SW1 indicates end 2-way valve interlock function. It is set to ON when this function is used.
The sixth digit of SW1 indicates the Air conditioning water ow system. ON: Air conditioning system for
variable water ow system; OFF: Air conditioning system for constant water ow system.
The seventh digit of SW1 indicates the refrigerant type. ON: reserved; OFF: R410A.
The eighth digit of SW1 indicates control mode. ON: LWT control (non-standard), OFF: EWT control (standard).
■ Setting up Address Using DIP Switch.
■ The master machine must set the number of slave machines connected. The slave machine doesn't
have to be set (bits 1~4 of SW2):
1
4 53
2
7 86
1
4 53
2
7 86
Digit upward represents 1
Digit downward represents 0
Digit upward represents 1
Digit downward represents 0
Slave
unit qty
1 2 3 4
Slave
unit qty
1 2 3 4
0 0 0 0 0 8 1 0 0 0
1 0 0 0 1 9 1 0 0 1
2 0 0 1 0 10 1 0 1 0
3 0 0 1 1 11 1 0 1 1
4 0 1 0 0 12 1 1 0 0
5 0 1 0 1 13 1 1 0 1
6 0 1 1 0 14 1 1 1 0
7 0 1 1 1 15 1 1 1 1
 Loading...